EP109: Mother’s Day With Dan’s Mom, Tessa & Tools, and One From the Archives

LISTEN HERE:

Segments 1 & 2: Mother’s Day With Dan’s Mom

To celebrate Mother’s Day, we invited Dan’s mom to stop by and tell a few stories about Dan and tell us where she gets her decorating inspiration. The stories are something you won’t want to miss!

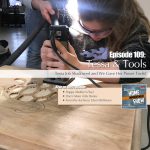
Segment 3: Tessa & Tools

It really is a family affair this week. Dan’s daughter, Tessa, job shadowed in the middle of the week. We gave her a number of projects to do of varying difficulties. She jumped right in and had a blast. If she can do it, so can you!

Segment 4: From the Archives – Dan’s Brilliance

From the first time we aired this segment, it made us laugh. Dan thought he’d share his infinite wisdom in his Emporium of Brilliance. The only problem was, it didn’t quite turn out the way he had planned!

Create a Live Edge River Table with Mira-Poxy

Tools

  • Butter Knife
  • Small Wire Brush
  • Hair Dryer
  • Heat Gun
  • Small Flexible Scraper
  • Level
  • Drill and Wire Wheel

Supplies

  • Epoxy
  • Mixing Cups (10)
  • Stir Sticks
  • Pipettes or disposable eye droppers
  • Xylene
  • Brushes
  • Gloves
  • Blue Tape
  • Paste Wax
  • Rags


Project Guide

PREPARE THE PLANKS

  • Remove bark with a non-serrated butter knife, palette knife, etc. DO NOT USE something like a chisel that could gouge the wood.
  • Wire brush the live edge surfaces with a small wire brush.
  • Flatten planks by running them through a wide belt sander.
  • Prepare a sealer mixture of Mira-Poxy and xylene that is 1:1:1. Mix the Mira-Poxy A and B first and then, when clear, add xylene.
  • Brush on all live edge surfaces. Apply a second coat after about 30 minutes in areas that are dull (where the sealer absorbed). Repeat if necessary.
  • Allow 24 hours for cure.

PREPARE THE WORK AREA

  • Work with good lighting.
  • Work in a clean, dust-free area and minimize air movement as much as you can.
  • Work on a level surface.
  • Work space should be kept at a temperature between 60 and 80℉ for the duration of the project including during the curing process.
  • We recommend using a melamine surfaced particle board for the “tray” or mold. A dark color would make it easier to detect bubbles in the Mira-Poxy.
  • Use “rope” or “cord” caulk on surfaces of the plank near the live edge. Extend up the sides of the plank.
  • Make “end plates” that will either be clamped or nailed to the ends of the live edge planks to dam up the epoxy.
  • Use paste wax to coat the bottom tray board and end plates, ensuring easy removal of the planks when finished.
  • Firmly attach planks to tray, pressing down for smaller pieces, screw or nail (upside down) for larger planks.
  • Attach end plates.

DETAILED EPOXY MIXING INSTRUCTIONS

Application Bulletin
  • Always wear gloves and prevent epoxy mixture–ESPECIALLY PART B–from contacting your skin. You may develop a sensitivity similar to poison ivy if you are over-exposed.
  • Keep all containers closed except when dispensing.
  • Heat Part A by using a hair dryer on high pointed at the container inside a bucket or cardboard box for 10-15 minutes. This reduces the viscosity of the mixture, aiding mixing and migration of bubbles to the surface after applying.
  • Part B will naturally amber with age with exposure to moisture in the air and when exposed to light. Store Part B in a dark, dry place and keep the container closed at all times except when dispensing.
  • Mix Part A and B together in a clean container at a 1:1 ratio by volume.
  • Add Part B first, followed by Part A.
  • Stir gently, scraping the sides and bottom of the mixing container frequently.
  • Stirring too vigorously will introduce air that can cause bubbles in the dried coating.
  • As you stir you will notice that the mixture will turn cloudy with a swirly, pearlescent appearance.
  • Over 3 – 5 minutes, the mixture will clarify.
  • Pour mixture into a fresh container and stir again for 1-2 minutes. THIS IS AN IMPORTANT STEP! Pouring into a fresh container prevents improperly mixed material that clings to the sides of the original container from contaminating the application).
  • Mix only enough material that can be applied in 30 minutes.

LAYERS OF EPOXY

  • Pour ¼” – ⅜” thick layers at a time. (If you try to pour too thick of a layer at one time, the heat generated by the reaction will cause the mixture to “set” before air bubbles can escape. This also allows items to be placed in the middle layers to give a 3D effect.)
  • For Each Layer:
    • 5 Minutes after application and again 15 minutes and 30 minutes after, wave a heat gun over the layer to pop bubbles.
      • NOTE: You may experience bubbles in the first layer over the tray. If that occurs use a wire or toothpick to draw these bubbles to the surface in the first half hour of cure. Subsequent layers will not exhibit this behavior.
    • Allow each layer to cure for 8-10 hours before application of a new layer.
    • Repeat layers until level with the top of the planks.
  • After 12-24 hours after the application of the final layer, remove from the tray and remove end plates.
  • Use a putty knife/butter knife to remove the majority of the rope caulk.
  • Use wire wheel to remove remaining rope caulk.
  • At this point, you may decide to run the planks through the wide belt sander again to flatten everything.

FINISHING

  • Prepare a sealer mixture of Mira-Poxy and xylene that is 1:1:1. Mix Part A and Part B first and then, when clear, add xylene. This mixture will be usable for 8 hours.
  • Brush a flood coat onto the plank faces. Repeat (probably twice) as material soaks in.
  • Use a disposable pipette or eye dropper to drip sealer mixture into porous areas. Monitor and add as necessary over 8 hours.
  • Do NOT use heat gun on sealer.
  • Do NOT build up too thick of a layer of sealer (solvent will be trapped in the layer, possibly causing future issues with hardness and clarity).
  • Do NOT sand sealer layers
  • Allow to cure for 24 hours.

FINAL FILL COAT

  • Use blue tape to form a ¼” dam around the perimeter of the piece to prevent the coating from flowing over the side of the piece.
  • Apply a layer of 1:1 Mira-Poxy about ⅛” thick over entire surface.
  • Use heat gun in the same manner as used in the fill layers.
  • After 12 hours, remove tape. (Full hardness takes two weeks. Allow 48 hours or more in warm temperatures before polishing).
  • After 48 hours (or more), smooth and polish edges, or smooth edges, sand with 600 grit sandpaper, and apply 6FPU132i Sirca Clear Acrylic Sealer and 6LPU001 Sirca Clear Wet Look Acrylic Sealer.

EP91: Pantry Organization, Decorating With Leftovers (NOT food!), Washer & Dryer Problems, and Best Home Improvement Projects

With the new year generally comes New Year’s Resolutions. These resolutions come in all different forms. Some people resolve to lose weight. Or to eat more healthy. Or to go to the gym more. Or to be more organized. And while we may not be able to help you with the first three, we can certainly help you with the last one. Especially if you are talking about the dreaded pantry. It’s kind of like the closets, except without the dirty socks….hopefully. We’ve got some ideas to help keep you from losing food in the back depths of your pantry.

And after we’ve helped you get organized, we’re going to help you decorate with the items you already have. So often we think that the things we own (such as a table or couch) limits what we can do in a space. But it certainly doesn’t have to! Step out of the box and try something new!

In our third segment, we’re chatting with Joe Rogers and Scott Hosteter from West End Appliance about common problems with washers and dryers. Some things we might be able to fix. Some things we might have to call them for. And some things can be avoided all together if we just take the right steps.

And to close the show, we’re going to discuss some of what we feel are the best home improvement projects. They’re all quite simple and will make you feel better about your home.


Listen here:

EP45 – February 10, 2018: Home Security, Ask RepcoLite, and Fighting the Winter Blues


We all think that because we live in a quiet neighborhood, our home is safe. But there are always a few things we can do to make it just a bit safer. Besides, a fire doesn’t care what neighborhood you live in. And breaking into a house just might be easier  on a quiet street than a busy one. Joe Kuhns will help make our homes more safe and make us more confident.

Listen here:

Show notes for episode 045:

How do you keep your home safe? Do you have a security system? A really big, mean dog? Or do you live in a good neighborhood so you think you are safe? Home security is not always something we stop to think about and that's why we've invited Joe Kuhns of CoverDown Consulting into the studio. Joe's 26 year history with the Navy SEALs give him a unique perspective on what we can do to stay safe. It doesn't matter how safe you think your home is, there is always just a little bit more you can do.
One segment wasn't quite enough to cover all the information that Joe had to share so we held him over for a second segment. He didn't seem to mind!
It's time, once again, to Ask RepcoLite! We have chosen another question from our Facebook page to answer on air. This week we are going to talk about that dated, 70's paneling that has the homeowner feeling like they are in a time warp!
Ok, let's be honest, even those of us who love the snow get tired of winter at some point....and we are reaching that point. The weather teases us with a slightly warmer, sunny day, only to force us back inside with frigid temps and snow. If the winter blues have you feeling down, we have a few suggestions to fight these feelings. Some projects will have you feeling accomplished. Some projects will boost your mood with color and life. And some projects will have you feeling creative after buying new tools! We think the Dremel Rotary Tool will open up all kinds of new creative avenues! Besides having all the tools, the website also gives you GREAT project ideas for using your Dremel. It's definitely worth a look. And if that isn't quite your thing, maybe try a Cricut cutter. We bought one to make invites for an event and LOVE it! It is very versatile and the computer program allows you to create anything you can dream up. If you scroll to the bottom of the page, there is a chart comparing all of the different machines. Release your creativity and explore!

EP18 – August 5, 2017: Yard Problems, Chalkboard Paint, Metal Buildings, and Bed Bugs!

Listen here:

Show notes for episode 018:

Dan has a shade tree in his yard that becomes a dirt pile by the end of summer. And we're pretty sure he's not the only one with this problem.

Matt Bakker, from Landscape Design Services, joins us in the studio to explain why this happens and what can be done about it.

It's time to grab your paint brush and get creative! Chalkboard paint can be used on so many different things and is now available in any color from Benjamin Moore. This allows you to stretch your creativity to the limit!

Check out some creative chalkboard paint ideas!

Chalkboard Paint Quick Tip

Be sure to "season" your chalkboard before using. This eliminates "ghost writing" which is when the chalk sticks in an unseasoned chalkboard and can never really be erased.

To season a chalkboard, brush with whiting powder or lay a piece of chalk on its side and cover the entire board with chalk. Erase and you're ready to put your new chalkboard to use!

We get questions about painting metal buildings all the time at RepcoLite. It's a confusing project for many people because they don't know the steps to take, or what product to use.

We'll tell you the prep that needs to be done, what products to use on the sides and roof, and even what the best application method is. You can paint a rusty metal building with confidence!

Bed bugs seem to have come back with a vengeance. All of a sudden, even the most swanky hotels in NYC have them! It seems no place immune.

We contacted David Popp from Rose Pest Solutions in Grandville to discuss this problem. He then informed us they have a K-9 unit for bed bugs! We got to meet Chili, and even watch him work. A special thanks to Dan's parents for letting us plant a vile of bed bugs in their house for Chili to find!