South-Facing Rooms: The Natural Light Jackpot
If you’ve got a south-facing room in your home—congratulations! You’ve won the natural light lottery. These spaces get consistent, warm sunlight all day long. The light glides in with energy and brightness, warming up your space and making most paint colors look great.
But here’s the twist: just because most colors look good in southern light doesn’t mean all of them are the right choice for your room. That beautiful sunlight is dynamic—it changes throughout the day, and it can drastically affect how your paint looks from morning to night.
Understanding Southern Light
Southern exposure brings warm, golden light during the morning and late afternoon, but midday sunlight can become harsh and overpowering. That intensity can wash out light colors or make saturated ones feel overwhelming.
So, choosing paint colors for a south-facing room is less about what’s trendy and more about what mood you want to create. Do you want the space to feel restful, energetic, cozy, fresh—or maybe a bit playful? Let’s break it down by vibe.
1. Want a Restful, Relaxing Space? Go Cool and Calm
To counterbalance the warmth of the southern sun, lean into cool-toned colors:
- Soft blue-grays
- Pale lavenders
- Dusty greens
These shades help settle a space and create a soothing retreat. Try:
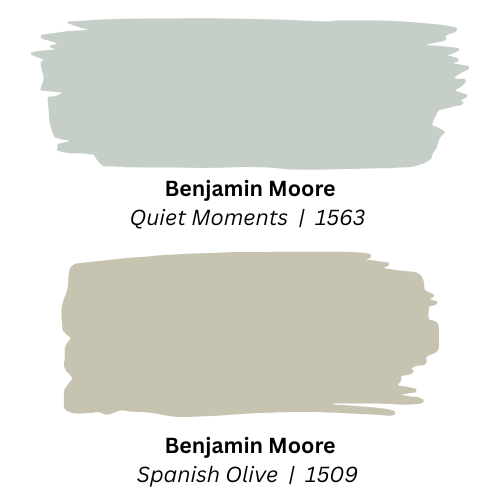
Perfect for reading nooks, bedrooms, or quiet retreats.
2. Looking for Energy and Warmth? Embrace Saturated Color
If you’re designing a space for lively gatherings—family dinners, game nights, or social events—lean into that southern light with:
- Buttery yellows
- Coral peaches
- Golden tans
- Earthy clay tones
These bounce the light around and energize the space. Just be careful—too much brightness, especially with lots of windows, can tip into lava lamp territory. Always test your samples first.
3. Want Cozy and Comfortable? Think Deep and Moody
To cozy up a bright, sun-filled room, try medium to dark shades in cool undertones:
- Smoky navy blues
- Charcoal with blue or green hues
- Muted deep greens
Great options include:
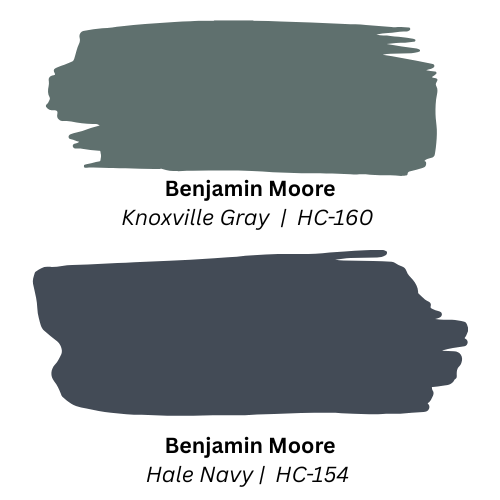
These colors absorb some of the sunlight, making the room feel intimate, grounded, and peaceful.
4. Going for Light, Airy, and Clean? Choose Wisely with Whites
Southern light makes light colors glow—but it can also exaggerate warm tones. If you want an airy, open feel:
- Choose cool whites with a hint of blue or gray: White Diamond or Decorator’s White
- Avoid too-warm whites, which might read yellow or peachy by midafternoon
Creamy whites and soft greiges can work beautifully—but make sure they don’t pick up too much of the sun’s warmth if that’s not your goal.
5. Feeling Playful? Go Bold with Whimsy
South-facing rooms are perfect for more expressive, unexpected choices:
- Sea-glass aquas
- Vintage rose pinks
- Chalky lilacs
- Muted teals
These colors might feel heavy or dreary in a darker room—but in bright southern light, they come alive.
What About the Seasons? Light Isn’t Static
The angle and color of southern sunlight shift with the seasons. In winter, the light is cooler and sharper. In summer, it’s stronger and golden. That means:
- A gray that looked perfect in January may read greenish in July
- A neutral cream might suddenly look peachy come summer
Sampling is essential.
Look at paint colors in the morning, afternoon, and evening—and ideally across a few days. But don’t stress about testing across all four seasons. Just be aware of the changes.
Trim and Ceiling Tips: Don’t Forget the Details
A classic white like Chantilly Lace is a great go-to for trim and ceilings. It’s neutral and crisp—but here’s the thing: glossy finishes can reflect a lot of that bright sunlight, creating glare. For a more comfortable look:
- Use eggshell or matte finishes on trim and ceilings
- These soften the reflection and add richness to the space
Final Thoughts: Every Room Is Unique
Not all south-facing rooms are created equal. Some get flooded with direct sunlight, while others are filtered through porches, trees, or overhangs. Here’s a good rule of thumb:
The more light a room gets, the more depth your color can have.
Lighter shades may wash out at peak sun, while medium and deep tones hold their character better.
And always—always—sample your colors. Live with them. See how they behave throughout the day. Because what looks perfect at 8 a.m. might feel like too much at 2 p.m.
Ready to Start? We’re Here to Help
South-facing rooms are full of potential—and with a little planning, they can be stunning. Visit your nearest RepcoLite Paints location, and we’ll help you find the perfect color. We carry Benjamin Moore products and can match any vibe you’re going for.
Have questions? Stop in and chat with our color experts. We’ll help you make your space feel exactly the way you want it to.

 a minimum.