EP40 – January 6, 2018: 15-Minute Regimen, Gel Stain Cabinet Fix, Winter Pet Safety, and Dan’s Bathroom Re-do


This week we cover a number of interesting topics. One of which is a concept that Dan thinks is brilliant: a 15-minute home improvement regimen! Yes, it sounds a little goofy, but you will be amazed at the amount of work you can accomplish by just spending 15 minutes a night working on it. It’s painless, quick, almost fun. And if you do it a few nights in a row, you’ll be blown away by how much work you crank out! On top of that, we spend some time talking about what we need to do as pet owners to keep our furry friends safe during these cold winter days!

Listen here:

Show notes for episode 040:

Things pile up over time when we don't stay on top of them. Weight is a perfect example. Let it go for a little while and before you know it, some unwanted pounds have found a new home around our middle!

Well, the same thing happens in our home. Little projects add up and before you know it, we've got tons of jobs to do and no idea where to begin!

Rather than jump into a crash-course of home improvement projects, why not instead create a manageable schedule that will help you easily and relatively painlessly take off those "extra pounds"? That's what we talk about today!

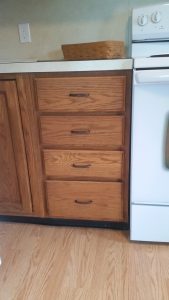
Looking to refresh your kitchen cabinets without completely stripping them down and starting over? If you're dealing with a few scratches or some worn areas, we might have a fix for you that will save you tons of time!

Here are a few photos submitted by a customer who gave the project a try!

The weather has been frigidly cold and while we all bundle up with layers and layers, we don't always think about our pets! Sure, they're covered in fur, but they can still get hypothermia and they can still suffer in weather like this. But just moving them into the garage may not be the answer. In this segment we talk about a number of different precautions we should all be talking to keep our furry friends safe and warm!

In this segment, we break down a bathroom re-do Dan just recently undertook. We talk about the materials used and the lessons learned! And hopefully provide everyone listening with the information and encouragement to step outside of their comfort zone and jump into a project!

The Vile Showerhead (or, Finding the Dread-Free Life)

shower-1027904_640(1)I’m a “dreader”.  That’s not a word–I know that.  But that doesn’t change the truth:  I dread things.  On a regular basis.

For example, I re-decorated my bathroom about a year ago.  I put wood planking on the walls, hung some wallpaper, stained and varnished new trim, installed a new (bowed) shower rod and new curtain and finally, to finish the whole thing off, I installed a new shower head.

Which was the biggest mistake I made.

See, right after installing it, my wife marched right in, closed the door and proceeded to take a 45-minute shower.  When she was done, the kids all marched through, one after the other.

When the shower marathon ended that day, I opened the bathroom door and it was as if a cloud had localized in that tiny room.  I literally couldn’t see the other side through the steam.  The little ceiling fan was working overtime, but there was no way it could keep up.

“Fortunately,” I thought, trying to wave away the steam, “this is something that won’t happen everyday.  Once the ‘newness’ of the shower head wears off, we’ll go back to having to fight the kids to take baths.”

Nope.  Not a chance.  Every single day since the installation of that vile shower head, our bathroom is engulfed in steam.  Shower after shower, hour after hour:  steam, steam, steam.

Well, that went on for a long time and then the inevitable happened:  the mold started growing around the edges of the ceiling.  The wallpaper started peeling and curling up on all the seams.  My beautiful bathroom had gone from a place of despair to a place of beauty and then back again to a place of despair all in about 6 months time. It was depressing to say the least.

And that’s where the “dreading” comes in.  Everyday, I’d look at the ceiling and see the mold or the wallpaper and see the peeling and I’d dread the “fix-up” job that was to come.

I dreaded it because it seemed like such a big job:  fixing the mold, fixing the paper, repainting the ceiling.  I’d just gone through some of this work and now, thanks to that dumb shower head, I had an even bigger mess to fix.

And so I stared at it for a long time.  I thought about it.  I tried to ignore it.  But most of all I dreaded it.

Until finally I got so sick of being depressed and frustrated about it that I actually fixed it.

I took a week and on a Monday night, I sprayed the mold with a bleach solution and scrubbed the ceiling.  That took me exactly 17 minutes.

Two nights later I came back with more bleach–no scrubbing this time, just the bleach on the mold.  That took about 7 minutes.

On Friday night I went around the room and primed all the previously moldy spots with ProFlo Alkyd primer and then I re-pasted all the peeling paper.  That night’s work took about 15 minutes.

Finally on Saturday, I got ready to paint the ceiling and finish the job.  I was ready for a big, painstaking job (I hate painting ceilings) but I was surprised to find that the whole thing took about an hour from the time I opened the can of paint to the time I put the paint back on the shelf in the workroom.

In the end, I realized that the job I’d dreaded for the last 6 months or more had taken me less than two total hours to fix.  In my mind, I’d exaggerated and inflated and imagined the work to be 10x worse than it was.  I imagined the mess, the problems to be 10x less fixable than they were.  I imagined the pain to be 10x greater than it was.

I’d spent 6 months feeling bad and frustrated and almost (in a sad and pathetic way) depressed about a room that took me less than 2 hours to fix.

So how does this apply to you?  Well, I can’t speak for you, but I’ve talked to many folks in the paint store at RepcoLite who feel the same way I was feeling.  They’re frustrated about the seemingly endless amounts of work needed in their homes.  They look at the jobs and the work to be done and assume that they’re worse than they really are.  And so they do what I did:  they put them off and they stew on them, thinking about them and mulling them over in their minds for months until the jobs seem even bigger and more horrible.  In short, we dread them and waste our time worrying about them and frowning over them.

But what we really should be doing is “doing” them.  The jobs aren’t as bad as we think.  They’ll go smoother.  They’ll go more quickly.  They won’t be as painful.  And best of all, once we’re done, you’ll notice what I noticed:  a real sense of relief and freedom from the work that had been hanging over my head.

So, bottom line:  If you’ve got a project that’s creating that feeling of dread, jump into it.  Get it accomplished.  And then kick back and enjoy the dread-free life…

4 Ways to Speed Up Your Next Weekend Paint Project!

driving-933281_1280The thought of tackling a painting project doesn’t always fill us with excitement.  In fact, a lot of us dread these “weekend-killers.”  Many of us don’t get all warm and fuzzy over the thought of spending tons of time painting.  At least I know I don’t.

Oh, the painting isn’t really the problem–that part’s relatively fun.  It’s the washing of the walls, the patching of the nail holes, the taping.  It’s the PREP WORK that I really hate.  And I hate it because it adds so much time to my project.

But there’s a simple fix for this:  Do the Prep Work Early!

PATCH THOSE NAIL HOLES

If you’re going to try to roll paint on your living room walls on a Saturday morning, then take 15 minutes on a Monday night and go around the room filling all the nail holes with a good spackling compound.  We recommend White Lightning Lightweight Spackle or Crawford’s Spackling.  Go around the entire room and fill ALL the nailholes and then quit for the night.

SAND THE SPACKLING

The night after you spackled all your nail holes, take another 15 minutes and go around the room doing a quick sanding of those spots.  By this point, (if you’ve truly waited 24 hours) the spackling will be bone dry and will powder nicely as you sand it.  This stage of the project should only take you 15 quick minutes as you work your way around that room.

WASH THE WALLS

Every paint job should start with a good wall washing using TSP (TriSodium Phosphate).  However, washing the walls down on the day you want to paint can really slow you down–it’ll take a good 30 minutes to an hour to wash the walls and then another 15 minutes or so for them to dry.  Avoid all of this by washing the walls down early. Just as we mentioned with the spackling and the sanding, take a night in the week BEFORE you plan to start painting and go around the room, washing the walls down.  Doing this will save you all that time on the day of your project.

ROLL OUT THAT MASKING TAPE

Finally, the night before you plan to do your work, apply your masking tape to all your trim and around your doors and ceilings, etc.  Of course, if you’re going to do this, you’ll want to use either 3M’s Blue Painter’s Masking Tape or 3M’s Blue (Orange Core) Safe Release Painter’s Tape.  Both of these tapes will still cleanly remove after being applied early!

If you tackle these prep work steps early, you’ll have more nights of work–but, each night will be relatively short AND, best of all, when the weekend arrives, all the boring work will be out of the way.  All you’ll need to do is pop the top on your gallon of paint and start rolling your new color on your walls.

Accomplishing this work early is a great way to minimize the frustration of a paint project.  Give it a try–you’ll like the results!

4 Hernias and a Heart Attack: De-Cluttering Your Home, Step 1

house-690199_1920This past Wednesday, I woke up and did what many of you likely did: I looked out the window. I had listened to the weather reports all week and I wanted to see if we received as much snow as the Doomsayers had predicted.

Unfortunately, I couldn’t see much from the window–it looked bad, but not as bad as I had feared. So, buoyed with hopeful thoughts, I got dressed, put on my gloves, my little snowpants, my little coat and hat and all that stuff and headed outside to snowblow and clean out the driveway.

However, when I got outside, I very quickly realized that the situation was infinitely worse than I had thought: my car was buried so deep I couldn’t open the doors. My shovel (and here I’d like to give a special thank you to my children) was in the yard. Somewhere. Beneath 20 inches of snow. Thankfully, we have a second shovel.

Unfortunately, it too was in the yard. Somewhere. Beneath 20 inches of snow.

Well, after my initial . . . shall we say, disappointment . . . I decided it was alright.  Everything was cool. Everything was groovy. I mean really, with all that snow, I wasn’t going to be digging my way out anyway, right? Right. That’s why I have a snowblower.

And so I marched (like Frodo in the Lord of the Rings) through a vast expanse of waist-deep snow, all the way to our little storage barn. After a brief (and occasionally loud) struggle, I managed to muscle open the doors, only breaking them a little. But I didn’t care about that. I didn’t care about doors that were only a little bit broken because I was staring at my snowblower: a machine of glory and power–a machine that would soon free my driveway from the clutches of . . . well you get the idea.

Anyway, I reached for the pull cord to power the machine into action and remembered something sad: two weeks ago I had ripped off the pull-cord that starts the blower. So, no pull-starting it. I’d have to use the electric start. So no big deal, right? No big deal.

Well, not exactly. See, there was a slight problem: my cord for the electric start was 10 feet long and my power outlet was sixty feet (through waist-deep, Lord of the Rings, Epic snow) away.

Well, never being one to think overly long about a problem, I did what any guy would do: I started dragging the snowblower backwards through the all that snow. I went all of about 4 feet when I realized I’d never make it alive. And then (finally) my brain kicked in and said “Dummy. Go get your shovel.”(I think, though I’m not yet sure, that my brain was messing with me).

So I slapped my forehead and said out loud, “my shovel! I’ll shovel out a path to the power outlet!” I belly-crawled through the snow all the way to where I’d left my shovel only to remember that very sad truth I relayed earlier: my shovels were (thanks again, kids) buried in the yard somewhere.

At this point, anger and sadness were descending on me, burying my spirits quicker and more effectively than the snow had taken care of my tools, but I dug deep and (after kicking the trashcan and falling down in a snowdrift and hitting my head on the van when I fell over), I went back to dragging the snowblower towards the house.

Yeah, I pulled on that thing like I was a little Hercules and managed to drag it another 4 feet  before I felt what could only be the onset of 4 hernias and a heart attack.

Sitting down in the snow, holding my side, huffing and puffing, inspiration FINALLY struck: my power cord was 10 feet long and the power outlet was still about 52 feet away . . . but I had something in my basement that we in the modern world call an extension cord.

So I ran in, grabbed the cord and in minutes had started the snowblower. But, sadly, that was only half the battle. Now I had to somehow blow all this snow away.

Well, for the longest time (and this is the whole point of this story) I just stood there, breathing the fumes coming off the snowblower and wondering how long it would take just for Spring to melt it all.  The job, now that I was finally ready to start it, seemed too big.  Too enormous.  Too overwhelming.  I seriously wondered if I’d even be able to get it with the snowblower.  I moved my hand to the throttle of the machine, fully intending to shut it down and just go in the house and think about it for a while.

But then, just before I did that–before utter helplessness kicked in and took over–I put the blower in gear and cleared a 2 foot section.

It was a start.

I then wiggled the machine around and cleared out another section. Before long, I had an eight foot section cleared and I’d found one of the shovels.  Or, at least most of it.

From there, I chipped away at the driveway. It didn’t go smoothly and it didn’t go quickly, but I got it done. Eventually.

And that brings me back to what I started writing about the other day:  de-cluttering our fat homes. See, in the next few days, I’ll be writing about some tried and true tricks to getting your house de-cluttered. But before I start that, I want to start by focusing on very first problem we all need to overcome when attempting to get the clutter out of our homes: the paralysis brought about by the immensity of the job.

See, just as I stared at the driveway and almost didn’t know where to begin, many of us do the same thing when it comes to de-cluttering our homes. The job looks too huge. We stand there and stare at it and wonder if there’s any possible way to accomplish all the work. We almost become paralyzed.

Well, the first tip I’m going to give you is buried in the snow story:  start small. Start with that first 2 foot section if you have to, but find somewhere to start and start.

Don’t waste your time staring. Don’t waste your time and your energy gawking at the work. If you do that, you’ll never start. You’ll talk yourself right out of it.

Don’t look at the attic and basement and closets and the cupboards and the drawers and the dressers that need to be sorted and organized. Start with a single box in a single closet and focus on that, organize that. Then move on to the next one. Before long, the closet will be done and you’ll be able to close the door and move on to another one. When that one’s done, you’ll be able to move on to the next and so on.

Eventually, you’ll work your way through it all. But only if you start.  That’s the first step:  start.  That’s the way to defend against the paralysis.

Next time we’ll talk about some tips and tricks to help you with the actual work.

Is Your Home Fat? It’s Time to De-Clutter!

Have you ever looked at yourself in a mirror and thought “Wow.  What happened?”

I have.  And I’m betting a fair number of you have as well.  (And the ones who haven’t, well, it’ll happen).

What I’m talking about is weight gain.  I mean, really, the older I get, the more I notice how the train’s gone off the tracks.  I’ve got pouches and bulges in places I’ve never even thought about before. It’s hideous. Honestly, I look like all those old paintings from the renaissance.  You know the ones.  The ones with all the fat naked people eating grapes. Yeah, the paintings we’ve all seen at one point or another and have thought: “I don’t get it. Who would take time and waste all that paint to paint these people?” Yeah . . . now I get it.  The artist probably looked like that, too and was painting these folks to make himself feel better.

Anyway, I’m pretty sure that most of us have, at one point or another, assessed ourselves and have decided we needed to lose weight. For me, that moment came when one of the kids asked me why I didn’t wear a bra. For you, it was hopefully something else . . . because let me tell you, that comment stung. But whatever it was . . . we’ve all felt that shedding a few pounds wouldn’t be a bad thing.

And really, that’s not a bad idea for your home as well. (Yes. This little blog is still about home improvement stuff.)  See, just as we pack on pounds over the years, so do our homes. Oh, our pounds are packed on because of extra twinkies and donuts that we eat when we shouldn’t . . . but our house gains weight as well. Not like that–not from donuts–but from the old furniture you don’t know what to do with, so you stuffed it in the basement. Or the home decor you don’t use anymore that fills the shelves in your cupboards. For me, I’ve got an entire closet upstairs committed to the following items: 1 vacuum that no longer works, a big foamy sleeping mat that nobody will sleep on because somebody had an accident on it and even though it’s been washed, nobody will use it. 3 guitars I rarely play anymore, 1 keyboard I never touch, a mandolin I wish I knew how to play and a box of clothes my wife hid there because she didn’t think I’d look there and because she didn’t want to haul them downstairs and bring them to the mission.

My home, just like me, has gotten fat over the years. We’ve got every paper the kids have ever scribbled their names on stuffed into boxes. We have piles and piles of old CDs I never listen to anymore. We have loads of plastic storage units that just take up space in my workroom. We have what seems like 37 car seats because every time we buy one, the government comes out and says it’s no longer any good. We’ve got bottles the kids used when they were little because of the sentimental value they possess. We’ve got 15 1/2 sippy cups stuffed into our cupboards. 15 1/2 sippy cups for 1 child who still uses them.

And then, there’s the attic. That place of despair. That place that holds all the empty boxes of electronics that I bought–boxes I’m afraid to throw away because the minute I do, I’m convinced the electronic equipment will fail and I won’t be able to send it back to the company. That place of despair that holds extra interior doors that we don’t and never will need, a Christmas tree we haven’t put up in over 6 years, a fan that doesn’t work and mounds and mounds of ratty old insulation bats that I’ve just stacked up against a far wall because I don’t know what else to do with them.

Yes, my home is fat. Obese. Cluttered. And I know mine isn’t the only one. You’re home is fat, too. Oh, it may not be as morbidly obese as mine seems sometimes, but it’s still fat. And I don’t know about you, but that depresses me almost as much as seeing myself in a mirror.

I hate the feeling (especially over winter, when I’m trapped inside) that the house is bursting at the seams–that every closet and cubby and hidey-hole is stuffed to the gills with junk I don’t need. That makes me feel all itchy and claustrophobic just thinking about it. And when I’m stuck in the house all winter, it drives me nuts.

And I’m banking on the fact that it can drive you nuts as well in your own homes. And even if it doesn’t, I still know you’re going to feel tons better if you could find a way to shed the pounds in your closet and your cupboards and your attics.

So tomorrow we’re going to dig into it. We’re going to talk about some professional clutter removal tips and I’m going to prove to you that you can really, seriously make some money with your junk.  I can’t help you get thin physically–look at me, I can’t help–but I do know how to trim your house down.  We’ll start tomorrow.

My First Night on the 15-Minute Home Improvement Regimen

Well, if you haven’t been reading this blog lately, you need to check out the last post.  In that one, I talked about what I think is potentially one of the best home-improvement ideas we’ve ever talked about:  The 15-Minute Home Improvement Regimen.

It’s a big, long name . . . but the concept behind it is extremely simple:  just take 15 minutes a day, two or three times a week, and work on some of the little projects around your home.

Now, you may wonder, why 15 minutes?  Why three times a week?  Why not longer?  Why not more often?

Well, I’ll tell you.  15 minutes is the perfect amount of time because it’s manageable.  It’s a painless amount of time to spend and it’s easy to dig up an extra 15 minutes here and there.  Doing this two or three times a week is perfect because it guarantees that you’ll be able to keep up on it without too much difficulty.  It won’t overload you.  It won’t fill you with dread.  If you set your goals or standards too high, you’ll wear yourself out quickly and you’ll abandon the program right away.  But if you set manageable goals, you’ll be able to stick with it.  And if you do that–if you stick with it–you’ll see tremendous results by the end of a year.  In fact, as we mentioned last time, if you spend 15 minutes a day for 3 days a week and do that for an entire year . . . by the end, you’ll have put almost 40 hours of maintenance into your home.

Anyway, that’s the idea.  Last night, I started my own 15 minute regimen and in so doing, I quickly discovered two benefits of this idea that I hadn’t anticipated.

Let me explain:  I finished up my RepcoLite work around 5:15 or so last night and then went out and mowed the yard.  That took another 20 minutes or so.  When that was done, I came in and asked my wife to set a timer for 15 minutes.

Well, she looked at me with a confused look on her face and asked me what I was doing.  When I told her, explaining my plan to accomplish little jobs around the house in 15 minute increments, throughout the next year, she surprised me.  She told me she’d start the timer, but that she’d also work on little jobs she wanted to accomplish while I was working on mine.

I hadn’t anticipated this.  In all my talk and writing about this idea, I hadn’t envisioned multiple sets of hands at work.  Needless to say, I was excited.  If we both stuck to this schedule, we’d accomplish almost 80 hours of work on the home by this time next year–twice as much as I had hoped.

That was the first discovery I made–and I urge you to keep that in mind.  Bringing your spouse into this program will instantly double your productivity.  And don’t be afraid to expand from here.  I’ve got 5 children–4 of whom can actually do a fair amount of work when they are asked.  If we’d all commit to spending 15 minutes a night working together on little tasks–sanding some trim, cleaning a room, organizing some toys, cleaning some closets . . . if we’d all do that, we’d accomplish nearly 234 work hours on the home by the end of the year.  Pipe dream?  Possibly.  But it’s definitely worth thinking about.

Also, before you label me some kind of child-labor proponent, let me point out that bringing your kids (and your spouse) into the work can be a good experience for all of you.  Your kids will learn the value of hard work, you’ll be spending time together, and, if you keep the work time limited to 15 minutes, it’s never going to be too much of a burden for any of you.  So think about it.

Anyway, that’s the first discovery I made.  The second one was just as exciting–at least to me.

See, when my wife set the timer, we both jumped straight into our tasks.  She went straight downstairs to start organizing a messy storage area we have down there while I headed outside to tackle our storage shed.

When I opened the doors and looked at the mess, I realized I had a job ahead of me.  The summer had taken its toll on my barn and as a result, there were piles of bikes and scooters and extension cords all heaped over with various kids toys–bats, balls, gloves and little shovels.

Now normally, I would have stood there for a while, staring at the mess and growing progressively more and more angry.  But last night, I didn’t have that luxury.  I didn’t have time to stare and get angry.  I had 15 minutes–probably 14 by now–to get that barn clean.  And so I went to work.

I hauled everything out, stacked it, organized it.  I threw away the garbage and swept out the grass clippings, the dirt and the dead leaves.  I worked quickly, almost nervously, because I knew that timer was going to go off any minute.  It became, in my mind, a race against time.

And that’s when I made the other discovery that surprised me:  I realized I was having fun.  I was hustling to finish the job before the buzzer.  I was up against the clock and I loved it.

Now, I don’t know about you, but when I’ve got a deadline . . . time seems to fly.  When I’ve got all day  to accomplish something, time seems to crawl.  Last night, I accomplished that entire barn-cleaning and re-organizing in 16 minutes.  It looks great and the time it took to do it literally flew by.  My wife expressed the same thoughts when she emerged from her task.

We both accomplished a lot of work in a short amount of time and we had fun doing it.  Tonight is our next work night.  Then, our plan is to put in another 15 minutes on Thursday and tall it a week.  I won’t report our progress every night–who’d want to read that–but I’ll keep reminding you of this idea from time to time because I really believe it will make a difference in your home.

So, do yourself a favor and give it a try.  No matter what jobs you have to accomplish in your home, this is the perfect way to tackle some of them.  Try it and see for yourself:  it’s painless, effective and almost . . . in a weird, race-against-the-clock-kind-of-way . . . fun.