Decorating Kids’ Rooms: They’re Only Young Once!

bigstock-Super-hero-flying-some-motion-64086529There are few places in your home where you can really cut loose and have a good time with color as much as you can in a kids’ room. When it’s your bathroom or your living room or a dining room we all tend to be a little more cautious.  We don’t want to go nuts and create something on the walls that will drive us crazy or overpower our other decorating.

However, in a kids’ room, we really don’t have to worry about those things.  Because really, with rooms for children, the crazier and more bold you go with your color choices, the more people will think you’re a really cool parent!

It’s amazing how it works:  do that crazy stuff in your living room and folks think you’re “over the top” or “gaudy.”  Put some bold colors in a kids’ room and suddenly, you’re “Hip Parent of the Year.”

And really, it’s a “win-win” proposition.  Sure, other people will think it’s great and fun and amazing–but really, is that all that important?  No, the real benefit will come from the fact that your kids will gain so much from a project like this. They’ll be excited about the new look, excited about the colors you’ve brought it, and you’ll give them a place of their own–a place that looks completely untouched by the boring, drab world of adults.

Sure, it’s not terribly easy to reconcile yourself with the thought of moving from nice, neutral earthtones into something bold and wild . . . but your kids will thank you for it.  And honestly, remember this:  they’re only young once!  Have fun with it while you can!

More Unique Headboards

I’m kind of frustrated.  See, I would love to try some of these headboard ideas I’ve been writing about in my own home–but I can’t.  Or really, to be more accurate, there’s no point.  The beds we already own are adequate and they don’t lend themselves to this project.  So I’m kind of frustrated.  But, I take some comfort in the fact that I can still write about these and get you thinking about them and hopefully convince some of you to give the ideas a try.

Anyway, I’m going to breeze through a few ideas today with only brief descriptions or information.  I think these particular ideas are pretty basic and don’t need too much explanation.

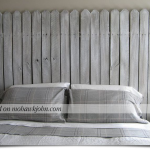
picket_fence_headboard

PICKET FENCE HEADBOARD

It’s just like it sounds.  Buy either a section of Picket Fence at the lumber yard, or build one specifically.  Since you’re using it inside, you could easily build it out of regular pine and then simply prime and paint it for that clean white look.

If you opt for this . . . don’t let yourself leave the motif without completing it.  You’ve installed a picket fence in your bedroom . . . that means you need lots of greenery and “outdoorsy” stuff.  Possibly sky blue walls, possibly (in a kids room) a tree mural.  Maybe you need to wind some “greens” or “vines” through the slats of the fence.  Whatever you do, have fun with the theme and build on it.

CHANGING SCREEN HEADBOARD

Here’s another idea that I think has a ton of potential.  Buy or get your hands on (lawfully, of course!) one of those changing screen things you see at home decor stores and then it’s up to you how creative you can get.

Some of these screens are frames with scrolling and winding metalwork.  That’s fine.  They can be mounted directly behind the bed as is.  I’ve seen other screens that are like the screen on the right.  This one had a uniform brown canvas backer that was removed and replaced with the black and white fabric.

Again, whatever you do is up to you . . . the point is . . . think beyond what you immediately see!

WOOD SHIM HEADBOARD

shim_headboard

I don’t know exactly how this one was done, but it seems to be more about patience than skill.  It’s made entirely of those little wood shims can pick up at any lumber yard.  They were probably sanded (though not necessarily) and varnished when the look was completed.

However they were put together, the look is a weird combination of modern . . . and warm and woodsy . . . you could really go any direction with something like this.

And there you go . . . a bunch of ideas for headboards.  And the point, above all, is to remember to think creatively when a need arises.  When you need a new headboard for a bedroom, you could jump in the car and drive to the home decor store, pick one out, and call it good.  Or, you could get creative.  Maybe you’ve already got everything you need for the perfect piece.

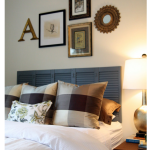
Old Shutters Headboard

Picture from M.E. Beck Design, Inc. at mebeck.com

Picture from M.E. Beck Design, Inc. at mebeck.com

In keeping with some earlier posts about headboards, here’s another idea worth your time and attention:  what about using old shutters?

This idea works especially well if you’re interested in a distressed look (as we see in the picture at the left).  If that’s the look you’re going for, it doesn’t matter if the shutters are old, chipping, faded or even broken (note the second white shutter).  All of those things play into “the look.”

So, whenever you’re wandering through a large flea market or a mission store . . . keep your eyes open for little treasures like these!

VARIATIONS

  • BUILD YOUR OWN.  Now, if you can’t find some plantation shutters like the ones above, don’t worry–you could still imitate the look with some very simple exterior shutters.  And if you can’t find any wooden ones for sale, you could easily build your own.  Just take a look at the picture to the right for inspiration.  The shutters don’t need to be complicated.  Just create some shutters, finish them in whatever style appeals to you and mount them.
  • MIX and MATCH.  Don’t be afraid to combine headboard ideas into one.  For example, an obvious combination would be to start with 1 old window and then install a shutter on either side of it.  Go crazy and complete the look by building a small flower box underneath the window with greens or real potted plants.

Whatever you do, as with all these ideas, have fun.  Don’t jump at the first idea that crosses your mind.  Think about it for a while . . . turn it over in your brain . . . and you’ll be surprised how creative you really can be!

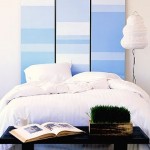
Tri-Fold Door Headboard

In an earlier post, we talked about using a standard paneled door as a headboard.  Here’s another take on the “door as a headboard” idea that really offers you a ton of creative opportunity:  create a headboard from a set of tri-fold closet doors.

Now, admittedly, this is maybe a bit more expensive than some of the other ideas–you would need to pick up a set of doors if you don’t have them–but the project will produce a very unique and interesting result that’s probably worth the expense.

Here’s how to achieve what you see in the picture, as well as some other variations you could try:

Stripes, Stripes, Stripes

As we see in the picture, stripes can create a calm, soothing, clean and somewhat modern feel in a room.  And the good news is that accomplishing a look like this is much easier than you may think.

However, before we spell out the “how-to’s” regarding this project, let me start by saying that the biggest, most important tool you’ll need (besides the doors and the paint) is the right tape.  Trying a project like this with the wrong masking tape is going to be disappointing and frustrating.  So don’t go cheap on the tape if you’re going to try this!  I strongly recommend picking up a role of 3m’s “Orange Core” safe-release masking tape at RepcoLite.  This is a specially formulated “safe-release” tape that will both leave sharp, clean lines while at the same time come off freshly painted surfaces without pulling up the paint.  Using a tape like this will prevent any bleed-through or “bumpy” paint lines.  You’ll get sharp, crisp lines and (trust me) you’ll be happy!

OK, start with the right tape and the rest of the project is easy.

Prime and paint the doors with a white (or the predominant color in your scheme) Eggshell finish.  Preferably RepcoLite’s Hallmark Eggshell.

After the doors have dried for 24 hours, carefully measure off and tape the different section that you want to apply the different color stripes to.

Roll your colors onto these areas using a small roller and allow to dry for 20 minutes to an hour before carefully removing tape.

Continue in this manner, filling in the doors with the differently sized and colored stripes until the doors look the way you want.

Once you’ve accomplish this, let the doors completely dry and mount them.  (Remember this, though:  Latex paint dries to the touch in hours, but doesn’t reach it’s full cure or full hardness until about 30 days later.  This means the doors/headboard won’t be as durable as possible for the first month or so–so go a little easy on them!)

Variations on this One

Don’t stagger the stripes–run them from one end to the other.

Skip the stripes entirely and paint each door a separate color.

Paint the doors a solid, consistent color–all three of them–and then run 1, 2, maybe 3 narrow stripes (1″, 2″ or so) across the doors from left to right.  Clump these narrow stripes or spread them out.

Run the stripes from top to bottom rather than left to right.

Apply wallpaper to the doors instead of paint.

The variations are basically endless.  It’s only a matter of the limits of your creativity.  Above all things:  have fun!

Old Window Headboard

old_window_headboardLast time we looked at a simple way to create a unique headboard for your bed using an old wooden paneled door.  Today, we’re going to move ahead with this topic (headboards) and give you another idea:  old windows.

For this project you need to once again scour your basement and your attic.  Call your friends and ask around.  And if you can’t get your hands on any old windows that way, then head out to the mission stores, the junk shops and even the antique malls (though watch out that you don’t pay too much money for somebody’s old window!)

However you (lawfully) acquire them is your business, but once you have them, you’ve got any number of ways to turn them into unique, bold, inspiring and interesting headboards for your bed.

Here are just a few ideas and tips:

Distressed Windows for that “French Country” Look

Take a look at the windows after you’ve finally found them.  Take into account the condition of the paint.  Is it pealing and flaking off?  Or does it just look worn and old?  If it’s currently flaking, you might do well to remove it entirely (trust me…leaving it on is just an invitation for it to continue flaking off all over your furniture and floors).

If you decide to remove it entirely, remember to exercise care–understanding that the paint used on the window could be lead-based.  Get an N-100 respirator which is available at any hardware or paint store and then either heat the paint up with a heat gun (less than 1,100 degrees F) and remove it that way or mist it with water (to minimize sanding dust) and power sand it off.

If you’re going for that distressed look, don’t worry too much about removing everything down to bare wood.  Just get the loose and peeling stuff off and then dust over it with a single coat of RepcoLite’s Hallmark Ceramic Matte Finish.  This will produce a very low sheen and it applies and covers very well.

Coat your windows with a single coat of this and then scuff sand them with some 120 grit paper, paying special attention to the edges and corners.  Sand them until they look sufficiently distressed and then hang them.

An option for greater durability and washability would be to topcoat them with a single coat of RepcoLite’s Flat Polyurethane Enamel Varnish.  This will keep the sheen down to a minimum while providing you with some durability down the road.  (This is only recommended over colors since it will yellow over time.  If you put it over white windows, they will look “cream” very quickly).

Neutral Windows, Colored Panes

Another way to turn these old windows into a unique headboard is to keep them simple and plain, but use colorful inserts in place of the window glass for interest.

To accomplish this, follow the original steps above to clean and prepare the windows, but rather than painting them with a bright or interesting color, paint them white or cream or some other neutral color.  Then head to the craft store and pick up either some heavy duty foam board or some small artist canvas boards (not the standard artist canvas that is stretched over a frame, but artist canvas that is glued to a thin, heavy duty board).

Pick up one of these types of materials and cut it to size to fit the openings where the window glass would normally be.

Once you’ve done that, you’ve got an almost unlimited number of options.  You could paint them solid colors–colors that coordinate or accent your room.  You could rag paint them or use any number of faux-finishing techniques to create an interesting look on the boards.  You could cover them with scraps of fabric or even leftover scraps of wallpaper.

Basically, the point is to cover these inserts with color–whether it’s paint or paper or fabric or even photos of your family.  Cover them with somethig interesting and then mount them in the windows.

Experiment with positioning and determine whether or not you want all the window openings filled with color or only several of them.

Other Variations to Consider

Clean the windows up and paint them a solid color and don’t distress it–leave it clean and simple.

Use the windows as picture frames.  If there’s no glass, you can mount new glass.  If there is glass (and if it’s old and wavy and dirty) LEAVE IT!  Mount black and white pictures behind it for a very cool and interesting look.

Fill the window openings with “Stained Glass”.  Your local craft store will usually contain small, 8×10 or so pieces of the glass that artisans use for crafting stained glass windows or mosaics.  Buy a few sheets of this and either cut it (carefully) yourself or have a hardware store cut it to size.  Then mount it in your frame.

Mount the windows and then finish the look by installing curtains around them.

Paneled Door Headboard

Creating an interesting, colorful or unique headboard for you bed is a fun and potentially easy way to completely change the look and feel of a bedroom.  Over the next couple entries, we’re going to look at some of the best ideas out there on the web–along with a little how-to steps from RepcoLite to make sure these projects go easily for you if you try to tackle them.

The first one I want to talk about is pictured at the left.  It’s the “Old Paneled Door” headboard and really can be a highlight or focal point of your room if you do it the right way.

The main thing you need to tackle this project is . . . obviously . . . and old paneled wood door.  Possibly you’ve got one sitting around in your basement or attic (like me!), or maybe you’ll need to scour some junk shops and mission stores.  Another thing to try is this:  call your friends and family.  Many people have all kinds of extra junk sitting around in their homes that they don’t know what to do with.  They hate to throw certain things away, but they also have no use for them.  As a result, people “sit on” items like old doors and they end up just taking up space.  It never hurts to ask….

Anyway, once you get your door, the steps are easy from that point on to achieve the look in the picture:

Install some trim (or crown molding) around the edge of the door that will be the top of the headboard (see top edge of door in photo above).  This will give it a finished look on the top and will also cover up the notches cut in the door for the hinges!

Clean it up and scuff sand it (if you’re going to paint it).

Apply your latex paint without primer (if you’re going for a distressed look as we see in the photo).

After the paint has dried for a couple days, take some 120grit sandpaper and dust lightly over the entire painted door.  Spend some extra time on edges and the panels to completely remove the paint in those areas and expose the original wood beneath.

Once the door looks sufficiently distressed, wipe it clean with a damp rag and let it dry.

After it’s dried you can either leave it and hang it, or for a little extra durability, you could top-coat it with 1 coat of RepcoLite’s Flat Polyurethane Varnish.  (If it’s white, you might want to leave it unvarnished as the varnish will yellow over time!)

After it’s dried for 24 hours, you just need to mount it sideways on the wall (door knob removed and hole down so it’s hidden behind the bed) and you’re done!

This is one of those projects that you should be able to accomplish relatively quickly and without too much effort.  The part that will require the most DIY’er skill will be the installation of the crown or trim around the top edge.  Other than that, it’s all pretty straightforward and simple.  But best of all, the impact is huge.

VARIATIONS on the IDEA

Leave the door with a “stained” look.  Either scuff sand it and apply a “freshen-up” coat of stain over the whole door (along with a couple coats of Polyurethane) to create a new, finely finished look; or, leave the stained door completely “as-is” for a more rustic look.

Don’t distress the door.  Skip the roughed-up look and go for a nice, even, solid coat of paint.  If you do this, I’d strongly recommend RepcoLite’s Prime-all Primer as a great basecoat.

Use those old wallpaper scraps!  Cut squares of wallpaper that will fit the panels of the door and install them.  Cut them from scrapes left over in your own home, or call RepcoLite and ask about discontinued wallpaper books you can grab for free!