


Thanksgiving is just days away and soon our homes will be filled with guests. For some people, this is no big deal; their homes are always clean. For others, panic is setting in as they realize their house is nowhere near ready for company and probably won’t be unless they pull some college type all nighters. But don’t worry! We’ve got some quick decluttering ideas that can be done in a weekend and some cleaning hacks that will have the house sparkling in no time.
Listen here:
Painting a stairwell is a daunting task for homeowners. How in the world do you paint the edge of where the wall meets the ceiling when it's 17 feet off the floor?
Well, there are a lot of "answers" out there. But some of those answers just don't cut it in our books!
For example, one solution given on the world wide web is to tape a paint brush to an extension pole. Or, better, to use an actual paint brush extender tool that's made for the job. In either case, you've got a brush on a pole that you're hoisting way over your head to cut a straight line between the wall and the ceiling . . . . Um. Right. For an experienced contractor, maybe. For a regular DIY'er, probably not.
Instead, try the Shur-Line Edger. You can see it over there on the right. It's a weird little gadget that can make your day or make you so mad you'll want to toss it across a room.
There are all sorts of mixed opinions regarding this little tool. You could honestly start a mini-war in the paint store just by vocally denouncing it or praising it!
Still, for this job, it might be the perfect solution because you can put it on an extension pole and use it to edge right up to the ceiling. You'll get a straight line and be able to do all of it from the ground!
However, there's a reason this little tool can cause arguments: if you don't use it correctly, it can really cause trouble. And the most common way of using the tool the wrong way is to load it with paint incorrectly. Here's a video that demonstrates the right way to load it:
The holidays are upon us! Here are a few quick weekend projects that will help get your home ready for your guests!
This segment is basically Part 2 of the Thanksgiving Survival Guide we started in the previous segment. With the Decluttering done, now it's time to talk cleaning. And we've got some great cleaning hacks to make your life easier and your cleaning quicker!
For quick oven cleaning, mix baking soda, water, and vinegar in an oven safe bowl to make a paste. Dab the paste onto the messiest areas in your oven and then set the bowl with the remaining paste on the shelf in the oven and bake it for 45 minutes at 100 degrees. When that's over, wipe the oven clean with a sponge! It's quick and easy! Check out this video from cleverly.com to see the process:
To get all that gunk that's all over the inside of your microwave, try this quick fix: put water and lemon juice (or vinegar) in a microwave safe bowl. Microwave on high for about 6 minutes or so and then let it sit and cool for a little while. Then, remove it and wipe the microwave clean. The steaming effect coupled with the vinegar or lemon juice will make clean up super easy! And the microwave will smell lemony fresh.
For those overnight guests, it might be a good idea to give the shower a once over. And here's something simple: Fill a spray bottle with equal parts vinegar and Dawn Dish Soap. Spray it on, let it sit for a while (the dawn will keep the solution in place on the surface) and scrub clean. The soap scum and other gunk will wash away!
Another method is to put the same mixture in a dish wand--something with a scrubby on the end. Then, during your next shower, just use that and give it all a good scrubb!
Moldy caulk around your tub or shower can be easily dealt with by wiping the caulk with a rag dampened with bleach. If the mold is surface mold, you'll be amazed how easily and quickly that terrible black caulk will turn white!
If the mold has established a bulkhead in your caulk, you could try a heavy gel toilet bowl cleaner that contains bleach. The heavy gel will keep the cleaner on the mold for longer, hopefully attacking the mold and whitening the caulk. After an appropriate period of time, rinse it off and measure your success!
Cleaning mini blinds is a pain. I hate pulling them down and tossing them in the bath tub and then trying to dry them off. I know I'm probably damaging the gears and mechanisms of the blinds, but I've always struggled to find a good way to get them clean. Well, here's the answer:
If they're dusty, simply use an old paint brush! Super fast! Super effective.
If they need a damp cleaner to remove other dirt, just mix vinegar and water. Then put a sock on your hand, dip it in the solution, and wipe over the blinds.
Dusty ceiling fans are so messy! Sure there are little dusters that will go up there, but the problem is, you pull the dust off onto yourself or the surfaces below. Here's a Betsy-Approved method that will eliminate ALL of the mess:
Use an old pillow case. Just carefully slide the pillow case over the blade and then sandwich it top and bottom with your hands and pull. The dust comes off and stays in the pillow case! It's perfect!
 If you've got pet hair all over your furniture, there are a lot of different hacks out there to help you clean it off. Sure, you could use lint rollers and tape and all that, but here are a couple other options that are a little more unique:
The Squeegee. A regular window squeegee, when dragged across your furniture will actually pull the dog hair into little piles. It's really fun. It's almost relaxing. Until you actually look at the pile of fur you've scraped up and realize you've got enough to create another dog. Still, at least you've got it off your furniture!
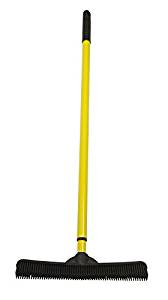
It also works great on your carpet. And if you're not interested in crawling around on your hands and knees "squeegeeing" your carpets, consider a rubber carpet rake/squeegee! They're super inexpensive and very well-reviewed. Click here to view one on Amazon!
Decorating kids rooms can be an incredibly rewarding experience. And it can also be a train wreck! Here's how you can do involve the kids, get great results, and have limited conflict along the way!
This week, Betsy and Dan discuss specific projects that will help you design remarkably creative kids’ rooms! They discuss ways to use your kids artwork on the walls of their room to add color and interest! And then they shift gears and talk about a number of interesting projects involving Benjamin Moore’s Chalkboard Paint. Also, (and perhaps most importantly), Betsy finds herself unable to say the word “great”, and in the process makes great radio memories….
View our Pinterest Board for Episode 7!
We had a lot of fun with this topic and really, we only scratched the surface. This is such a great project for a kid’s room or playrooms because it gives you the chance to put some of their creativity on display, give them some input in the room, and bring in some (typically) bold, vibrant colors without letting them overpower the room.
The ideas we talked about were designed to be easy to change out. When your kids create new art, you (or even they) can swap out older art for newer. The walls can be updated regularly, often, and best of all, easily!
Check out the ideas in the podcast and then, if you come up with something even better, be sure to let us know! Email your photos to colormehome@repcolite.com!
We spent a fair amount of time in this episode talking about Chalkboard Paint from Benjamin Moore. And that’s because we really believe this to be one of the coolest paints available! If you’re even mildly creative, it’s not going to take you long to dream up hundreds of uses. And remember, as we mentioned, Benjamin Moore’s Chalkboard Paint is available in ANY Benjamin Moore color. So, say goodbye to black chalkboards! (Unless of course, that’s what you want.)
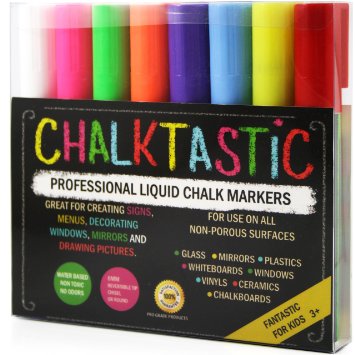
Betsy made a remarkably bold statement when we started talking about Chalk Markers. She declared that chalk markers were, and I quote, the “greatest invention ever.” Yes. Not one given to overstatement, Betsy firmly places Chalk Markers above electric lights, automobiles, moving pictures, and even computers on her list of “Greatest Inventions of All-Time”. Sorry Edison, Benz, and all you other thinkers and inventors. Sure, Betsy enjoys driving, having lights that go on with the flick of a switch, watching movies, and using her new Mac. But all of those things pale in comparison to doodling with Chalktastic Markers.
I, on the other hand, am a little more grounded and would likely place chalk markers just slightly further down on the list. Still, they’re pretty cool. And they’ll keep a lot of the chalk dust and mess off your floors. Click here for a link to purchase your own set from Amazon. (These are the ones Betsy uses and recommends. And remember, she says they’re the “greatest invention ever.”)

This week, Betsy and Dan talk about decorating kids’ rooms. These are great projects and can be a lot of fun: you’ll get to use colors you might not typically use and you really get to put your creativity on display! But how do you create something that the kids will love–with all their favorite colors–without having the whole thing turn into, quite literally, a circus? That’s what we talk about in this episode, so give it a listen!
View our Pinterest Board for Episode 6!
In the podcast, we mentioned ceilings as a potential area to bring in some color. If you’re going to give that a try (and you should, because it’s a very cool idea that’ll payoff with great results!) then you should definitely be using Benjamin Moore’s Waterborne Ceiling Paint. It’s specifically formulated for ceilings, and provides an ultra flat finish that easily hides common ceiling imperfections. It’s easy to work with, has minimal spatter and dries very quickly for fast recoats.
We covered 4 different products that would be perfect. Here’s a quick summary in case you didn’t have a note pad to jot all the good ideas down while the podcast was playing:
Hallmark is our Premium interior paint. It’s created with Ceramic microspheres and provides exceptional washability and durability even in our matte finish. Hallmark is available in a Matte, Eggshell, Satin Sheen, and Semi-Gloss.
Aura delivers remarkable durability and offers the most advanced way to bring color to life. Using Benjamin Moore’s exclusive Color Lock® technology, Aura paint brings you discernibly richer, truer color. Aura is ideal for kids’ rooms whenever you’re using colors with poor coverage or if you’re covering over other bright and bold colors. The reason? Aura’s specifically formulated to cover and hide better than any other paint out there. If you don’t want to fuss with 3 or 4 coats, choose Aura!
Regal paint stands up to today’s active lifestyles in colors and finishes that create the home you’ve always imagined. A premium quality coating featuring Advanced Particle Technology® which includes our proprietary 100% acrylic resin. This makes the finish itself more durable, providing for superior uniform coverage as well as easier touch-ups. Additional benefits include spatter resistance for easier clean-up, and superior coverage for a flawless finish in fewer coats.
Natura Waterborne Interior Paint continues Benjamin Moore’s commitment to providing the most environmentally friendly paint. Natura goes beyond zero VOC* to offer zero emissions** and no harsh fumes***, making it a safer paint for your family and the environment, all without compromise to performance or color selection. Natura is truly “Green Without Compromise®.”
While we didn’t mention Carefree in the podcast, we certainly should have! Carefree is a tremendous product for walls, will give you great washability and durability, and will price out below all of the other products here! If you’re working on a budget, Carefree might be a great option to consider.
When it came to finishes, we strongly recommend either Satin Sheen or Semi-Gloss for your trim, doors, and furniture. Semi-Gloss finishes hold up well and wash up readily.
For your walls, however, our favorite choice is an Eggshell Finish. It’s dull enough to hide wall imperfections (Betsy kept referring to the dings and dents made by someone bouncing a ball of the wall . . . perhaps something she was guilty of long ago) but it also has enough of a finish to be washable.
We drew from a lot of articles and posts when we gathered info for this podcast. Here are just a few of them if you’d like to read further!

 Once upon a time, probably about 6 years ago or so, my wife and I walked with our kids to the Zeeland Bakery. Caleb (who was 5 at the time) waited outside with me while my wife and the other kids sauntered into the shop and ordered various donuts and cookies and different types of bread. (It’s always a huge undertaking whenever we go to the bakery).
Anyway, while Caleb and I were waiting outside, a lady walked by with a 1-year-old boy in a stroller. I smiled at the lady and Caleb smiled at the lady and he even went so far as to say “Hello.” I was proud that the little guy was so polite. And it was this pride which eventually led to my downfall.
See, as the lady was walking away, but while she was still within earshot, I thought I’d demonstrate how polite and kind my little guy was. So I said, loud enough for the lady to hear, “Wasn’t that a nice little boy?”
Oh, it was a question that he should have been able to hit out of the park. It was an easy one. A no-brainer. All he had to say was “Yes Dad, that boy seemed very nice, indeed.” Had he said that, the lady would have thought I was a super parent because I’d raised such a wonderfully polite little lad. In fact, I figured there was always the off chance that she’d turn her stroller around, shake my hand and ask my advice as to how to raise her own child.
Yes, my mind was brimming with the possibilities and the glory when Caleb spoke up. He raised his little voice to match my raised voice and suddenly, as is always the case when this kind of thing happens, the entire world quit moving. Suddenly, there were no cars–no road noise. The shop doors quit opening and closing. The clocks that had been ticking ceased their workings for a few split seconds. Even the birds and the wind and the airplanes and the fountains went silent. A whisper at one end of Main Street would have been audible at the other. And it was into this utter and complete silence that Caleb bellowed his answer, informing me, the lady, her poor, poor child and everybody else within earshot that, “No,” he didn’t think that kid was all that much. “In fact,” he went on to say, “the kid was actually kind of ugly. His ears were big and his nose was all turned up and his eyes were squinty. Like a rat.” As if this wasn’t bad enough, Caleb ended by informing me (and all of Zeeland) that he had only said “hello” to the kid because “he felt sorry for him.”
Well, I just stared at him in horror and disbelief as he continued to rattle off all sorts of uncomplimentary descriptions that reverberated off the buildings and up and down the silent streets. Silent, that is, except for the wildly squeaking wheels of the lady’s stroller as she pushed her child rapidly away from that horrible father and his nasty little son….
I mention this little episode partly as penance but also because it’s the perfect example of how kids think and act. If you ask for a child’s opinion, you’re going to get it. They’ll typically tell you exactly what they think. Problem is, while they’re usually honest, they don’t always exercise the best judgment.
In an earlier article (which you can read HERE), I suggested that it’s important to involve your kids in the process of decorating their rooms. You should let them pick the colors, ask them what they like and what they hope to see in their rooms. However, when you do that, you’re going to have to be ready for some crazy answers from time to time. In fact, when you ask an 8-year-old what colors he’d like on his walls, don’t plan on hearing him say “Oh, a nice medium-beige with an earthy brown would do just lovely.” No, get ready for black and orange (halloween colors). Or bright blue and red and yellow (Superman colors).
So, with that said, if you do decide to let them help you decorate their own rooms (which I still believe to be a great idea), you better have a method in mind as to how to incorporate their ideas without completely abandoning the overall look of the room. You both need to be happy with the outcome. And that means compromise. Here are 3 tips:
When your kids choose the brightest yellows and oranges, the flashiest greens and blues, a great compromise is to paint one of the walls–an accent wall–with one of those bright, flashy colors. Have them settle on which color they like best and see if you can’t work that into a small wall–a wall with a window or a door.
Now, in most cases, when you paint an accent wall, you’d pick the focal point of the room to do this with. In this case, however . . . well, not so much. If you’re trying to minimize the effect of the color, then picking the focal point of the room is the last thing you want to do. Just pick a small wall–a wall that’s not the first thing you see when you walk into the room–and see if you can’t put their color there. They’ll be happy, feeling proud when they see their bright wall and you’ll be happy because the room doesn’t glow like the face of the sun.
Another great compromise that sometimes works in the paint store is to steer kids toward more muted versions of their colors. If they love bright reds and yellows, maybe throw out some options like a rusty red or terracotta and a more muted yellow. Sometimes they’ll see these new colors and be completely willing to compromise. Again, with this type of scenario, both of you can potentially reach a mutually happy outcome.
Perhaps the best way of working wild, crazy colors into a decorating scheme is to bring those colors in with accessories. If your kids want to see black and orange or some other funky combination of colors on their walls, but you can’t bring yourself to do it, then offer this: coat the walls with a nice neutral color and then bring in accessories that fit your child’s desired color scheme. Bring in lampshades with bright colors, find art prints with the colors, switchplates and any number of other accessories that will serve to fill the room with the chosen colors without overloading the walls and driving you crazy.
The bottom line is this: when you bring your kids into the decorating picture, you’ve got to be ready to compromise. Don’t let them decide everything when you hate what they’re coming up with. Likewise, don’t decide everything yourself when they hate what you’re coming up with. You both have to be happy with the outcome for this little project to work. If you hate the room, you’re always going to feel irritated when you walk past it. If they hate the room, don’t worry, they’ll find a way to let you know about it.
So work together, have fun, and compromise!