Making New Wood Look Old

If you spend any time at all on Pinterest, you’ve definitely seen any number of home projects involving reclaimed wood. We see old barn wood boards being used as accent walls and headboards, backsplashes and even light fixtures. It’s everywhere. And there’s good reason! It’s a beautiful look that works in almost any setting. Even a sleek, modern kitchen can benefit from the gray, natural tones and textures of a barn wood light fixture.

Unfortunately, finding old, weathered wood (at a decent price) isn’t always easy. But the good news is you can make your own! And it’s an incredibly fun project!

Not Just Color!

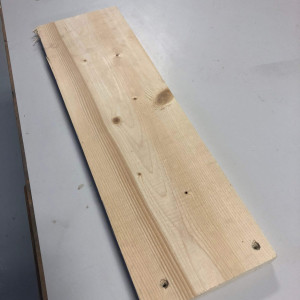
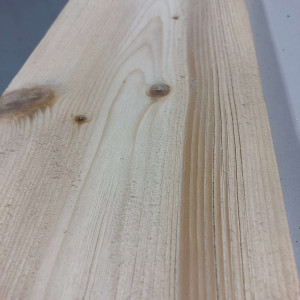
If you look at a piece of authentic barn wood that’s naturally aged outside, you’ll notice a couple of things: the wood usually has a gray, weathered color and the wood has a weathered texture. When aging wood–if you truly want an authentic barn wood look–this physical texture is integral. You can certainly gray or “age” any piece of smooth, pristine wood. But generally, it just ends up looking like a new board that’s been stained. It’s the physical distressing of the wood that gives it character.

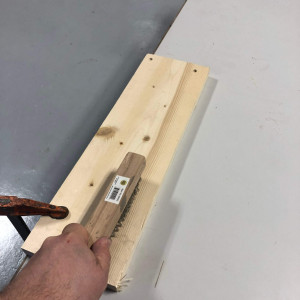
So we recommend starting with a quick distressing of the wood. It’s not a labor intensive process and it can be a lot of fun. You can do everything from putting a wire wheel on a drill or grinder to simply sticking with hand tools. It’s up to you. We found that for our tastes, a simple stiff-bristled wire brush was ideal. We worked on pine planks and found that by running the wire brush over the wood in the direction of the grain, we very quickly were able to produce a worn and weathered look.

A SIMPLE TIP:

  • Use a clamp to secure the board to your work bench. Then you can put both hands on the brush and get a little more leverage. And, even if the clamp leaves a dent in the wood, it’s no big deal! You’re distressing it anyway.

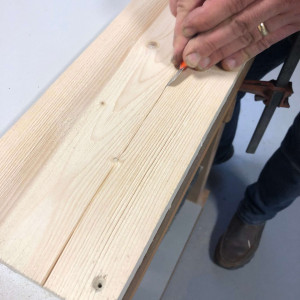
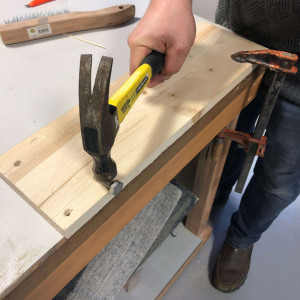
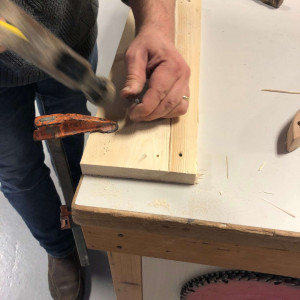
Once we wire brushed the wood, we dinged it up in a number of different ways. Hit it with a hammer, pounded the threads of a bolt into the grain, drove a few nails and pulled them out, and finally poked a few holes to look like worm holes.

Get creative. There are no rules here! Well. That’s not true. There is one rule: Know When To Quit! This is so important. When the wood looks good, quit. Sometimes we keep going thinking that we will make it look older and older with all our different distressing methods. However, what actually happens is that the piece begins to look fake! So quit when you’re ahead.

Aging Solution 1: Stain

Once you’ve got the wood distressed, it’s time to add color and give it that “I’ve-been-out-in-the-weather-for-50-years” look! And there are a number of different ways to do this. The first we’ll look at is to use regular wood stain. We’ve got a formula for a darker and a lighter “weathered gray”. It’s something that looked good on the pine we were staining and it gave the wood a bit of that gray, washed out look. It’s simply a typical wood stain that you brush or rag onto the wood and then  rag off, depending on the color you want to achieve.

It’s definitely a bit of a trial and error process, so use some scrap pieces of wood and sample away! If you are coming to a RepcoLite for the stain, bring some samples of the wood you’ll be working on and we can mix up your quart, sample the wood, and adjust the color if necessary! And always remember to sample the stain if you’re going to switch to another type of wood. A stain that looks one way on one species of wood can look entirely different on another!

When you’re all done and the wood has dried (unless you’re going to add paint or other effects), we recommend top coating with a polyurethane. The number of coats and the finish you choose depends on the overall look you want to achieve.

BENEFITS OF THIS METHOD: 

  • A generally even color on all planks
  • Consistent color on planks even if one is stained 4 days before another
  • No waiting! You get your color instantly and you don’t have to wait several days until your solution (see below) is ready.

DOWNSIDE TO USING THIS METHOD:

  • A generally even color on all planks (some of the natural variations of weathered wood isn’t present)
  • The harder grain in the wood resists the stain to some extent and you get more contrast in the finished product.

Aging Solution 2: Vinegar and Steel Wool

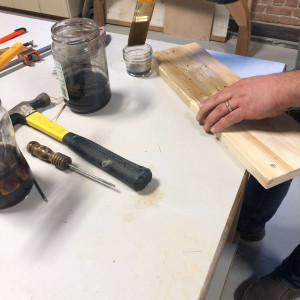
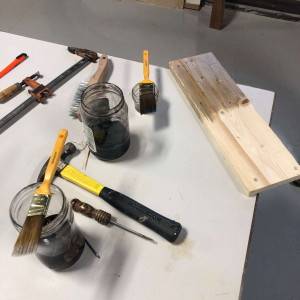
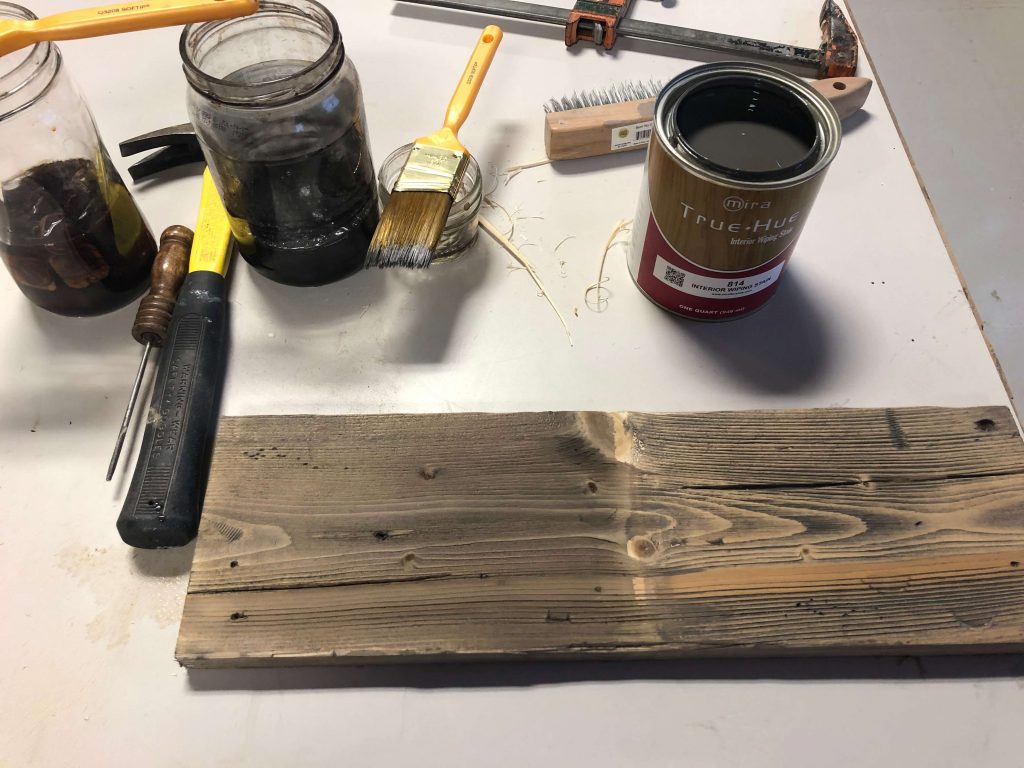
The second aging method is popular all over the internet: steel wool and vinegar. We spent some time testing this method and here’s what we found works best (and will hopefully help you avoid some of the poor results other people have had). First thing, is to start with #0000 steel wool. Wash it with dish soap to remove any oils that might slow down the chemical reaction when you mix it with the vinegar. After you’ve cleaned it and wrung the water out of it, cut it up into smaller pieces and toss them in a container. Then half-fill (or so) the container with vinegar. We used white distilled vinegar, but apple cider vinegar seems to work as well (though possibly producing slightly different color results).

Anyway, once you’ve filled the container with steel wool and vinegar, put the lid on it (after popping some holes in the lid so gasses can escape), and let it sit for a day, two days, three days, or more. The longer it sits the stronger it becomes.

When you’re ready to try the process, brew a cup of strong tea (8-10 bags of cheap tea in a cup). Take the tea and brush it onto your distressed wood. You can let it dry (which seems to produce darker end results), or you can brush the vinegar/steel wool solution over the wet tea. Either way works–the important thing to understand is that the tea and the vinegar solution must be applied in different steps! Once you’ve done that, you will not have immediate results. Over the next 5-20 minutes, the wood will dramatically age right before your eyes!

One quick note about the tea: It’s not mentioned or recommended in every post about this project, but we found that it was essential if you really want a darker, weathered gray end product. The people who’ve tried the process online and didn’t like the results generally used ONLY the vinegar and steel wool solution. That certainly works, but it’s not as dark or rich as they were hoping. Here’s why: The vinegar and steel wool mixture reacts with tannins in the wood. However, by adding the tea you infuse the wood with even more tannins.

SOME TIPS

  • Be sure to strain your vinegar and steel wool mixture by running it through a coffee filter or a paint strainer to remove the small pieces of steel wool
  • Be sure to TEST, TEST, TEST! Try different methods, mix the tea stronger and weaker. Brush it on and let it dry. Apply the vinegar solution immediately. Try different methods until you produce results you like!

BENEFITS OF THIS METHOD: 

  • Very random, very natural aging results
  • Looks incredibly authentic

DOWNSIDE TO USING THIS METHOD:

  • Slower process because of the wait time necessary for the solution to become ready
  • Much more difficult to produce even and consistent results. The longer the mix sits, the darker it becomes when you use it.

The Comparison

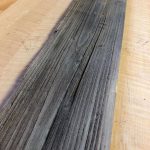
Here’s a look at what we came up with using both methods side by side. The stain is on the right, the vinegar/steel wool and tea is on the left. Each side has it’s pros and cons. And largely, it depends on personal preference and what look you’re going for.
Just the Beginning, Young Grasshopper…

Try this project! Try it! We know that if you do, it will get your creative juices flowing. Once you see brand new, pristine boards become old and weathered, you’ll be thinking of ways to use them in your home. Or, if you’re like us, you’ll be brainstorming about other things you can do: you’ll be brushing paint on and sanding it off to create that look of reclaimed wood. Or maybe you’ll come up with something entirely different. We found that using a putty knife to apply simple spackling into all the grooves and the scraping most of it off produced the look of boards holding tenaciously to old layers of white paint. (We’ll cover this in a future post because it turned out so well!) Whatever you do, have fun! It’s a great project and it’s tough to screw it up. We’d love to see what you come up with. Post some pictures of your projects in the comments!

Lesson One In Furniture Refinishing: Pay Attention!

Who among us hasn’t seen those shows where they take some junky piece of furniture that seems destined for the trash heap and miraculously turn it into something incredible? Many of us WISH we could do that. They make it look so easy on TV!

Let the Treasure Hunt Begin!

Well, we decided to investigate how hard it really is to do something like that. So we began our search for the perfect piece to transform. And when we couldn’t find that perfect piece even remotely in our price range, we decided that any piece would do!

In the end, we found an old desk in a quiet (and dark) little secondhand shop. It looked perfect sitting in there, covered with assorted knick-knacks. The price was right and, quite honestly, someone else was eyeing it, so we snatched it up.

Riding back to our shop with the little desk in the back of the car, we were pleased with our find. And we talked about how we were going to trannsform this tired and dusty desk into a gloriously stained piece of fine furniture. We had big plans.

But, as they say, even the best laid plans…

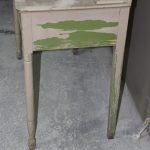
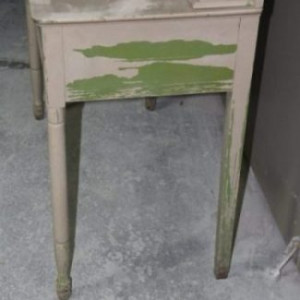
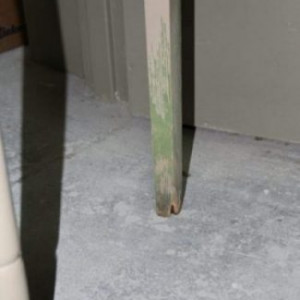
See, it all started to fall apart when we actually looked at the piece in the light. We knew it was covered with peeling paint. But we hadn’t realized that the drawers would fall into a hundred pieces at the slightest tug and that huge chunks of the legs were missing from rot and water damage.

Lesson One: Pay Attention!

We had been in such a rush to find the perfect piece, we never took the time to inspect it as we should!

If you’re going to try your hand at furniture refinishing, the very first lesson to learn is not about the actual refinishing process at all. The first lesson is about the search!

Pay attention. Take your time. Look a piece over–even if it takes getting on the floor and looking at it from underneath. Check out the legs and the feet. Examine the hardware. Pull out the drawers. Do they slide easily? Are the joints tight? If not, will a little wood glue bring everything back together?

Look at the sides and inspect the veneer. Is it in good shape or are pieces missing?

Look for dings and dents in the wood. And don’t forget to look to see if the piece is truly made of wood at all! We’ve seen a number of people make this mistake, purchasing a laminated piece with the thoughts of stripping it and refinishing it. It’s an embarrassing mistake! Don’t make it.

All in all, take your time, pay attention, and examine the piece from top to bottom. You know your skill set. You know what you can fix and what you should leave for someone else. You don’t want to be surprised. Like we were!

Moving Forward

At any rate, surprised or not, there was only one direction for us to move: forward! After all, we’re stubborn. And we had paid good money for this thing. We weren’t quitting now. We were going to turn it into something cool if it killed us. But how? Check out the next post to find out!

SaveSave

SaveSave

SaveSave

SaveSave

SaveSave

SaveSave

SaveSave

SaveSaveSaveSave

SaveSave

More Unique Headboards

I’m kind of frustrated.  See, I would love to try some of these headboard ideas I’ve been writing about in my own home–but I can’t.  Or really, to be more accurate, there’s no point.  The beds we already own are adequate and they don’t lend themselves to this project.  So I’m kind of frustrated.  But, I take some comfort in the fact that I can still write about these and get you thinking about them and hopefully convince some of you to give the ideas a try.

Anyway, I’m going to breeze through a few ideas today with only brief descriptions or information.  I think these particular ideas are pretty basic and don’t need too much explanation.

picket_fence_headboard

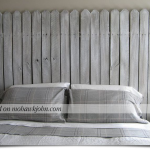
PICKET FENCE HEADBOARD

It’s just like it sounds.  Buy either a section of Picket Fence at the lumber yard, or build one specifically.  Since you’re using it inside, you could easily build it out of regular pine and then simply prime and paint it for that clean white look.

If you opt for this . . . don’t let yourself leave the motif without completing it.  You’ve installed a picket fence in your bedroom . . . that means you need lots of greenery and “outdoorsy” stuff.  Possibly sky blue walls, possibly (in a kids room) a tree mural.  Maybe you need to wind some “greens” or “vines” through the slats of the fence.  Whatever you do, have fun with the theme and build on it.

CHANGING SCREEN HEADBOARD

Here’s another idea that I think has a ton of potential.  Buy or get your hands on (lawfully, of course!) one of those changing screen things you see at home decor stores and then it’s up to you how creative you can get.

Some of these screens are frames with scrolling and winding metalwork.  That’s fine.  They can be mounted directly behind the bed as is.  I’ve seen other screens that are like the screen on the right.  This one had a uniform brown canvas backer that was removed and replaced with the black and white fabric.

Again, whatever you do is up to you . . . the point is . . . think beyond what you immediately see!

WOOD SHIM HEADBOARD

shim_headboard

I don’t know exactly how this one was done, but it seems to be more about patience than skill.  It’s made entirely of those little wood shims can pick up at any lumber yard.  They were probably sanded (though not necessarily) and varnished when the look was completed.

However they were put together, the look is a weird combination of modern . . . and warm and woodsy . . . you could really go any direction with something like this.

And there you go . . . a bunch of ideas for headboards.  And the point, above all, is to remember to think creatively when a need arises.  When you need a new headboard for a bedroom, you could jump in the car and drive to the home decor store, pick one out, and call it good.  Or, you could get creative.  Maybe you’ve already got everything you need for the perfect piece.

Old Shutters Headboard

Picture from M.E. Beck Design, Inc. at mebeck.com

Picture from M.E. Beck Design, Inc. at mebeck.com

In keeping with some earlier posts about headboards, here’s another idea worth your time and attention:  what about using old shutters?

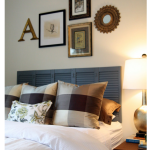
This idea works especially well if you’re interested in a distressed look (as we see in the picture at the left).  If that’s the look you’re going for, it doesn’t matter if the shutters are old, chipping, faded or even broken (note the second white shutter).  All of those things play into “the look.”

So, whenever you’re wandering through a large flea market or a mission store . . . keep your eyes open for little treasures like these!

VARIATIONS

  • BUILD YOUR OWN.  Now, if you can’t find some plantation shutters like the ones above, don’t worry–you could still imitate the look with some very simple exterior shutters.  And if you can’t find any wooden ones for sale, you could easily build your own.  Just take a look at the picture to the right for inspiration.  The shutters don’t need to be complicated.  Just create some shutters, finish them in whatever style appeals to you and mount them.
  • MIX and MATCH.  Don’t be afraid to combine headboard ideas into one.  For example, an obvious combination would be to start with 1 old window and then install a shutter on either side of it.  Go crazy and complete the look by building a small flower box underneath the window with greens or real potted plants.

Whatever you do, as with all these ideas, have fun.  Don’t jump at the first idea that crosses your mind.  Think about it for a while . . . turn it over in your brain . . . and you’ll be surprised how creative you really can be!

Tri-Fold Door Headboard

In an earlier post, we talked about using a standard paneled door as a headboard.  Here’s another take on the “door as a headboard” idea that really offers you a ton of creative opportunity:  create a headboard from a set of tri-fold closet doors.

Now, admittedly, this is maybe a bit more expensive than some of the other ideas–you would need to pick up a set of doors if you don’t have them–but the project will produce a very unique and interesting result that’s probably worth the expense.

Here’s how to achieve what you see in the picture, as well as some other variations you could try:

Stripes, Stripes, Stripes

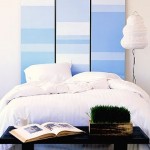
As we see in the picture, stripes can create a calm, soothing, clean and somewhat modern feel in a room.  And the good news is that accomplishing a look like this is much easier than you may think.

However, before we spell out the “how-to’s” regarding this project, let me start by saying that the biggest, most important tool you’ll need (besides the doors and the paint) is the right tape.  Trying a project like this with the wrong masking tape is going to be disappointing and frustrating.  So don’t go cheap on the tape if you’re going to try this!  I strongly recommend picking up a role of 3m’s “Orange Core” safe-release masking tape at RepcoLite.  This is a specially formulated “safe-release” tape that will both leave sharp, clean lines while at the same time come off freshly painted surfaces without pulling up the paint.  Using a tape like this will prevent any bleed-through or “bumpy” paint lines.  You’ll get sharp, crisp lines and (trust me) you’ll be happy!

OK, start with the right tape and the rest of the project is easy.

Prime and paint the doors with a white (or the predominant color in your scheme) Eggshell finish.  Preferably RepcoLite’s Hallmark Eggshell.

After the doors have dried for 24 hours, carefully measure off and tape the different section that you want to apply the different color stripes to.

Roll your colors onto these areas using a small roller and allow to dry for 20 minutes to an hour before carefully removing tape.

Continue in this manner, filling in the doors with the differently sized and colored stripes until the doors look the way you want.

Once you’ve accomplish this, let the doors completely dry and mount them.  (Remember this, though:  Latex paint dries to the touch in hours, but doesn’t reach it’s full cure or full hardness until about 30 days later.  This means the doors/headboard won’t be as durable as possible for the first month or so–so go a little easy on them!)

Variations on this One

Don’t stagger the stripes–run them from one end to the other.

Skip the stripes entirely and paint each door a separate color.

Paint the doors a solid, consistent color–all three of them–and then run 1, 2, maybe 3 narrow stripes (1″, 2″ or so) across the doors from left to right.  Clump these narrow stripes or spread them out.

Run the stripes from top to bottom rather than left to right.

Apply wallpaper to the doors instead of paint.

The variations are basically endless.  It’s only a matter of the limits of your creativity.  Above all things:  have fun!

Old Window Headboard

old_window_headboardLast time we looked at a simple way to create a unique headboard for your bed using an old wooden paneled door.  Today, we’re going to move ahead with this topic (headboards) and give you another idea:  old windows.

For this project you need to once again scour your basement and your attic.  Call your friends and ask around.  And if you can’t get your hands on any old windows that way, then head out to the mission stores, the junk shops and even the antique malls (though watch out that you don’t pay too much money for somebody’s old window!)

However you (lawfully) acquire them is your business, but once you have them, you’ve got any number of ways to turn them into unique, bold, inspiring and interesting headboards for your bed.

Here are just a few ideas and tips:

Distressed Windows for that “French Country” Look

Take a look at the windows after you’ve finally found them.  Take into account the condition of the paint.  Is it pealing and flaking off?  Or does it just look worn and old?  If it’s currently flaking, you might do well to remove it entirely (trust me…leaving it on is just an invitation for it to continue flaking off all over your furniture and floors).

If you decide to remove it entirely, remember to exercise care–understanding that the paint used on the window could be lead-based.  Get an N-100 respirator which is available at any hardware or paint store and then either heat the paint up with a heat gun (less than 1,100 degrees F) and remove it that way or mist it with water (to minimize sanding dust) and power sand it off.

If you’re going for that distressed look, don’t worry too much about removing everything down to bare wood.  Just get the loose and peeling stuff off and then dust over it with a single coat of RepcoLite’s Hallmark Ceramic Matte Finish.  This will produce a very low sheen and it applies and covers very well.

Coat your windows with a single coat of this and then scuff sand them with some 120 grit paper, paying special attention to the edges and corners.  Sand them until they look sufficiently distressed and then hang them.

An option for greater durability and washability would be to topcoat them with a single coat of RepcoLite’s Flat Polyurethane Enamel Varnish.  This will keep the sheen down to a minimum while providing you with some durability down the road.  (This is only recommended over colors since it will yellow over time.  If you put it over white windows, they will look “cream” very quickly).

Neutral Windows, Colored Panes

Another way to turn these old windows into a unique headboard is to keep them simple and plain, but use colorful inserts in place of the window glass for interest.

To accomplish this, follow the original steps above to clean and prepare the windows, but rather than painting them with a bright or interesting color, paint them white or cream or some other neutral color.  Then head to the craft store and pick up either some heavy duty foam board or some small artist canvas boards (not the standard artist canvas that is stretched over a frame, but artist canvas that is glued to a thin, heavy duty board).

Pick up one of these types of materials and cut it to size to fit the openings where the window glass would normally be.

Once you’ve done that, you’ve got an almost unlimited number of options.  You could paint them solid colors–colors that coordinate or accent your room.  You could rag paint them or use any number of faux-finishing techniques to create an interesting look on the boards.  You could cover them with scraps of fabric or even leftover scraps of wallpaper.

Basically, the point is to cover these inserts with color–whether it’s paint or paper or fabric or even photos of your family.  Cover them with somethig interesting and then mount them in the windows.

Experiment with positioning and determine whether or not you want all the window openings filled with color or only several of them.

Other Variations to Consider

Clean the windows up and paint them a solid color and don’t distress it–leave it clean and simple.

Use the windows as picture frames.  If there’s no glass, you can mount new glass.  If there is glass (and if it’s old and wavy and dirty) LEAVE IT!  Mount black and white pictures behind it for a very cool and interesting look.

Fill the window openings with “Stained Glass”.  Your local craft store will usually contain small, 8×10 or so pieces of the glass that artisans use for crafting stained glass windows or mosaics.  Buy a few sheets of this and either cut it (carefully) yourself or have a hardware store cut it to size.  Then mount it in your frame.

Mount the windows and then finish the look by installing curtains around them.