Color Me Home Episode 10: Inexpensive Kitchen Updates

On today’s episode, Betsy and Dan discuss some inexpensive projects you can tackle to update your kitchen! They discuss a quick way to make your old cabinets look new again, a way to cover up those old, dated tile backsplashes, and much more!

View our Pinterest Board for Episode 10!

Episode Outline

  • The Gel Stain Fix! (0:52)
  • Can I Lighten My Stained Cabinets With Stain? (5:49)
  • Painting Your Cabinets  (7:10)
  • Get Creative! (20:42)
  • How Do I Apply the Paint? Do I Spray It? Brush It? Roll It? (24:08)
  • Replace the Hardware! (27:01)
  • Update That Dated Tile Backsplash! (28:50)
  • What Finish Should I Use on the Cabinets or the Backsplash? (33:16)

The Gel Stain Fix

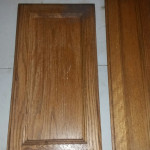
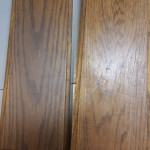
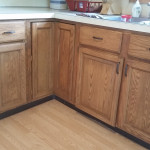
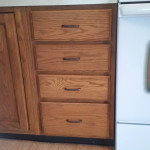
Betsy started the episode talking about an easy way to update old and scratched cabinets. Yes, it takes some work.  And yes, you need to do the right prep work . . . but if you do, this can be a great way to update your cabinets very quickly and for very little money. Here’s a blog post that explains the process in detail. And below are some of the photos sent to us by our customer who had such great results!

 Painting Your Cabinets

A second solution we discussed for updating your kitchen is a pretty basic one:  painting the cabinets. It’s not a complicated process, but it does take some time and it definitely requires that you do the proper amounts of prep work to make sure the finished product holds up well. Here are the steps we discussed in the podcast and a brief description. For more information, listen to the podcast and/or check out our blog post on painting kitchen cabinets!

STEP ONE:  Remove the hardware and hinges and label the doors with their location.

STEP TWO:  Clean the surfaces thoroughly using TSP.

STEP THREE:  Scuff-sand the surfaces you’re going to paint.

STEP FOUR:  Prime the cabinets with STIX Waterborne Primer.

STEP FIVE:  Topcoat with a Benjamin Moore’s Advance or RepcoLite’s Hallmark Ceramic.

Those are the basic steps we cover in the podcast. Again, listen to the episode for more details or check out our blog post on painting your cabinets! (Or, better yet, stop out at any RepcoLite, Port City Paints, or Snyder Paints location and we’ll walk you through the whole process!)

Painting An Old Tiled Backsplash

Another topic we discussed on the episode was painting an old, tiled backsplash. The backsplash in a kitchen can often look dated. And usually, people have no idea how to easily fix it. After all, ripping out the tile involves a lot of demolition, sweat, and (in my case) blood. But, there is a quick fix if you’re looking for an easy solution that will buy you some time. And of course, we’re talking about paint! Here are the basic steps. Again, if you’re looking for more detailed info, please check out our blog post on the topic!

STEP ONE:  Clean the surfaces thoroughly using TSP.

STEP TWO:  Prime the cabinets with STIX Waterborne Primer.

STEP THREE:  Topcoat with a Benjamin Moore’s Advance or RepcoLite’s Hallmark Ceramic.

Color Me Home Episode 7: Creative Kids’ Rooms (The Chalkboard Paint Episode)

This week, Betsy and Dan discuss specific projects that will help you design remarkably creative kids’ rooms! They discuss ways to use your kids artwork on the walls of their room to add color and interest! And then they shift gears and talk about a number of interesting projects involving Benjamin Moore’s Chalkboard Paint. Also, (and perhaps most importantly), Betsy finds herself unable to say the word “great”, and in the process makes great radio memories….

View our Pinterest Board for Episode 7!

Episode Outline

  • Using Your Kids’ Artwork in their Room (1:26)
    • Betsy Can’t Say “Great” (1:40)
    • Empty Frames (2:33)
    • Corkboard Frames (4:56)
    • Clipboards (5:52)
  • Chalkboard Paint Projects (7:25)
    • There Are Some Dumb Projects Out There (8:02)
    • Paint the Wall (but not in the boring way you’re thinking!) (10:42)
      • Paint Random Shapes (11:08)
      • Replace Your Wallpaper Border with Chalkboard Paint (12:45)
      • Cityscape (14:07)
      • A Tree (15:47)
    • Paint some furniture! (16:35)
    • Chalk Markers (This is Awesome!) (22:21)
    • Various Accessories (27:43)

Frame Their Artwork

We had a lot of fun with this topic and really, we only scratched the surface. This is such a great project for a kid’s room or playrooms because it gives you the chance to put some of their creativity on display, give them some input in the room, and bring in some (typically) bold, vibrant colors without letting them overpower the room.

The ideas we talked about were designed to be easy to change out. When your kids create new art, you (or even they) can swap out older art for newer. The walls can be updated regularly, often, and best of all, easily!

Check out the ideas in the podcast and then, if you come up with something even better, be sure to let us know! Email your photos to colormehome@repcolite.com!

Benjamin Moore Chalkboard Paint

We spent a fair amount of time in this episode talking about Chalkboard Paint from Benjamin Moore. And that’s because we really believe this to be one of the coolest paints available! If you’re even mildly creative, it’s not going to take you long to dream up hundreds of uses. And remember, as we mentioned, Benjamin Moore’s Chalkboard Paint is available in ANY Benjamin Moore color. So, say goodbye to black chalkboards! (Unless of course, that’s what you want.)

Chalk Markers

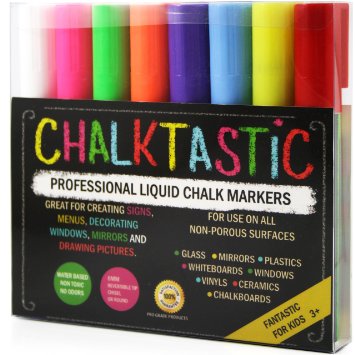
chalktastic_markers

Betsy made a remarkably bold statement when we started talking about Chalk Markers. She declared that chalk markers were, and I quote, the “greatest invention ever.” Yes. Not one given to overstatement, Betsy firmly places Chalk Markers above electric lights, automobiles, moving pictures, and even computers on her list of “Greatest Inventions of All-Time”. Sorry Edison, Benz, and all you other thinkers and inventors. Sure, Betsy enjoys driving, having lights that go on with the flick of a switch, watching movies, and using her new Mac. But all of those things pale in comparison to doodling with Chalktastic Markers.

I, on the other hand, am a little more grounded and would likely place chalk markers just slightly further down on the list. Still, they’re pretty cool. And they’ll keep a lot of the chalk dust and mess off your floors. Click here for a link to purchase your own set from Amazon. (These are the ones Betsy uses and recommends. And remember, she says they’re the “greatest invention ever.”)

Color Me Home Episode 6: Decorating Kids’ Rooms

This week, Betsy and Dan talk about decorating kids’ rooms. These are great projects and can be a lot of fun: you’ll get to use colors you might not typically use and you really get to put your creativity on display! But how do you create something that the kids will love–with all their favorite colors–without having the whole thing turn into, quite literally, a circus? That’s what we talk about in this episode, so give it a listen!

View our Pinterest Board for Episode 6!

Episode Outline

  • Involve Your Kids With the Decorating! (0:30)
  • What Do We Do When the Kids Pick Crazy Colors? You Compromise! (4:32)
    • My Son Embarrasses Me In Public (5:00)
    • Pick a Lighter Version of the Color (8:02)
    • Pick a Muted or Muddier Version of the Color (10:11)
    • Paint an Accent Wall (13:43)
    • Doors, Window Frames, Ceilings . . . (15:0o)
    • Accessories (16:30)
  • Choose the Right Paint and the Right Finish (17:30)
    • The Right Paint (17:57)
    • The Right Finish (21:46)
  • Our First Email Question! (23:06)

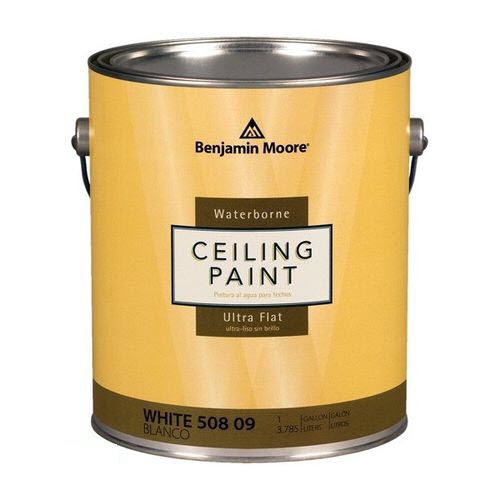
Benjamin Moore Waterborne Ceiling Paint56295-9030107

In the podcast, we mentioned ceilings as a potential area to bring in some color. If you’re going to give that a try (and you should, because it’s a very cool idea that’ll payoff with great results!) then you should definitely be using Benjamin Moore’s Waterborne Ceiling Paint. It’s specifically formulated for ceilings, and provides an ultra flat finish that easily hides common ceiling imperfections. It’s easy to work with, has minimal spatter and dries very quickly for fast recoats.

  • Superior hide for a flawless finish
  • Flattest finish offered by Benjamin Moore
  • Conceals common surface imperfections
  • Easy application with fantastic results
  • Formulated for minimal spatter

Recommended Paints for Kids’ Rooms

We covered 4 different products that would be perfect. Here’s a quick summary in case you didn’t have a note pad to jot all the good ideas down while the podcast was playing:

Hallmark Ceramic Paint by RepcoLite

Hallmark is our Premium interior paint. It’s created with Ceramic microspheres and provides exceptional washability and durability even in our matte finish. Hallmark is available in a Matte, Eggshell, Satin Sheen, and Semi-Gloss.

Aura by Benjamin Moore

Aura delivers remarkable durability and offers the most advanced way to bring color to life. Using Benjamin Moore’s exclusive Color Lock® technology, Aura paint brings you discernibly richer, truer color. Aura is ideal for kids’ rooms whenever you’re using colors with poor coverage or if you’re covering over other bright and bold colors. The reason? Aura’s specifically formulated to cover and hide better than any other paint out there. If you don’t want to fuss with 3 or 4 coats, choose Aura!

Regal by Benjamin Moore

Regal paint stands up to today’s active lifestyles in colors and finishes that create the home you’ve always imagined. A premium quality coating featuring Advanced Particle Technology® which includes our proprietary 100% acrylic resin. This makes the finish itself more durable, providing for superior uniform coverage as well as easier touch-ups. Additional benefits include spatter resistance for easier clean-up, and superior coverage for a flawless finish in fewer coats.

Natura by Benjamin Moore

Natura Waterborne Interior Paint continues Benjamin Moore’s commitment to providing the most environmentally friendly paint. Natura goes beyond zero VOC* to offer zero emissions** and no harsh fumes***, making it a safer paint for your family and the environment, all without compromise to performance or color selection. Natura is truly “Green Without Compromise®.”

Carefree by RepcoLite

While we didn’t mention Carefree in the podcast, we certainly should have! Carefree is a tremendous product for walls, will give you great washability and durability, and will price out below all of the other products here! If you’re working on a budget, Carefree might be a great option to consider.

Recommended Finishes for Kids’ Rooms

When it came to finishes, we strongly recommend either Satin Sheen or Semi-Gloss for your trim, doors, and furniture. Semi-Gloss finishes hold up well and wash up readily.

For your walls, however, our favorite choice is an Eggshell Finish. It’s dull enough to hide wall imperfections (Betsy kept referring to the dings and dents made by someone bouncing a ball of the wall . . . perhaps something she was guilty of long ago) but it also has enough of a finish to be washable.

Further Reading

We drew from a lot of articles and posts when we gathered info for this podcast. Here are just a few of them if you’d like to read further!


How Do I Clean an Old, Gray Deck?

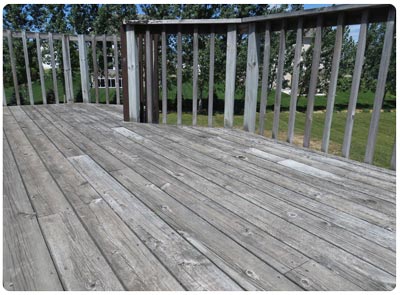
old_weathered_deck_web2“We just bought a new house and the deck looks terrible!  It’s gray and faded. How do we get it ready for a new coat of stain?”
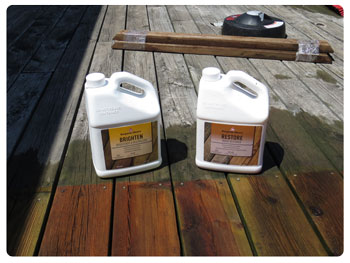

This is a question we hear all the time–in one form or another. Sometimes, it’s about a deck that’s never been stained or protected. Other times it’s about a deck that has been stained, but so long ago that you can barely tell.

In either situation, people are concerned about how to get the deck looking good again. Some even wonder if they can.

Well, the good news is that yes, in most cases, you can completely revitalize your old deck. It’s just a matter of knowing the right steps and using the right products.

So, here’s the scoop:

Step 1: Check for Rotten Boards

The first step in any deck project is easy: look at your deck. Very carefully. Check the wood over. If it’s rotting, splintered, falling apart, or full of knot holes you’ll have to ask yourself a tough question: is it even worth trying to save this?

Stains will protect your wood and give it some water repellancy, but they won’t turn something that’s rotten into something that’s sound! The hard truth is that some decks just aren’t worth trying to save. It’s better and more expedient just to start over.

So check your boards over. If some need to be replaced, do it. If more need to be replaced than not, then consider building a new deck.

Step 2: Sweep it Off

Once you’ve looked it over and either have replaced the boards that needed it or decided that the deck is sound (even though it’s currently gray and ugly!), then it’s time for step 2: Sweep it. Yes, it’s that simple. Brush off the leaves, buds, acorns, branches and whatever else has collected there.

Step 3: Apply the Cleaner

Next, it’s time to start the actual work of cleaning the deck. At RepcoLite, we recommend two different cleaners depending on your situation:

RESTORE from Benjamin Moore:  This cleaner’s for old, weathered wood that either has no stain on it or so little as to be completely negligible. This cleaner will restore your old wood to a nearly new look.

REMOVE from BENJAMIN MOORE: This cleaner’s for decks that still have a noticeable amount of stain on them. REMOVE will . . . remove . . . that stain. Now, we want to clarify that REMOVE will work well on transparent and semi-transparent stains. It’s not designed to remove solid color stains from your deck.

Whatever cleaner is appropriate for your situation, the application is the same:brighten_remove_web

A.  Mix it with water according to the label instructions.

B.  Mist your landscaping and siding (near the deck) with water to protect them.

C.  Spray the cleaner onto the deck with a garden sprayer.

D.  Wait 10 – 30 minutes depending on the condition of your deck. And be sure not to let the cleaner dry out in this step! If necessary, mist more cleaner onto the deck to keep it wet.

E.  Scrub the boards with a good scrub brush in the direction of the grain. This is an important step! The better you do here, the more effort you put in, the better your end results.

F.  After scrubbing the deck, rinse it clean with a power washer or a garden hose. Be sure to give your plants and siding a quick rinse as well!

Step 4: Apply Brighten

Once you’ve rinsed the deck, you’re likely going to be very excited at the results you’re seeing. And you’ll be tempted to quit and wait for the deck to dry. But don’t do that–not just yet. There’s one more step: you need to apply BENJAMIN MOORE’S BRIGHTEN to the boards. This will neutralize the cleaner that you just rinsed off and will also brighten the boards considerably.

Application is essentially the same as the cleaner and should be done immediately after cleaning the deck.

Mix it according to label instructions, mist the landscaping and siding, spray it onto the deck, let it sit, scrub it around, and then rinse it off.

Step 5: Let it Dry

And you’re done! With the cleaning step, that is. All that’s left before you apply a stain is to let the deck dry. We recommend waiting at least 3 good drying days. And by “good drying days” we mean days without rain. Stain needs to be able to penetrate into the wood of your deck to perform. If the deck is damp, the stain can’t penetrate as well . . . and problems usually follow! So let it dry.

And that’s pretty much it. Cleaning an old deck and getting it ready for stain may sound like a complicated process or a long project, but it’s not! The work goes quickly and, on the right day, can actually be a great 2-3 hours spent outside. And the results you’ll get will be more than worth it.

If you’re still not convinced, check out this video we made last summer when we sampled the Benjamin Moore cleaners. And if you’d like more information about decks and what’s required to get them ready for summer, why not give a listen to our Color Me Home Podcast all about decks! You can listen on your computer or download it and listen to it later on your phone or any mp3 player. Check it out!

And here’s our video:

Color Me Home Episode 5: Clean and Protect Your Deck

This week, Betsy and Dan talk about the quintessential Spring/Summer project:  cleaning and protecting your deck! Deck projects may seem complicated, but they’re really very straightforward. You just need to arm yourself with a little information. Lucky for you, that’s almost entirely what’s contained in this episode. (Actual information content is roughly around 85%. The other 15% is stuff we have a tough time categorizing…)

Episode Outline

  • How long do I have to let a new pressure-treated deck dry before staining? (2:30)
  • My deck’s gray and faded! How do I get it ready for stain? (6:37)
  • Why is cleaning the deck important? Can’t I just skip this step? (15:00)
  • Do I have to protect my wife’s plants around the deck? Or will they be OK? (18:00)
  • I don’t understand all the different deck stains that are out there! Can you help? (22:38)
  • What tools do you recommend for applying the stain? (30:02)
  • How do I apply the stain to my deck? (37:52)
  • Is there a best time of day to apply the stain? (43:20)

Pressure-Treated Lumber

Pressure-treated lumber has been chemically treated to resist rot, decay, and termites. And really, it’s an interesting process by which this is all done. See, the lumber is rolled into giant pressurized tanks where the preservative is forced deep into the wood’s fibers. Here’s a video for those of you who want the full “deck experience”!

Getting the Deck Ready for Stain

OK. In the episode, Dan talked about having video of a co-worker, Dave Williams, falling down the stairs while cleaning the deck. As is usually the case, Dan’s memory of the event and the reality depicted in the footage, aren’t necessarily the same. While in his mind, the event was long, drawn out, and utterly hilarious, the video is much less so. Still, it’s someone falling down who’s not Dan. So, that’s cool. And, best of all, Dave was just fine! The big takeaway here is this: these deck cleaning products can create a very, very slippery surface! So be careful!

Other than the video of Dave falling, we also mentioned a very quick video that demonstrates a sample of what Benjamin Moore’s Restore and Brighten can do for a deck that’s old and weathered. The results are remarkable! Check it out:

OnFloor Machine

Here’s a demo of the OnFloor Machine we discussed in the podcast, though we want to note that the situation in this video shows the OnFloor Machine removing nearly 5 layers of freshly applied stain (yikes!). As a result, the speed is dramatically reduced. Still, you can see a great example of how clean the OnFloor Machine will get your deck. It’s a very quick way to get your wood ready for stain without having to do any cleaning or introduce any water to the deck at all. This means you could clean it and stain it on the same day!

We have an OnFloor Machine for rent. You can contact us at 616-396-5213 to check availability and rental rates!

Which Tools are Best?

In the podcast, we discuss 3 recommended tools for staining your deck. For a more in-depth look complete with video of how quickly (or not!) the tools work, look below:

Summary

And that’s it for all the information we covered in the podcast. We knew this was a long one and we debated about the best way to present it. In the end, we decided to present it in it’s entirety and let people pick and choose what parts they wanted to listen to more closely! We hope the information’s helpful. And don’t forget, if you have any questions at all, you can stop out at any RepcoLite Paints, Port City Paints, or Snyder Paints location and let us help! Or, you can email Dan and Besty directly at colormehome@repcolite.com!

3 Reasons Why Simply White Simply Works

Bessler_2014

Photo by Bessler_2014

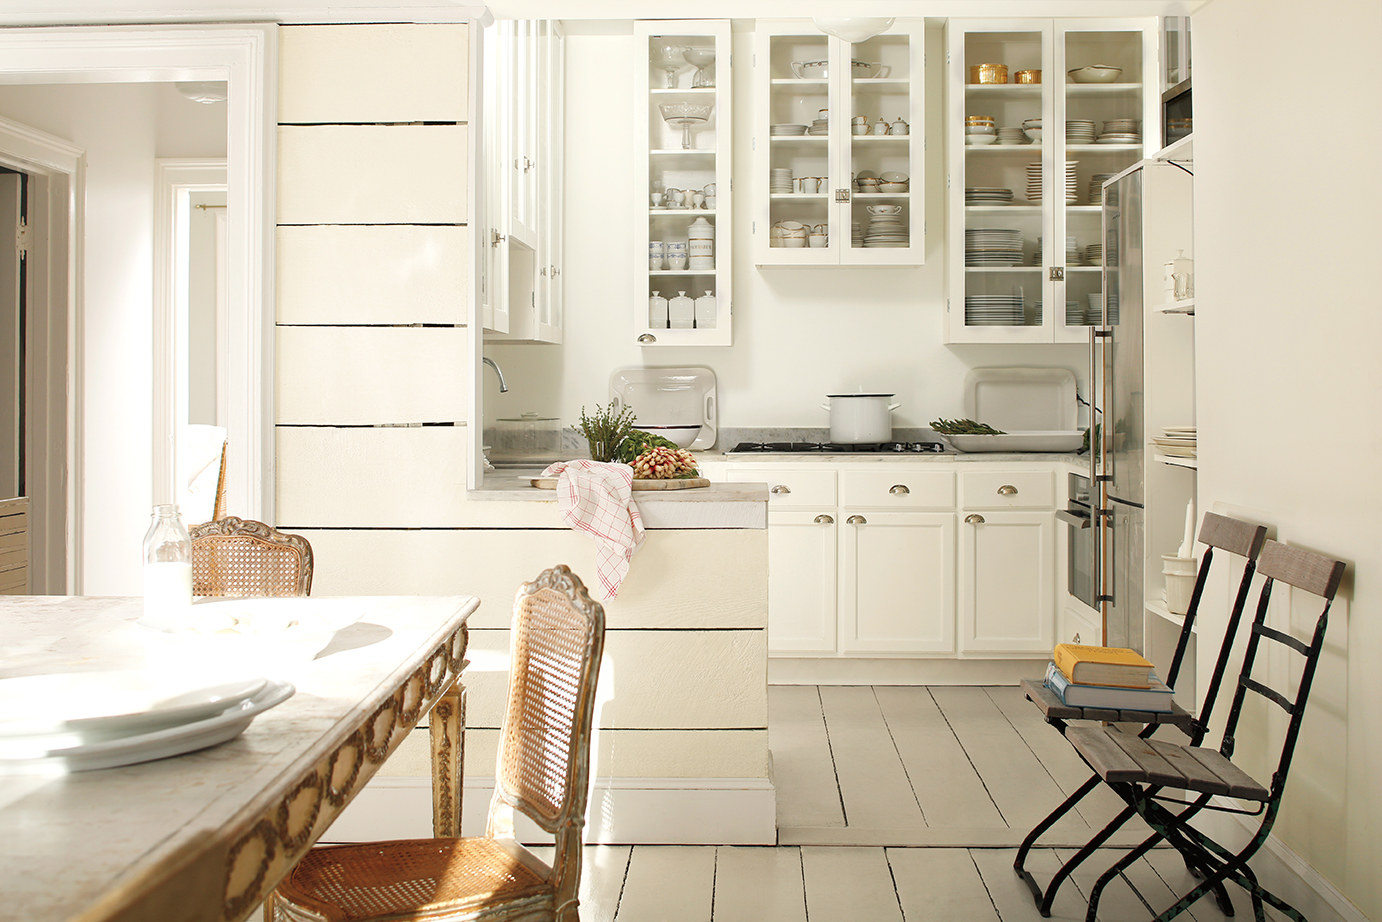
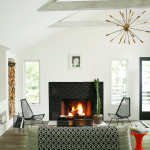
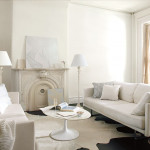
It’s old news, I know, but the color of 2016 is white. Yeah. White. Oh, technically it’s #OC-117 Simply White from Benjamin Moore, but, for all practical purposes, it’s white.

And that seems so profoundly . . . boring. White? The Benjamin Moore color system is home to over 3,500 bright, soft, wild, calming, deep, muted colors and the best they could come up with for 2016 was white?

A few months ago when the news came out, I thought it was crazy. The bold joke of some group of color professionals at Benjamin Moore who just didn’t care anymore. A group of people who, while sitting around sipping designer drinks, decided collectively: “let’s go into that meeting tomorrow and tell them white and see what happens! It’ll be hilarious!”

Yet, instead of being laughed out of whatever official color meeting took place, nobody got the joke and white was officially enshrined as the color of the year.

White?

That’s what I thought, anyway.

And then I saw some of the photos Benjamin Moore was using in their promotions. I read some of the explanations, the stories, the Narrative (with a capital “N”). And it started to make sense. Here are 3 reasons why I’ve changed my mind on Simply White.

Simplification

White simplifies. It declutters. It breathes a sense of calm, of peace, of cleanliness into a room. In this day and age of overwhelming visual stimulation, what’s needed most is often a simplification. A harbor. A space where visual overload isn’t allowed. A space where we can sit with a cup of coffee and the only distractions are the swirling snow outside the window and the gentle creaking of the hardwood when the furnace runs. White conveys that sense of calm, that sense of peace that is lacking in so much of our lives.

The Perfect Backdrop

White provides the perfect backdrop for all the other colors we use in our homes. As Ellen O’Neill, Benjamin Moore’s Creative Director, states in an interview with Architectural Digest: “When we were redesigning the showroom in the D&D Building, I said, ‘Just paint it all white because the story here is about all of our colors. And the best way to see those colors is in a white space.'”

What she’s getting at is this: white doesn’t compete for primacy. White’s content to take the backseat, to highlight another color, to direct all attention that way. In a space with white walls, any other color will gain strength, will stand out, can become the accent tone that gives a room it’s personality. And the beauty of it is that that color doesn’t need to be a vibrant orange, a deep blue, a dark red in order to do this. In a white room, that accent color can be as simple as a honey-hued stain on a couple of wood stools in a kitchen. Or the wooden beams on a ceiling. Or a slate gray countertop. Or a denim blue wall. Or a mossy green dresser. A white backdrop infuses each of these simple tones with a strength and a power in our decorating that they don’t have when surrounded by other colors.

Accommodating

Finally, white is imminently easy to work with. Working in a paint store and knowing the struggles many folks have when they try to find colors for their home, this is a very important point for me. Sure, design and style are important, but so is practicality. And Simply White is imminently practical. Why? Because it works in any decor. It adapts easily, fluidly, to whatever style you prefer. It can look rustic and it can look modern. It can work in a home where the desire is to create a lived-in, comfortable setting and it can work in a space where the goal is to create a pristine, almost clinical cleanliness. Few other colors are this accommodating. Few will look this good in so many settings with so little effort.

Making Home Feel Like Home

Benjamin Moore’s decision to make Simply White the color of the year was a bit of a surprise. And while at first it seemed like a choice devoid of serious thought, I’ve changed my mind. And on this particularly blustery winter day, I find myself drawn into the rooms in the photos. The simplicity, the clean lines, the natural tones…they make every one of those rooms feel, in a strange sense, like home. And that’s the point and power of paint, isn’t it?  To take a space that’s wrapped in something as impersonal and cold as drywall and plaster and turn it into something that feels like home.