EP43 – January 27, 2018: Selling Your Home In Winter, Extension Cords, Marine Varnish Question, The Perfect Light!


Selling your home in the winter seems counter intuitive. Everyone waits until Spring, right? That’s the perfect time to list, right? Well, if you want to sell the house quickly and for the highest dollar possible, Winter might actually be your best bet! Roger Allan from Keller Williams Lakeshore Realty is with us and he makes a compelling case for listing now!

We’re also joined by Renee Huff from The Lighting Corner and she’s going to talk about the pivotal role lighting plays in our homes and in our decorating!

Listen here:

Show notes for episode 043:

The weather is cold and the ground is white...at least in some areas. Now is the perfect time to sell your house, right? We sat down with realtor Roger Allan from Keller Williams Lakeshore Realty in Holland to discuss this. Most people think winter is the worst time to sell a home. But Roger says now is the best time!
Do you have a new power tool? Do you want to ruin it very quickly? Use the wrong extension cord and you are on your way to success! Most people aren't aware that they need different extension cords for different tools. The more power the tool needs and the further from the outlet it is, the bigger your extension cord should be. We walk you through the basics of choosing the best extension cord for every job.  
Need to reach 25' or less14 Gauge Extension CordWill deliver up to 15 amps
Need to reach up to 50'12 Gauge Extension CordWill deliver up to 15 amps
Need to reach up to 100'10 Gauge Extension CordWill deliver up to 15 amps
Because we got such good questions at the Remodeling and New Homes Show a couple weeks ago, we decided to answer a few more. The first question has to do with choosing color. Many people struggle with this because there are so many options and they don't know where to start. We'll give you some tips to put you on the right path to color bliss. The other questions is about using a marine varnish on window sills. We'll tell you if it's a good or bad idea and why.
In the paint industry, we know how important light is to the final color outcome. A light bulb can actually make OR break a color scheme. Renee Huff from The Lighting Corner in Grandville stopped by to talk all things light bulbs. She discussed the differences in bulbs (CFL, LED, etc.), how to choose a bulb according to where it falls on the Kelvin heat scale, and so much more! This is a segment that is absolutely worth the time!

Is It Too Cold to Paint Outside?

When the temps drop, questions crop up in the stores about painting in colder, fall weather. People are unsure how long they can effectively paint outside as the year crawls toward winter. After all, who wants to paint outside, only to find out in the spring that it has to be redone because the paint blistered and peeled?

Don’t worry! There’s still time to get one more project in, but there are some things you need to know before you paint outside as the temperature drops.

The Right Paint

The cooler the temp, the more important it is to use a low temp exterior paint. Traditional exterior paints could only be applied as low as 50°, but many paint companies have formulated paints that can be applied in the 40’s and sometimes even the 30’s. RepcoLite’s ENDURA is rated for temps down to 36 degrees and Benjamin Moore’s AURA and REGAL are rated for temps down to 40 degrees.

Important Reminders

  • Temperature ratings include night time temps. You’re looking for temps that reach 36 (or 40) or higher and remain that way for 6-8 hours after application. This allows the paint to dry and form the protective film on the surface. Also,  the temperature rating is for the surface temperature, not just air temperature.
  • The best time to paint is between 10 AM and 2 PM. By starting at 10, you give the dew time to dry before application and the surface you are painting has time to warm up to at least the minimum temperature. By quitting at 2, you are giving the paint enough time to dry before dew sets in again.
  • The short paint window is critical as the temperature drops because paint takes so much longer to dry as it gets cooler.
    • Latex takes 4 hours to dry at 70°
      • It takes at least 6 hours if it is 60° or below
    • Oil takes 8 hours to dry at 70°
      • It takes about 48 hours in cold weather
  • Paint in the sun! We normally tell people to paint in the shade, but as the weather gets cooler, it is actually a benefit to paint in the sun. The sun will help the paint dry and cure better. And it doesn’t hurt that your hands will stay warm too!

You can have great success painting outside well into the fall. It’s just important to be aware of the limitations and conditions that have to be worked around. If you follow the above tips, you will be able to squeak in that one last project before snow flies.

EP14 – July 8, 2017: It’s Toilet Talk Time!

We know, it’s something people don’t normally talk about in social circles. It’s a topic left for the privacy of our own homes. But we’re breaking the mould and asking all the toilet questions you may have pondered. Mark DeVisser from The Plummer Is Here stops by to answer our questions and walk us through the options when buying a new toilet. The subject matter makes us uncomfortable, but the information is worth the discomfort!

Listen here:

Show notes for Episode 014:

Kitchens are the most commonly redone room in a house. They are also some of the most costly. And there are some things you can do to change the look, without spending a ton of money. We've all heard of painting the cabinets and replacing the hardware. But there is one more project that is often overlooked, but dramatically changes the look of your kitchen.

Painting a tile backsplash can really change the look and feel of your kitchen. It can make a dated kitchen feel current. And, with a little creativity, you can make your backsplash a one-of-a-kind. Check out our Backsplash Ideas Pinterest board to see what inspired us!

Figuring out the perfect lighting for your home can be a challenge. But it can be more difficult as we get older. Our eyes go through drastic changes as we age and most people will require more and different types of light.

Renee Huff from The Lighting Corner in Grandville stops by to discuss how eyes change as we age and some things that we can implement to help us, or our loved ones, see better as we gracefully age.

Outdoor living spaces are the fastest growing segment of home improvement. Everyone is trying create that backyard spaces that every neighbor wants. And all may be perfect until it comes to the furniture.

There are three general issues that come up when it comes to patio furniture:

  1. It looks terrible from sitting in the weather.
  2. It's the wrong style. You bought log furniture, but now hate it!
  3. It's an eclectic collection of yard sale finds.

When people find themselves in one of the above situations they generally do one of two things: they either live with it, or they toss it (for the eclectic collector to find!) and buy new. But there is a third option that we like a lot better! It will save you money over replacing and you can make it something the neighbors will envy! You can find amazing ideas on our Outdoor Furniture Pinterest board.

Yes, we have finally come to Dan's favorite segment of this episode! He has been dying to have all of his hard-hitting toilet questions answered by an expert plumber. And lucky for us, The Plumber Is Here!

Mark DeVisser from The Plumber Is Here! stops by to answer all Dan's questions and add a few laughs.

Mark DeVisser is a Master Plumber and Owner of  Great Lakes Plumbing Services, LLC (or, as it is more commonly known, The Plumber Is Here!). The plumber Is Here can take care of all your plumbing needs including water heaters, faucets, tubs and showers, water and sewer hookups, drain cleaning and so much more! They service residential, commercial and new construction in all areas around Saugatuck, Holland, Zeeland, Grand Haven, Grandville, Jenison, Hudsonville, and beyond. 

Common Paint Mistakes We All Make!

OK. In the spirit of honesty and the common good and all that, I’ll admit that I’ve made a lot of dumb mistakes in my life when it comes to painting. The thing with me is that I should know better. But, unfortunately, at heart, I’m busy. And this lack of time actually makes me an eternal optimist when it comes to trying shortcuts. I always figure that this time the shortcut will work. This time I won’t have a mess on my hands. Turns out, I’m almost always wrong.

Well, I’m not the only one who struggles with this. At RepcoLite, we meet people everyday who are like me. People who wanted to save a little time. People who discovered that shortcuts in the paint world don’t often end well. Here are a few of the most common mistakes we see on a regular basis. How many have you made?

One Coat Coverage or Die Trying

So you start rolling your paint on the wall. You’ve got a schedule to keep and a vision of the rest of your day and everything hinges on getting that paint to cover in one coat. And that’s when you notice, with a sinking feeling in your stomach, that the paint isn’t complying. It’s not covering like you hoped.

And so, our first thought is to load up that roller and by sheer force of will make that paint cover in a single coat. The problem with this is obvious: a heavy coat of paint on a wall will dry dramatically slower than a proper application. And the slower dry time will mean your finish will start to show sags and runs. These are huge problems that are not easy to fix!

If you find yourself in this situation, your best bet is to do what we all know, deep down, is right: Apply the paint as it’s intended. Two thinner coats are going to give you a better looking finish (by a long shot) than one heavy coat. And really, you’re probably not going to spend too much extra time anyway. Rolling two coats on properly isn’t going to be much slower than rolling one insanely thick coat on the wall and then dealing with all the drips and runs!

Scrub that Wall? Are You Kidding? I Power Washed It!

We see this all the time! We’re getting ready to paint our home or a pole barn and we know that we should wash it. And so we gas up the power washer, pull on shorts, lather up with sunscreen, and start blasting! We work our way around the house, engulfed in a rainbow mist, washing every ounce of dirt and grime and filth from the surface, right? Well…

As powerful and amazing as power washers can be, they will never replace the need for a good scrubbing on many surfaces we want to paint. Think of it this way: when you wash your car, what would happen if you just sprayed it with the hose? Do it sometime and check it out. Is it clean? Or is it still coated with all kinds of road goodies? We all know that scrubbing the car and then rinsing is necessary in order to really get it clean.

The siding on our home is the same. A power wash alone will not get it clean enough for paint. It needs to be scrubbed. And yes, I know that sounds terrible but it needs to be done. Skipping the step means you’ll probably have premature failing of your paint coat. If the surface isn’t scrubbed clean, your new coat of paint will bond to that layer of chalky residue or dust that the power washer left behind. That means it’s not bonded to the surface of your home or your barn or whatever . . . it’s only stuck to the dirt that’s stuck to the side of your home. That’s not ideal. By a long shot.

So get a scrub brush on a pole, a box of TSP, and scrub the siding before power washing it. You can still work on your tan and you’ll get a great cardio workout to boot. All the while ensuring that your paint job will last!

Wash My Interior Walls? We’re Not Pigs…

The same thing happens inside (without the power washer, of course!) All walls to be painted should be washed with a mixture of TSP. TSP is a degreaser and it will cut through all sorts of contaminants that will build up on our walls over time: cooking oils, body oils, soot from candles, just plain old dirt, and so on. Even if the walls look clean, these contaminants are likely there and they can prevent or hinder your paint from bonding well.

Also, trust me, even if you’re house is relatively spotless, there’s probably a stray cobweb or two on your wall. And nothing is more frustrating that rolling or brushing into something like that and getting it mixed up in your paint, on your roller, or in your brush.

I Just Stripped Wallpaper. I’ve Done My Penance. I Just Want to Be Done…

Another tempting shortcut when happens when we paint a room where we’ve stripped wallpaper. Taking paper down is bad enough. But then to think that there’s a primer step before you can finally roll your finish paint on is often too much for people. The outdoors is calling! The TV is calling. The tedium of wallpaper stripping has killed a part of our soul and we just need to rest. Skipping that primer step is so tempting!

But here’s the deal: wallpaper paste is water-activated. And no matter how well you clean your wall after you pulled that paper down, there’s a good chance that there’s some residue left behind. If you roll latex paint over that paste residue, the water in the paint will re-activate the paste on the wall and you’ll end up with a texture in your finish.

We see it all the time. And it’s a problem that’s typically only fixed with sandpaper on a pole. Which is definitely not a fun project.

So no matter how much you don’t feel like priming, it’s the wisest choice! You can use an oil-based primer like RepcoLite’s Pro Flo primer. Or you can use Benjamin Moore’s Fresh Start Multi-Purpose Oil Primer. Both of these can be topcoated with a good, high quality latex.

If oil’s not your bag, there’s one single waterbased option that we will happily recommend: Gardz Sealer from Zinsser. Gardz is specifically made to seal in wallpaper paste residue and we’ve seen great results when using it! So, if soap and water clean up is a must for you, there’s an alternative. But just remember: this product is specifically made for this purpose! Don’t use just any waterbased product. Because it won’t work!

Working Out of the Gallon Container

Who hasn’t done this? We pop open the lid of our gallon, grab the bucket by the handle and start marching around the room with it, dipping our brush in from time to time and working that way. I’ve done it, I’ve seen it done. I think we’ve all done it. But the problem is, it’s kind of a dumb thing to do for a few reasons:

It’s Heavy and I’m Clumsy. Carrying around a gallon can can be a little tiring. It fatigues our arms and fingers and just makes a project more painful than it needs be. Also, some of us (I’m thinking of me, here) are a little clumsy. The likelihood of me bumping into something and sloshing paint onto the floor is high. If I’m carrying around a full gallon of paint, the chances are even better.

Loading a Brush Correctly is Impossible in a Full Gallon. Yes, there’s a correct way to load a brush with paint. And yes, it’s very difficult to do that when you’re working out of a full gallon. (Here’s a video demonstration of the right way to load a brush).

Don’t Poison the Waterhole. I’ve written about this before. The concept is simple: if you’re working out of your source for the paint (the gallon) and you brush into a spiderweb, dirt, or anything else, you’re going to end up dipping that contaminant into your paint when you go to refill your brush. Suddenly your paint isn’t as pristine as it once was because you’ve introduced who knows what into it! This is especially true when working outside.

To get away from this problem, simply work out of a smaller container. We sell any number of them at RepcoLite. Get something light, easy to hold, and only pour some of your paint into it. It’s not as heavy, you won’t be as likely to drop it or spill it, and if you do contaminate it, the bulk of your paint is still clean and fresh!


EP07 – May 20, 2017: Enjoy that Outdoor Living!


Outdoor living spaces are big right now! They’re exciting ways to expand your home, your entertaining space, and make the most out of some of our beautiful Michigan summer weather. Today we talk with Rob Cackowski from Heritage Fireplace and Design Center ALL about outdoor living spaces and what you need to do to create the perfect one for your home!

That and much more on today’s episode:

Listen here:

Show notes for episode 007:

Shopping for carpet can be overwhelming. Most of us don't do it very often and every time we do, it seems that the industry has changed dramatically since our last visit to the carpet store!

Today, we're in the studio with Nick Sargent from Johnson Carpet One in Grandville and he's going to help us cut through some of that paralyzing confusion. He's got tips for how to find the perfect carpet for your space and we'll also talk about the pros and cons of the most common carpet fibers. It's like a Carpet Shopping 101 class for anyone who's starting the process!

Nicolas Sargent is a Flooring and Design Consult at Johnson Carpet One in Downtown Grandville Michigan. Nicolas has a background of working with Interior Designers and Builders in a wide variety of products and design styles for the past 15 years. He also has his own clients helping them achieve their own design vision. Some of his favorite products are Wool Carpets, Custom Area Rugs, Hardwoods and Natural Stone.

Most of us have at least 4 - 5 gallons of leftover paint sitting on shelves in our basement at any given time. Sometimes it's paint we plan to use for touch-ups later. But often, it's just extra. And the collection usually keeps growing as time goes by. Well, did you know that there was a green, environmentally friendly solution to all this leftover paint? And best of all, it's incredibly economical.

We're in the studio with Dave Williams from Re-coat Recycled Paint and he explains how easy it is to clean out your basement and, at the same time, help keep old paint out of our landfills!

Re-Coat Recycled Paint Details:

As Dave mentioned in the episode, you can bring any of your usable latex paint to any RepcoLite or Port City Paints location for recycling. There are just a few requirements:
  • Only latex paint can be recycled at this time
  • Paint must be in the original container
  • Paint must be in liquid form
  • Cost is $2 per container
  • There is a 20 gallon maximum per visit

Oil-Based Paint Disposal Options:

If you have oil-based paint or other household hazardous waste you want to dispose of or recycle, you need to contact one of the following locations. Be sure to check with them regarding the times they're open!

When it comes to innovations in the paint and coatings industry, nothing has caused more of a stir recently than the introduction of "Paint and Primer All-In-One" products. They're marketed to be time-saving, money-saving, labor-saving workhorse products. But are they everything they're cracked up to be? We dig into it on this Ask RepcoLite! segment.

And from our blog:

So, last fall I may have done something kind of dumb that may have destroyed my grass in a large are of my backyard. But rather than cry over spilled milk, I'm thinking I'm going to convert that enormous dead zone into an outdoor living space. Unfortunately, I have no idea where to start beyond just throwing down some patio blocks down.

Happily, we have a home improvement radio show and something even better: connections! We got in touch with Rob Cackowski from Heritage Fireplace and Design Center. Besides helping us with all our indoor fireplace needs, Heritage is big into helping people create outdoor living spaces that they'll love. It's a great interview that gave me a little insight into all the possibilities out there!

Rob Cackowski is the General Manager of Heritage Fireplace and Design Center in Grand Rapids. He has 20 years experience in the Hearth, Patio & BBQ industry. He's NFI Certified (National Fireplace Institute) and received his BBA in Finance from Western Michigan University.

Heritage Fireplace is a fully mechanically licensed, bonded and insured company. We specialize in both retail and direct to builder sales and installation. We have serviced the greater Grand Rapids and Lakeshore area for over 25 years.

EP06 – May 6, 2017: Simple Steps to Home Staging and More!


Home staging. We’ve all heard about it, but how many of us know how to do it? On today’s episode of the RepcoLite Home Improvement Show, we list 5 simple steps that will help you make your home as appealing to new buyers as possible. We also discuss the best colors to choose when painting your home for resale. Do you go with neutrals and look like every other house out there? Or do you roll the dice and try to stand out with color?

We have the answer to that and more on today’s episode.

Listen here:

Show notes for episode 006:

Spring is the best time to put your house on the market.....along with everyone else in town! So how can you set your house apart from all the rest, while getting top dollar?

Home staging is a great solution if you are planning to sell your home. It helps potential buyers to see your house in a different light. And it isn't as bad as you may think. We've got 5 simple home staging tips that will help you put the best house forward.

And here's the article with the interesting statistics we referenced in the show:

Paint color is a hotly debated topic whether you're selling your house or not. We help you decide between a neutral or dramatic color scheme. And tell you the last two important steps to home staging.

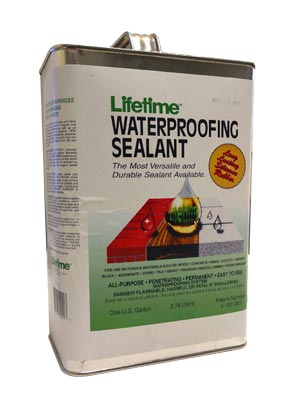
And, because we have a few extra minutes, Dan decides to tell us about his brick chimney leak and tells us about a great product that will seal the brick and stop the water before it's too late!

We always ask that our listeners email us with questions and Lisa emailed a great one about painting cabinets and trim that we think many other people may have as well. We thought about just answering, but we had a few questions. So, we asked Lisa to call us with her question so that we could give her the best possible answer. Hence, our first caller!

On today's Ask RepcoLite segment, we've got the answers for Lisa's questions!

While we have had a lot of rain recently, at some point it will dwindle and we will be forced to create our own rain to keep our grass green. I have spent a lot of time dragging a hose and sprinkler around to keep everything that SHOULD be green from turning brown and dying. It's hard work!

Aaron Katerberg from Grapids Irrigation stops by to tell me what it takes to put in a new sprinkling system. And Dan asks about upgrading his old system so he can stop jumping out of bed in the middle of the night to turn off his sprinklers when he hears rain!