EP05 – April 29, 2017: One of a Kind Furniture and More!


Today, we sit down in the studio with Kim DeBoer and discuss the adventures of refinishing furniture. Kim talks about some of her best experiences and the joys of taking something old and unwanted and turning it into a centerpiece in your home!

That and more in today’s episode of the RepcoLite Home Improvement Show!

Listen here:

Show notes for episode 005:

Shopping for furniture to refinish or repurpose can be stressful! What's worth buying? What can actually be refinished and what is just going to make you sad? And where do you look to find these pieces?

Kim DeBoer is a professional painting contractor who does a lot of furniture refinishing on the side. She's been doing this for years and has answers for all of these questions and more!

It's Spring and the weather's getting warmer! And that means that we're right on the cusp of air conditioner season. But did you know that there are a few simple projects you can tackle on a Saturday morning (or anytime!) that will help you make sure your unit runs efficiently, for less cost, and lasts longer!

Today we go over the 2 must-do jobs this Spring!

Staining a deck is a great project! It's fun and even relatively easy. In fact, the most confusing part of the whole project is trying to choose the right stain. Should you go with an oil-based product? Or a waterborne? What opacity is best for your situation? Clear or Solid or something in between?

On today's Ask RepcoLite segment, we've got all the answers!

Spring is here and with it, we get warmer weather, baseball . . . and ants! My home is right now under invasion and so I'm very excited to be in the studio with David Popp from Rose Pest Solutions. He's here to talk about ants, termites, what to look for and what to do when you find a problem!

EP04 – April 22, 2017: Painting Vinyl Siding and More!

Vinyl siding was supposed to last forever. But . . . it doesn’t. At least the color doesn’t. After a while, houses with vinyl siding can start to look tired, faded, boring . . . old. Well, Benjamin Moore’s Revive is a paint specifically made for vinyl siding. It sticks remarkably well and is available in a range of over 300 vinyl safe colors! It’s definitely worth a look if you’d like to change the entire look and feel of your home this summer!

That and more on this episode!

Listen now:

Show notes for episode 004:

Did you know you can paint vinyl siding? Kevin Hermann dropped by our studio to discuss Benjamin Moore's Revive Vinyl Siding Paint and gave us some tips to get the job done right. The best news is, there are over 300 "vinyl safe" colors to choose from! These colors will allow you to choose a color that is darker than your original siding, without warping your siding. A whole new world of possibilities has been opened!

Kevin also stressed the importance of proper prep/cleaning before painting. Revive does not require a primer if you take right the steps to clean the siding first. Check out our blog post for everything you need to know about getting your siding ready for paint.

Browse Revive's Color Palette of over 300 Colors!

Kevin Hermann is a Territory Representative for Benjamin Moore. He has been with the company for 26 years and has a wealth of paint knowledge. He answers questions from what type of paint to use for a specific project to application tips. And if you really push him, he might even tell you a fish story or two!

How often do we drive through a neighborhood and slow as we come to a house with a beautiful front yard? We sigh heavily as we dream about that house.

But wait! This can be your house. No need to dream! These curb appeal projects are simple and inexpensive. They range from cleaning the exterior of the house to landscape primping. We've got 4 projects that don't take a lot of time or money. And if you go through these and are STILL looking for more ideas, listen to our podcast about curb appeal, check out our front door color Pinterest board, or read our blog post that gives you 6 more inexpensive projects.

We also found this great HGTV slideshow with before and after curb appeal photos. It proves how far a change in landscaping (often minimizing it!), some paint and a little color will go!

When it comes to snowblower maintenance, how many of us just fill the gas tank and push it to the back of the garage to collect dust for the next 6 months? Lots of people! But there's more to it.

If you have limited time or energy, we have the one step you ABSOLUTELY should not bypass. If you have a bit more time to spend, we have 4 other things that will help your snowblower start the first time you pull the cord when faced with a foot of snow next winter. We also have a tip that will save you from being like Dan and annoying your neighbors for the better part of four hours!

Imagine this scene: you are shoveling your driveway after a long day at work. Everything is fine until you are stopped abruptly when the blunt end of your shovel tries to impale you through the stomach. Dan is all too familiar with this feeling.

But the pain is over! Andy Van Dyke from VDC has the solution for those pieces of sunken concrete. The best news is, it's way cheaper than we would have imagined.

EP01 – April 1, 2017: Getting Your Deck Ready for Spring


It’s Spring! At least mostly…. And there is no better time to clean your deck and get it ready for the season. In this episode, we talk all about what it takes to get that deck cleaned and ready for stain. We also talk with Rose Pest Solutions about a common outdoor pest: mosquitoes.

That and much more on this inaugural episode!

Listen now:

Shownotes for episode 001:

Cleaning the deck is a simple Spring project (or Summer or Fall!!). We ran you through the basics on the show today, but there's a lot more information out there. If you're interested, stop out at any RepcoLite, Port City Paints, or Snyder Paints location and let us help.

Also, we recorded a podcast last summer. It's basically a Deck Cleaning Q&A and it's full of great info. Check it out:

OnFloor Machine Demo

Here's a demo of the OnFloor Machine we discussed in the episode, though we want to note that the situation in this video shows the OnFloor Machine removing nearly 5 layers of freshly applied stain (yikes!). As a result, the speed is dramatically reduced. Still, you can see a great example of how clean the OnFloor Machine will get your deck. It's a very quick way to get your wood ready for stain without having to do any cleaning or introduce any water to the deck at all. This means you could clean it and stain it on the same day!

We have an OnFloor Machine for rent. You can contact us at 616-396-5213 to check availability and rental rates!

Which Tools are Best?

We didn't have time to get to all the different tools on the radio show today, but below we have a video that walks you through a number of different application options and how quickly (or not!) they work!

Mosquitoes are a giant pain in the neck! You just get your deck looking great and find that you can't even be out on it for more than 10 minutes at a time. And all of that time is spent running in circles, waving your arms, and trying to present them with a moving target.

Today, we sit down in the studio with David Popp from Rose Pest Solutions and we talk about prevention and reduction of this annoying spring, summer, and fall pest!

In this first Ask RepcoLite! segment, we answer your exterior paint questions:
  • How early is too early to paint outside?
  • Can you use exterior paint inside?
  • Can you use interior paint inside a garage?
We've got the answers!
It's Spring and that means we're going to be working on our lawns soon enough. Is your lawn equipment ready? What do you need to do to make sure it's ready to go for the season? We sit down with Brian Stacey from Bergman Power Equipment and he tells us everything we need to know!

Color Me Home Episode 3: Curb Appeal on a Budget, 1

This week, in honor of the beautiful weather we all experienced over Spring Break, Betsy and Dan discuss some simple exterior projects that will help you increase the curb appeal of your home without breaking the bank!

Episode Outline

  • Front Doors (1:55)
  • What If I’ve Got a Storm Door? (7:34)
  • Careful With Your Color, Though! (12:12)
  • Garage Doors (12:39)
  • Shutters (13:40)
  • Vinyl Safe Paint and Colors (15:20)
  • How to Paint Your Shutters (18:20)
  • A Quick Miracle Fix to Revive Faded Shutters (21:51)
  • Mailboxes (25:40)

Before and After Homes with Shutters!

As we mentioned in the podcast, adding shutters to a home can make a tremendous difference. And while I’d love to share a large gallery of photos making our case, I don’t have the rights! So, I’m doing the next best thing: Here’s a google image search that will allow you to see exactly what we’re talking about!

Check it out! And we’re betting that if you don’t already have shutters on your home, after seeing those photos, you’ll move that project to the top of your list.

Vinyl Safe Colors

Benjamin Moore’s Revive is available in a wide variety of vinyl safe colors. Check out the full palette!vinyl_safe_colors_revive4

Penetrol Fix for Shutters

We talked about this at the 21:51 mark on the podcast and if you didn’t hear it, you should listen in to know exactly what these notes refer to. At any rate, I was able to dig up the photos that I took when I applied Penetrol to my shutters early last Spring. The first photo shows the shutter before application–faded and chalky. The next two obviously show the shutter in process. The final photo of the house shows the shutter finished and the surrounding trim cleaned up.

It’s definitely a project to try if you’re looking for a quick and easy way to restore the color of the vinyl. Just be aware, it’s not a long-lasting fix. You’ll typically get anywhere from 6 months to a year out of it. A full paint job is going to last much longer!


Don’t Poison the Waterhole: How to Keep Spiderwebs and Dirt Out of Your Paint

hannah_helping_in_the_kitchen

This is Hannah. Never drink out of anything she’s already used. Ever.

OK, the other day I experienced something I hope never, ever, ever to experience again.  NEVER. EVER.

Let me explain.  It all started innocently enough while I got the kids their dinner the other day.  My wife was gone and I was in charge.  I made them spaghetti-O’s and then put a pitcher of water on the table.

They ate their food, made a mess, and eventually, finished.  I came behind, mopped everything up and wiped the table down and, finally, once they were all taken care of, sat down with my own dinner.

As I ate, the kids came by, one by one, and told me EVERY single thing that happened during their day.  It’s great to be loved–for a while–and then it’s just mind-numbing.  Story after story went through my ears and eventually, I found myself sitting at the table–my food gone–and Hannah my 3 year old–sitting on my lap–still talking.

My brain was thoroughly exhausted at this point, but I do remember grabbing the pitcher of water that was still on the table from the kids’ dinner and pouring myself a glass.  As Hannah went on and on and on about this or that, I took little sips of water and tried to understand what she was telling me.

At some point, in the midst of all of this, I noticed that something wasn’t quite right.   I wasn’t immediately aware of what it was, and I tried to ignore the feeling, but my brain wouldn’t let me.  I took another drink of water and it suddenly hit me:  I was chewing.  I was done eating–had been done for a while–there was no food left on my plate . . . but here I was . . . chewing.

Now, drinking water is not normally, a chewing experience.  But here I was, sitting at the table, drinking water and chewing it.  And the more I thought about it, and focused on it, the more I realized I wasn’t chewing water–I was actually chewing something that was in the water.

Well, naturally, I quickly grabbed my glass and held it up to take a look and when I did, I was shocked–horribly, horribly shocked.  Instead of the clear, crystally liquid I had hoped to see, it was grey.  And murky.  Things were floating in there:  something that looked like a part of a meatball and something else that I was pretty sure was a spaghetti-O.  And there were other, unidentifiable things as well.  It was a smorgasbord of gray food products.  All suspended in a liquid that seemed, suddenly, thicker and heavier than simple water.

I put the glass down, swallowed the meatball I was chewing and picked up the pitcher of water.  A quick look inside revealed more of the same:  floaty things bobbing up and down in some gray, opaque liquid.

And then I looked at the outside of the pitcher.  I saw small orange, spaghetti-o sauce handprints  on the handle.  A closer examination revealed orange lip marks around the rim.

I looked at Hannah.  “Did you drink out of the pitcher?”

She nodded and then said, “only twice.”

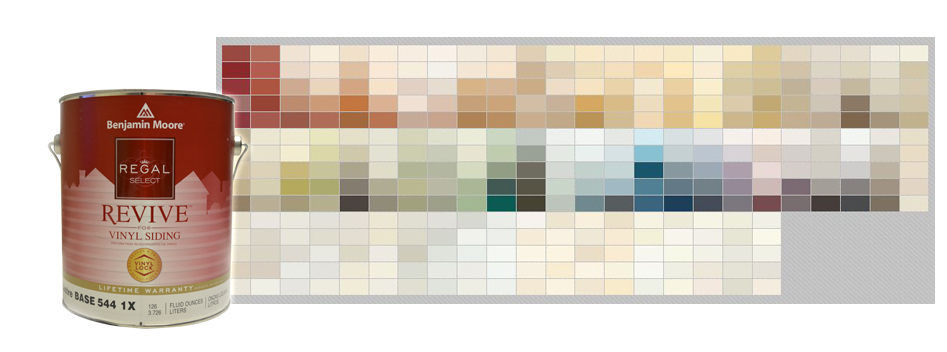
Well, apparently two times was enough for Hannah to poison the waterhole so to speak.   I grabbed the pitcher off the table and brought it to the sink.  And, as I did so . . . inspiration dawned:  This was a perfect illustration of a common mistake people make when painting.

See, how many times have you started a painting project with some brushwork?  You know, you start brushing around the edges–around your windows or your doors or something like that.  Inside outside, it typically doesn’t matter.  When you do that, what do you typically do?

And Here’s the Paint Point…

I’ll tell you what most people do:  most people grab the paint bucket–the gallon of their paint–and carry it with them.  They dip the brush into it, wipe the excess paint off the brush on the rim of the can, and then paint. When the brush is empty, they go back to the bucket or more paint.

That’s like Hannah drinking out of the water pitcher.  If she had gone to her glass of water for a drink, she’d only contaminate that cup.  Everybody else’s water would have been fine.  But she went to the source and contaminated that.  Once that was done, there was no way to get the spaghetti parts and meatball chunks out of it.  The only fix was to pour the water out, rinse the container and fill it up with new.

With water, that’s no big deal.  But if you’re doing that with paint, you can create quite an expensive and frustrating mess.  If you brush into a spiderweb or pick up some dirt (this happens especially often when people are working outside), and then dip back into your bucket, you’ve instantly contaminated all of your paint.  And you’ll find that out when you start rolling it onto bigger areas later.  You’ll be picking little chunks of this or that out of the finish and you’ll be very frustrated.

And here’s the Answer…

The solution?  Work out of a smaller container.  We’ve got some at RepcoLite that are perfect for this, or you can just use an old tupperware-like container.  Whatever you decide to use, remember:  whenever you do brush work, always work out of a smaller container–it will protect the bulk of your paint from contamination.

Paint Your Front Door and Change the Look of Your Home for $30!

A red georgian door on an ivy covered house

Summer’s getting closer!  And with it, comes a natural desire for many of us to get outside and do some work on our homes.  There’s just something about nice weather, sunny days, warm breezes, and all the beauty of Spring that makes us want to “spruce” up our homes a little bit.

Unfortunately, money is a little tight for a lot of us right now and the thought of dropping a few hundred dollars on a big paint job can be daunting to say the least.

Well, if that sums up you (as it sums up me!), then consider this:  what about a smaller paint project that will still have a huge impact?

I’m talking about your front doors.  Doors can be painted, typically, in a matter of just a few hours.  The cost?  Typically under $30.  The results?  (To use the over-used formula):  Priceless.

A new color on a front door can bring your home from “boring” to hip in just a matter of minutes.  A new color on a front door can give your siding–what you may think of as tired and old–a new look.  A new color on your door will interact differently with your shutters, your roof, your landscaping, everything.

In short, a new color on a front door can give your entire home a subtle new look.  All for under $30 (tools included) and a couple hours worth of work!

So, if you’re looking for a project , but aren’t quite ready to repaint your entire home, give this a try!