
 If you’re into decorating and if you’ve got even the slightest amount of creativity, you’re always looking for a project. Something outside the norms, something a little different, little things that will set your home and your decorating apart from everyone else.
Well, if that’s you–if you’d love a quick project with a huge payoff–then read on!
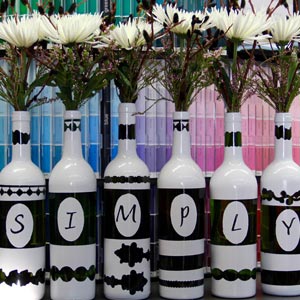
Betsy Thompson, at our 17th Street Store, came up with the following project. And I’ve got to admit, when I walked by and saw her working on this in the store, I was intrigued. In my opinion, it’s one of those perfect projects: easy, inexpensive, and there’s no limit to what you could do with it.
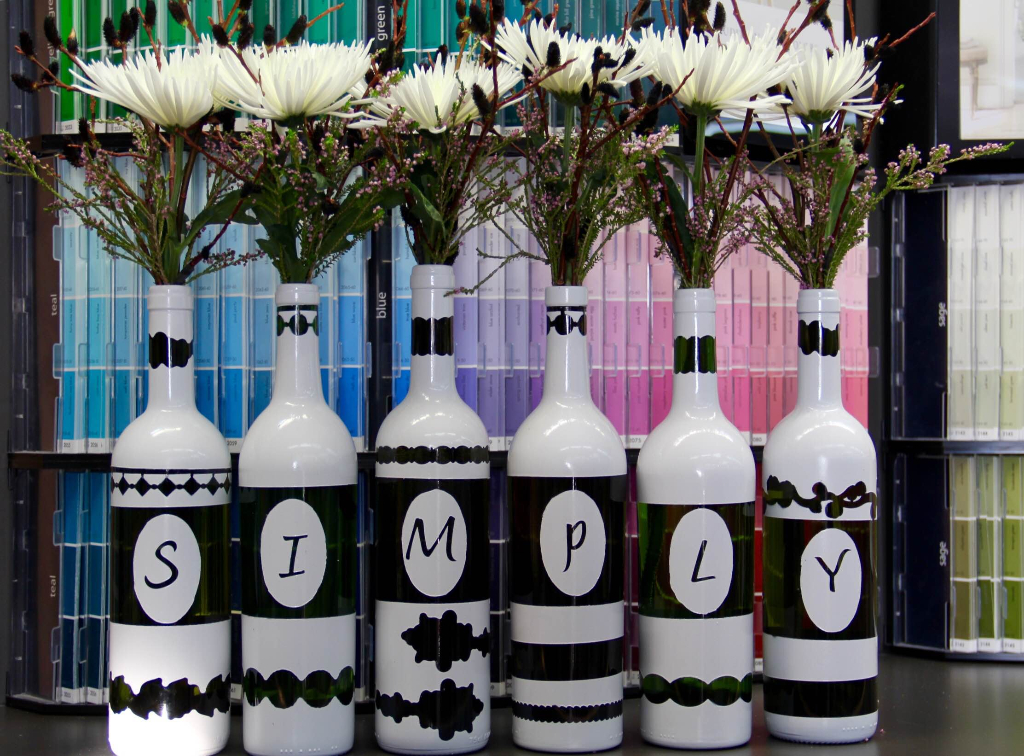
Now, the concept behind this project is simple. Betsy taped off or masked off sections of the bottles and then painted them. Once the paint was dry, she removed the tape or masking to reveal areas that received no paint, thus creating the designs.
To do this on your own, all you need to do is follow these simple steps:
1. OBTAIN SOME BOTTLES
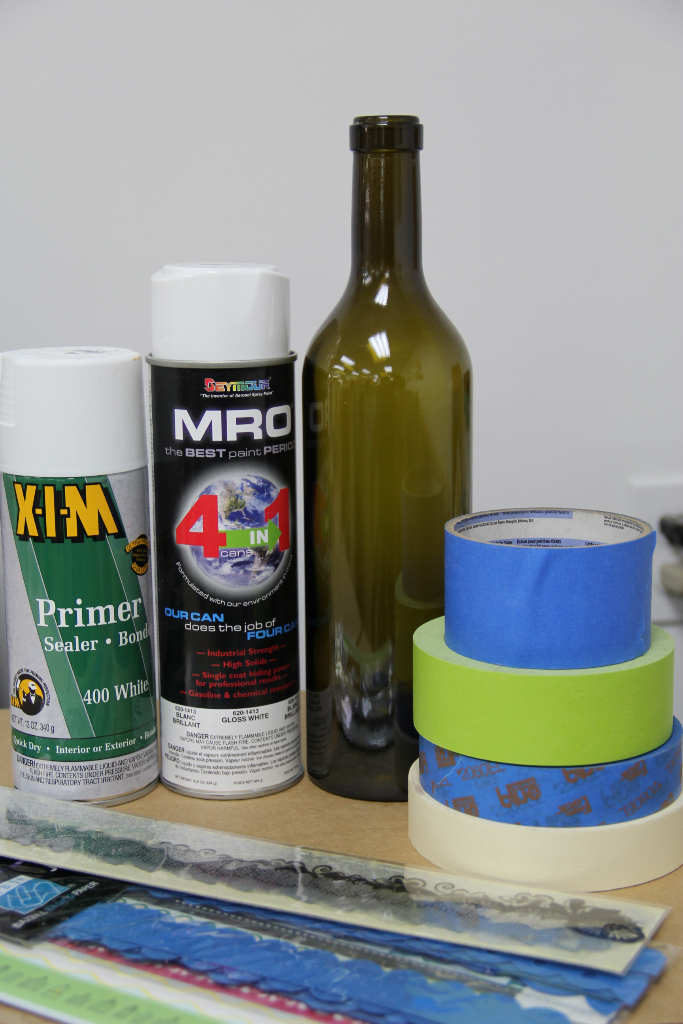
The bottles Betsy used for our project are a dark green. Any color glass would work, but clear glass might not provide you with quite the same contrast in the finished look.
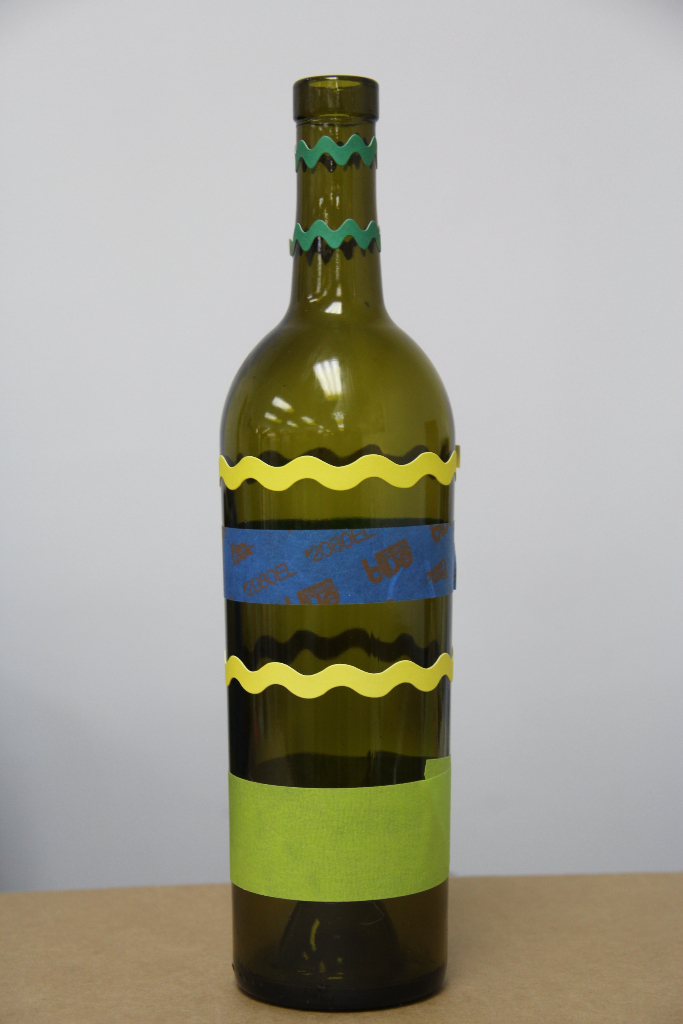
2. CREATE YOUR DESIGNS
To create your designs, you can use tape, stickers, or whatever else you can come up with! In her project, Betsy used a combination of masking tape and scrapbooking border stickers. Simply apply the stickers and tape over the bottles in whatever patterns you would like to create. Get creative here and don’t be afraid to experiment with a few different looks!
3. IT’S TIME TO PRIME
Glass is a tough surface to get paint to bond to, so it’s necessary to use a special primer. Betsy used XIM primer to solve this problem and to give the finish paint a good surface to adhere to. XIM is what we call a “bonding primer” and is designed to bond to tough-to-paint surfaces like porcelain, tile, glass, plastics, and more. So it’s the perfect primer for this project.

4. SPRAY ON THE FINISH PAINT
When the primer is dried (typically anywhere from 20 – 40 minutes), it’s time for your finish paint. Betsy used white spray paint. She applied a couple coats to ensure solid coverage and then left it to dry.
5. REMOVE THE STICKERS
This can be somewhat tricky and requires a little patience to do it well. You may want to carefully run an X-Acto knife along all the edges to cut through any paint film that might have formed over both the bottle and the tape. Failing to do this could result in peeling paint off the bottle when you remove your tape. At any rate, carefully remove the tape, the stickers, or whatever it was you used to mask the bottle off.
6. A LITTLE CLEANUP and then ENJOY!
Once that’s all done, you’re basically finished! You may need to clean up any areas where the paint bled under your tape or stickers, but you can do that with your X-Acto knife or, if you start soon enough, a little of the proper cleanup solvent on a Q-tip.
This is a simple project with a huge payoff! You create a very unique piece that’s perfect for displaying cut flowers, dried flowers, or just sitting empty on a shelf.
Give it a try and see what you can come up with. Experiment with different designs and paint colors. Get creative and post your projects in the comments section below! We’d love to see what you’re working on.