EP03 – April 15, 2017: Benjamin Moore Color of the Year


Benjamin Moore’s Color of the Year is purple. Yeah. And we’re hearing a lot of questions in the store about how in the world to decorate with purple. Today, we’re on the phone with Hannah Yeo from Benjamin Moore. She has a TON of great color information. It’s easily one of the most interesting interviews we’ve done so far. If you have any interest in decorating with color (purple or otherwise) give this a listen!

That and more on today’s episode!

Listen here:

Show notes for episode 003:

In this first segment, we're on the phone with Hannah Yeo from Benjamin Moore to discuss Benjamin Moore's Color of the Year for 2017. We're just letting you know: It's purple! But, of course, that's being a little too simplistic.... Benjamin Moore's Color of the Year is sophisticated, unusual, interesting, and the perfect "enabler" color.

Hannah's here to explain how Benjamin Moore came up with this color and how you can easily use it in your own home.

Hannah Yeo is a Color & Design Expert for Benjamin Moore, North America’s favorite paint, color and coatings brand. As part of the Benjamin Moore Color & Design team, Hannah plays an integral role in forecasting trends, developing and curating colors, and managing four sub-brands at Benjamin Moore & Co.

Prior to joining Benjamin Moore in 2009, Hannah began her career at Fisher-Price as a Graphic Designer. Her background in graphic design and color gave her a unique skill set: infusing graphic design elements to communicate color.

Hannah holds a Bachelor of Arts degree in Communications Design from Pratt Institute.

At RepcoLite, we get tons of questions on a regular basis. Tons of questions. In our Ask RepcoLite! segment today, we focus on a couple of very common questions.

The first one is simply: "What in the world is a RepcoLite?" We know that our company name doesn't exactly roll off the tongue. And we also know that it doesn't make tons of sense. But apart from that, we still think we're a pretty interesting company with a lot to offer! So we take a minute to introduce ourselves! (And if you'd like to read our origin story, check it out here!)

The second question gets down to the nitty gritty: "I just painted my bathroom. How long before I can start using my shower again?"

Brian Stacey from Bergman Power Equipment is a lawn equipment specialist and he joins us in the studio to talk about the Must-Have Lawn Equipment Every Homeowner Needs. Some of us think we can get by with a lawnmower. Some of us feel we need a different edger for odd and even numbered days. Brian's going to walk us through the 4 pieces of equipment he feels are absolutely necessary.

When we told co-workers that we were interviewing a vet for the last segment of today's show, everybody figured we meant a veteran! Nobody could imagine what in the world we were going to talk to a Veterinarian about on a home improvement show. But Betsy is both an animal lover and extremely creative and she came up with the idea of interviewing a vet about how a home remodel project can produce stress in our pets. To find out what we can do as pet owners to alleviate this stress, we interview Dr. Jim Havinga from the Animal Clinic of Holland. He's got some great advice and recommendations regarding how you can keep your pet safe and calm during the next project.

And, after the interview wrapped up, Dr. Jim started telling us stories from his practice: A dog who rattled, a horse on the tracks, and a number of others. Betsy and I thought the stories were great and we want you to hear them, too! So we've got them below. They're really worth a listen!

EP01 – April 1, 2017: Getting Your Deck Ready for Spring


It’s Spring! At least mostly…. And there is no better time to clean your deck and get it ready for the season. In this episode, we talk all about what it takes to get that deck cleaned and ready for stain. We also talk with Rose Pest Solutions about a common outdoor pest: mosquitoes.

That and much more on this inaugural episode!

Listen now:

Shownotes for episode 001:

Cleaning the deck is a simple Spring project (or Summer or Fall!!). We ran you through the basics on the show today, but there's a lot more information out there. If you're interested, stop out at any RepcoLite, Port City Paints, or Snyder Paints location and let us help.

Also, we recorded a podcast last summer. It's basically a Deck Cleaning Q&A and it's full of great info. Check it out:

OnFloor Machine Demo

Here's a demo of the OnFloor Machine we discussed in the episode, though we want to note that the situation in this video shows the OnFloor Machine removing nearly 5 layers of freshly applied stain (yikes!). As a result, the speed is dramatically reduced. Still, you can see a great example of how clean the OnFloor Machine will get your deck. It's a very quick way to get your wood ready for stain without having to do any cleaning or introduce any water to the deck at all. This means you could clean it and stain it on the same day!

We have an OnFloor Machine for rent. You can contact us at 616-396-5213 to check availability and rental rates!

Which Tools are Best?

We didn't have time to get to all the different tools on the radio show today, but below we have a video that walks you through a number of different application options and how quickly (or not!) they work!

Mosquitoes are a giant pain in the neck! You just get your deck looking great and find that you can't even be out on it for more than 10 minutes at a time. And all of that time is spent running in circles, waving your arms, and trying to present them with a moving target.

Today, we sit down in the studio with David Popp from Rose Pest Solutions and we talk about prevention and reduction of this annoying spring, summer, and fall pest!

In this first Ask RepcoLite! segment, we answer your exterior paint questions:
  • How early is too early to paint outside?
  • Can you use exterior paint inside?
  • Can you use interior paint inside a garage?
We've got the answers!
It's Spring and that means we're going to be working on our lawns soon enough. Is your lawn equipment ready? What do you need to do to make sure it's ready to go for the season? We sit down with Brian Stacey from Bergman Power Equipment and he tells us everything we need to know!

Color Me Home Episode 11: Brighten Your Basement Walls!

On today’s episode, Betsy and Dan discuss a question that comes up at RepcoLite Paints all the time: how do I paint my basement walls? Basement walls often present homeowners with a number of unusual obstacles when it comes time to paint them. In this episode, you’ll discover everything you need to know to confidently brighten up what can often be one of the darkest, dreariest places in your home!

Episode Outline

  • Check for Moisture and Determine the Cause! (2:28)
  • What is Efflorescence? (6:50)
  • Fixing Moisture Issues Inside! (8:27)
  • Fixing Moisture Issues Outside! (12:16)
  • Getting the Walls Ready for Paint (16:17)
    • Dealing With Efflorescence (16:40)
    • Remove Flaking Paint (18:36)
    • Remove Dirt and Grease (19:48)
    • Kill Mold and/or Mildew (21:30)
    • Dry the Walls (22:22)
  • Painting a Bare Wall with No Moisture (23:03)
    • Betsy’s Easy Test for Moisture (23:45)
  • Painting Bare Walls that Have Moisture Issues (26:58)
    • WaterBlock (27:10)
    • Applying WaterBlock (30:24)
  • Painting Previously Painted Walls (33:16)

WaterBlock by Insul-X

As we mentioned in the episode, WaterBlock is a masonry waterproofer that needs to be applied over bare concrete in order to be effective. In the episode, we debated whether or not it was tintable. Turns out, it is! You’ll be limited to lighter colors, but it definitely can be tinted. If you’d like more information, check out the podcast. Or, you can click the button below and download the Technical Data Sheet!

Download WaterBlock Info

Paint Your Kitchen Cabinets in 6 Steps!

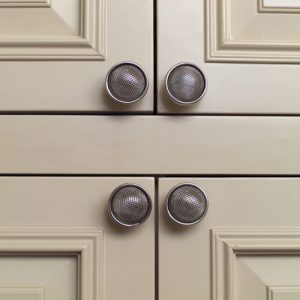
bigstock-Cabinet-detail-13573895_webDid you know that the average cost of remodeling your kitchen is right around $20,000? Yes, $20,000. That’s a significant amount of money. So significant, in fact, that it means I won’t be doing any kitchen remodeling anytime soon. Sure, I’d like new cabinets or a new backsplash or a new floor, but we’re just too attached to having things like groceries and running water. And I don’t think we’re alone. A lot of people like groceries and running water. And yet, many of those same people also wish they had a better kitchen.
And that brings me to the good news: there are many things you can do that will help you update your kitchen without forcing you to give up those little luxuries we all like to have. Like food in the refrigerator. And one of those projects is painting your kitchen cupboards. If the doors and drawers are structurally sound, why rip them out and replace them? With a little elbow grease, some time, and the right products (I’m looking at you RepcoLite and Benjamin Moore), you can brighten them up and, in so doing, completely change the look and feel of your kitchen. And all for very little money!

If you think this project could be perfect for your kitchen, here’s what you need to do:

STEP ONE: Remove the hardware and hinges and label the doors with their location. Removing the hardware and taking the doors down requires no explanation. However, let me stress the importance of labeling the pieces. You definitely want to make sure you do this!  Find a system that will work for you and make sure to mark each door and drawer as well as the place they go in the cabinet. Safe-release (Delicate Surface) painter’s tape works well. Just make 2 tags with a “1” and put one on the back of the door, and the other on the frame of the cabinet where the door goes. It’s a simple step, but will help you when it comes time to put things back together!

STEP TWO:  Closely examine the surface of the cabinets and drawers and be sure to remove any peeling paint by sanding and scraping. Whatever paint remains on the surface of your cabinets must be sound! New paint brushed over a peeling surface won’t make that old layer stick. The old layer will continue to fail and will take the new one with it. So make sure that whatever paint you leave on the doors is adhering well. Also, if you have to scrape or sand off some of the paint, make sure that you spend some time feathering the bare spots into the spots where the paint remains.

STEP THREE: Clean the surfaces thoroughly. After taking care of loose, flaking, or peeling paint, you need to clean the surfaces with a mixture of 1 part TSP to 4 parts water. Kitchens are sources of many different surface contaminants and you need to make sure that the surface you’re painting is clean and free of grease, dirt, and so on. Use a Scotchbrite (“scrubby”) pad with the TSP to thoroughly clean the surfaces. And if you have some really stubborn dirt or grease, use the degreaser Spray Nine.

STEP FOUR:  Scuff-sand the surfaces you’re going to paint. You can use an orbital sander for this, or you can do the sanding by hand. Either way, use either 180 – 220 grit sandpaper. The goal isn’t to sand through the current finish, it’s just to lightly scuff it. And when you’re done, remove all the dust from the cabinets. You can blow them off with an air compressor, vacuum the dust off, or wipe it off with a solvent like Denatured Alcohol or Xylene. However you remove the dust make sure that it’s all removed before moving on to the priming step!

STEP FIVE:  Prime the cabinets with a good bonding primer. We recommend STIX Waterborne Primer. It will bond to the previous coating on your cabinets and will provide an excellent base for your topcoat! Let the primer completely dry and then assess the cabinets for any bleed-through of stain or tannins. This can happen if you’ve cut through the original coating while scuff sanding. If you do see some bleed through, spot prime those areas with an oil based primer or a white pigmented shellac like BIN.

STEP SIX:  Topcoat with a good finish paint in either a satin sheen or a semi-gloss (for washability). If you’re brushing, we recommend giving Benjamin Moore’s Advance a try. It’s a waterborne alkyd which means you’ll get the performance of an oil-based product without the drawbacks. It will flow out remarkably well, providing you with a smooth finish even when you brush or roll the paint on. And, best of all, it cleans up with soap and water and doesn’t have the smell of an oil. Another great option is RepcoLite’s own Hallmark Ceramic. It rolls and brushes well and or can be sprayed. There are also a few other options we may recommend in the store, depending on your situation.

And that’s basically what you need to know. Yes, there is some work involved. Yes, it will take some time. You’ll have to do the sanding and the cleaning, the priming and the painting. But, when you’re done, you’ll be amazed at the difference in your home. And all for as little as $200 – $300 (or less!)

If you’re interested in this project, please email us with your questions or type your questions in the comment boxes on this post!

Deck Staining Tools: What’s Better, What’s Best?

When it comes to applying stain or sealer to your deck, there are a wide variety of tools and applicators available. But which tools work the best? Which ones do the job quicker than anything else?

Success on a deck project–as well as your overall experience–depends largely on the tools you use to apply the stain. Using the wrong tools can make the job more grueling than it needs to be. They can slow you down and prevent you from getting the stain on quickly and evenly. This can affect not just your experience, but also the quality and durability of the finished job. So, finding the right tools is important.

Well, last year, we filmed a review video where we tested out most of the various application tools and techniques that we’ve ever heard discussed at RepcoLite. Some of these were recommended by employees and others are the “favorite” methods of some of our customers. Either way, we put all of these methods to the test and discovered very quickly that some of them are much better than others.

Here are our top 3 recommendations:

METHOD 1: Roller and Brushwooster_bravo_brush

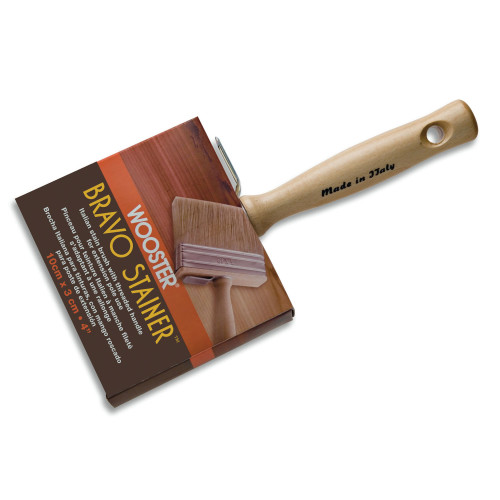
In our tests, we found that the fastest way to apply the stain evenly and quickly was to roll it on with a standard, 9″ roller with a 3/8″ nap and then back-brush it using a Wooster Bravo Stain Brush. If you’re going to use this application method (and it’s the best!), make sure you pick up 1 or 2 extension poles. You can attach the roller to the pole and apply your stain to the deck without leaving your feet. And, that’s why we recommend that particular Wooster stain brush–you can unscrew the handle and instead thread the brush onto the end of an extension pole. So you’ll be able to back-brush your deck from a standing position as well. Which is, (though I don’t have to say it), awesome.

Now, when we tested this method, we found it to be the fastest and easiest way to apply a smooth, even coat of stain to your deck. There are other faster ways (but they’re not as easy). And there are other easier ways (but they’re not as fast.) This method provides, in our opinion, the best balance between ease and speed. However, it’s important to note that the back-brushing step is of paramount importance! And typically will require a second person (helpers are always helpful!).  The reason it’s important is because the roller alone will apply the product too heavily which can lead to all sorts of problems. Back-brushing spreads the stain evenly, helps you get it into the gaps between the boards, and works into deep into the fibers of the wood. It’s a critical step to producing a beautiful deck. So don’t skip it! (And don’t, for your own sake, buy any brush other than the Wooster Bravo–you’ll thank us later. We promise!)

METHOD 2: Padco Paint and Stain Padpadco_floor_pad

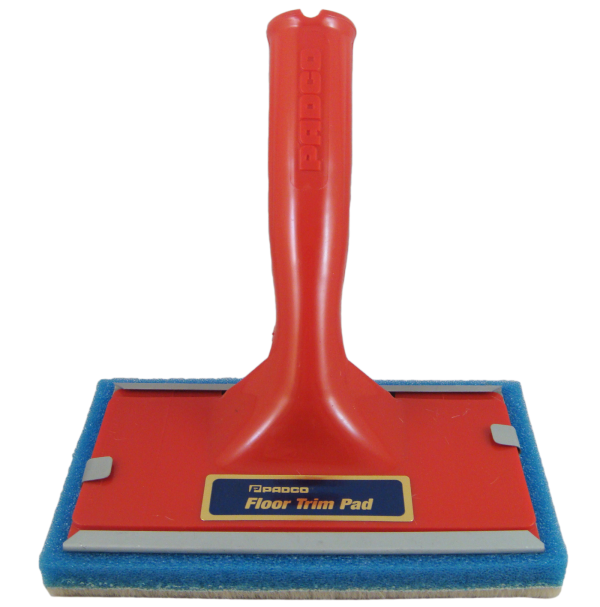
Alright, in our testing, there was a second method that we really liked as well: a Padco paint and stain pad. You can see it in the picture here, but just to clarify, it’s a six-inch pad with a handle that can be threaded onto an extension pole. The pad itself is a sponge with a bristled face.

We found this tool to work very quickly and because the face of the sponge is bristled, it does not require back-brushing. It was as fast or faster than the roller and back-brushing method, but, there are two reasons we rated it second. First, it is not nearly as easy to stain the gaps between the deck boards when using this pad. It works and can be done by turning the pad on it’s side, but it’s much easier to do so with the brush. Second, and more importantly in our consideration, the pad works best when the deck boards are in very good condition. If you have boards that are splintered, uneven, or rough, the pad doesn’t perform as well. It’s too rigid to conform to boards that have cupped over time (and you end up with spots that get no stain). It’s also a sponge pad that can be easily snagged and torn apart by boards with splintered edges.

If you’re staining a new deck or a deck that’s in great shape, this is a very fast tool that you won’t be sorry you purchased. If the boards are less than ideal, definitely opt for the roller and brush combo we mentioned above!

METHOD 3: Garden Sprayer and Brush

A third method we tested (and really liked) was the garden sprayer/brush combination. Basically, we took a conventional garden pump-up sprayer and used that to apply our stain to the deck. Now, a couple of clarifications. First, this only works for transparent or translucent stains–sprayers like this are not designed to spray stains with too much pigment. Second, this method can be… will be… messy! So, watch out for overspray on your siding, on your house, on your feet, and so on!

However, if you can take care of all of those issues, then this is a tremendously fast method for applying stain to your deck. Just remember that as was the case with the roller, the stain still needs to be backbrushed to work it into the wood.

And there you go! RepcoLite’s top 3 methods for applying stain to your deck. And if you’d like to check out our full review (and first video–so be kind to the dopes on camera), we’ve conveniently placed it just below this sentence!

Dress for Success: 3 Tips for Your Next Paint Job!

bigstock-Man-s-Legs-83108792_webA number of years ago, in the middle of the night, we heard something that sounded like gunshots outside our window. Well, needless to say, the second I heard the “shots”, I hopped out of bed, ready for action. Fight or flight, right?

Anyway, I was standing there, running through all the potential scenarios in my head when I looked down and realized I was in my underpants.

Well, this wouldn’t do.

See, in all of the scenarios I’d imagined–fighting off burglars, bustling my family to safety amidst a hail of gunfire–in none of them was I dressed in my underpants.

And so I went straight to my dresser and started rummaging around for my jeans.

“What are you doing?” My wife’s whispered voice cut through the darkness.

I could see her sitting in the bed, staring at me. “I’m looking for my jeans.” Duh. I closed the drawer I’d just searched and opened the next one down.

“Why?” her whisper was sharp and cutting, laced with anxiety and a little bit of fear. Gunshots, you know.

“Because I’m in my underpants,” I said without turning around. Time was of the essence. “Do you have any idea where that one faded pair with the hole in the knee is?”

There was a sudden thud on the floor next to me and she said, “There! There’s the pair that was sitting on the nightstand.” Her words were tense, strained.

I picked them up, but they were my fancy jeans. They were stiff and a little uncomfortable. And, like I said, a little too fancy.

“Nah. I want my faded pair.”

There was silence for a second and then her whispers filled the void: “Seriously? You need a specific pair of jeans to go fight off a burglar?”

I just shook my head. She didn’t get it. But everyone knows you can’t fight off a burglar in fancy pants or underpants. You need action pants. It’s really not that complicated.

And that’s when I found them. Relief washed over me. I yanked them out of the drawer and stepped into them, instantly feeling cooler and much more ready for whatever was happening.

Ten minutes later, it was clear that there was no burglar lurking. Nobody shooting. It was just fireworks. It was honestly a bit of a let down.

As I pulled off my action pants and placed them back in my dresser, it hit me that there was a paint point in all of this. I just never knew what it was until now.

See, I’ve been discussing a number of painting tips for the Do-It-Yourselfer on our daily little radio blurbs. (You can click here to listen!) And one of the recommendations I’m making is to dress for the part whenever you paint.

Here’s what I mean:

1. Wear old clothes.

This is a no-brainer. I get that. And yet . . . it happens all the time. We tackle a small project thinking we’ll just be careful. 10 minutes later, we’re standing at the sink doing everything we can to rinse blue paint out of a nice shirt. Or a good pair of shorts. I’ve personally done this countless times and have resigned countless clothing items to the “can’t-wear-that-to-Church-again” bins. Instead of accidentally damaging good, expensive clothing, take the extra few minutes–even if the project is a quick one–to throw on some old clothes.

2. Wear the Right Clothes.

OK. The first recommendation was about wearing old clothes. What I’m talking about here revolves around wearing the right ones. And what I specifically mean is this: pick up a pair of painter’s pants or painter’s shorts at a RepcoLite, Port City Paints, or Snyder Paints store. These things come with extra pockets for putty knives, screwdrivers, brushes and other tools you’ll need when you’re working. If you’ve ever worked through a paint project and spent a fair amount of time running around trying to remember where you set your putty knife down or left your screwdriver, then check these out. They’re not very expensive and they’re definitely worth it if you tackle more than 1 or 2 painting projects in a year.

3. Dress your room appropriately.

Finally, the last tip that’s even remotely connected to my jeans story is this one: dress the room appropriately. And what I mean by this is simple: purchase some dropcloths and use them! Cover your furniture, cover your floors, protect your decor. Sure, it takes a few extra minutes, but the minute that first drip falls from your brush and lands on a plastic sheet instead of your couch, you’ll realize how smart you were!

And there you go. 3 Tips to help you dress for success on your next paint job! Give them a try! And if you have any other great ideas, leave them in the combox!