EP42 – January 20, 2018: Get the Lead Out, Ask RepcoLite, Tools You Can’t Cheap Out On, Painting Cabinets


Some episode are a lot of fun. Others are packed with information. This one is both! On episode 41 of the RepcoLite Home Improvement Show, we cover everything from important lead safe paint information to the hilarious (and informative) discussion about the benefits of bidets. It’s definitely an episode with something for everyone!

Listen here:

Show notes for episode 042:

Statistics show that Grand Rapids is seeing an alarming jump in children with elevated lead levels and lead poisoning. This is a concern because lead poisoning can cause brain, liver, and heart damage. Some people assume the lead must be coming from water but, in actuality, it's coming from paint. Any home built before 1978  (the year lead paint was banned) is likely to have lead-based paint. Because this problem seems to be on the rise, we sat down with Paul Hann, Executive Director of the Healthy Homes Coalition to discuss some of the local lead concerns and what parents can do. We also discuss programs like the Michigan Lead Safe Home Program and Get the Lead Out! Grand Rapids that offer financial assistance for lead problems in homes. If you have lead concerns, you can call the Healthy Homes Coalition at (616) 241-3300 or contact them through their website.
We recently had a couple listeners ask questions that we are guessing other people may have as well. 
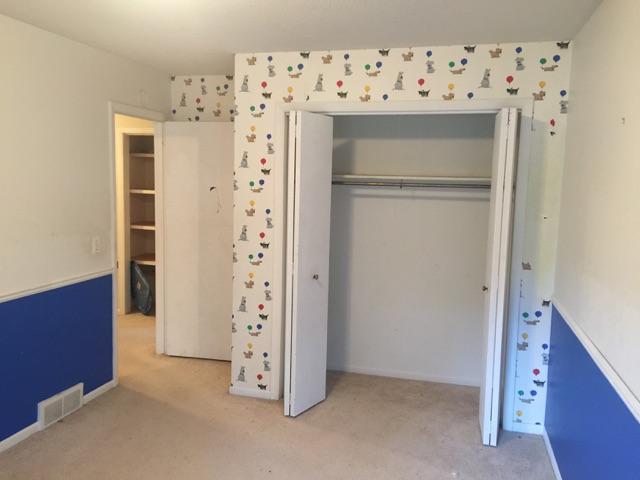
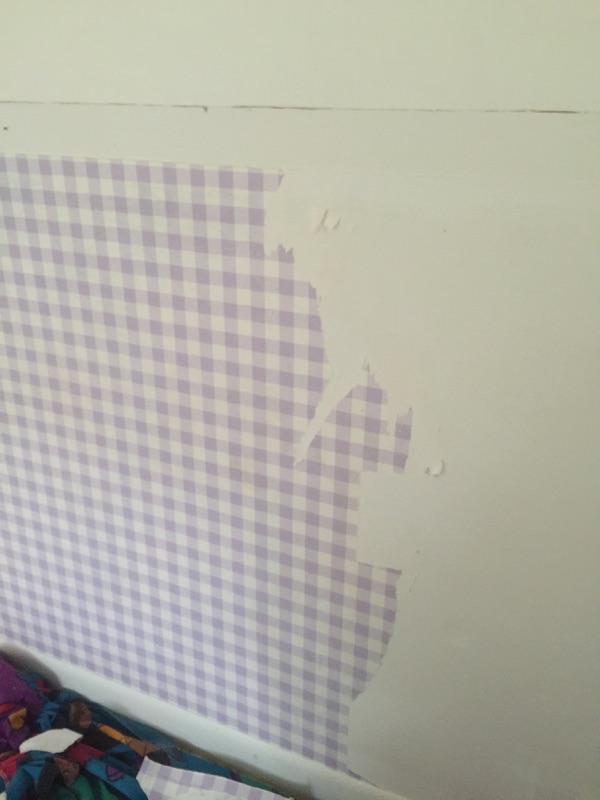
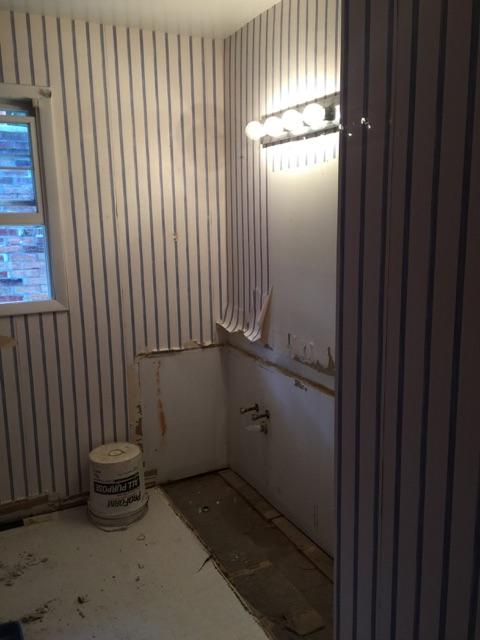
One listener has 40+ year old oil paint she wants to paint over. Another listener just bought a cottage and discovered the previous owner put wallpaper in the stall above the shower. Both listeners are looking for advice on the best way to deal with their situation. And, of course, we are happy to oblige!
We recently read an article in Popular Mechanics about tools you should never skimp on. And that got us thinking...we've done a lot of projects lately and having GOOD tools has made all the difference. Dan and Betsy both have the tendency to save a bit of money when it comes to buying tools. But, lesson learned! The screwdriver set you buy for $1 barely lasts through the first screw...and it was a set of 12!!
Dan and Betsy spent last weekend at the Remodeling and New Homes Show, talking to customers and listeners. What was amazing was almost EVERYONE had the same question: how do I paint my cabinets? For those who didn't hear the answer or didn't get a chance to ask the question, we'll tell you how to do it.

EP17 – July 29, 2017: Wallpaper Myths, What to Fix Before Selling Your Home, Mossy Roofs, Painting Ceilings

Mossy roofs aren’t just an eyesore! That moss up there is actively breaking down your shingles and shortening the lifespan of one of the biggest investments we make in our homes! We’ll tell you how to deal with it safely and effectively. That and much more in this episode!

Listen here:

Show notes for episode 017:

The Fabric Softener Fix for Stripping Wallpaper!

IMG951538

On August 28, 2015, we finally closed on our home in Fruitport, Michigan. Being a short sale, Patrick and I had been waiting since late February of that same year to sign the documents, solidifying the closure. I knew it would be months before we could move in, even after the closure, but that was the least of my worries. We were inching closer to our ultimate goal of remodeling a home. Standing two stories tall, half brick-half vinyl siding, attached garage, on just shy of an acre, seven bedrooms, and three and one-half baths, we were eager to start our adventure in reconstructing and cosmetically reconditioning a three thousand square foot, 1970’s retro home.

A twenty foot dumpster had barely enough space for all the garbage and debris we removed from the home. White ceramic tile and soiled carpet had been pried and stripped from the floors; drywall torn down in the master closet, living room, basement, and upstairs spare bathroom; three layers of shingles had been removed from the roof surrounding the fireplace. Yet, despite all this, the most agonizing and time consuming demolition project was still ahead: the removal of the wallpaper!

Throughout the whole process, my most valuable resource was Patrick’s mom, Phyllis, and her sister, Aunt Diane. Thanks to their much-appreciated help, we were able to remove the majority of wallpaper from six walls, including the kitchen, two bedrooms, a master walk-in closet, and two bathrooms in two days time.

However, even though we got the job finished in the end, it wasn’t without some complications. In fact, after many “oops” and a bunch of experimentation as to what solutions and tools to use, it occurred to me that stripping wallpaper was going to take a lot more time and patience than I had anticipated. Who knew that dogs of all shapes and sizes holding balloons could be so intimidating? (see the photos!) It only took us three walls of peeling quarter-sized paper pieces, one-by-one before I was found myself ready to defeat.

It was around that time, at the moment of near despair, that we decided to shift gears and try something different.

After reading somewhere that fabric softener actually helped in the process of removing wallpaper, we decided to give it a try. After all, what was there to lose?

So, in a yellow garden Sprayer, we combined 1/2 gallon of SUPER hot water (though not quite boiling) with 1/2 gallon of fabric softener (we used the least expensive!) along with 1 cup of DIF Concentrate Wallpaper Remover.

Using a PaperTiger by Zinsser, I scored the wallpaper in circular motions. And here, I’d like to urge a little caution: I cannot stress how important it is not to press too hard when scoring. Using too much pressure with the PaperTiger can easily result in damaged drywall. Light to medium pressure works just fine.

To prevent damage to our sub floors, we used Blue Painter’s Tape to stick plastic sheeting to the top lip of all base boards to catch excess solution that dripped from the walls.

(On a side note: If you find yourself removing wallpaper in a room or setting where you’re concerned about using a garden sprayer, you can get the same effect by using a spray bottle filled with solution!)

Anyway, once we had all the prep work done, we sprayed our new solution onto the walls and let it sit for 20-30 minutes, then scraped it off using a variety of different wallpaper scrapers and putty knives.

The paper came off with remarkable ease and we realized we were finally closing in on finishing the project. A second application of solution was applied to clean what residual glue was left after the wallpaper had been peeled away. After a final wipe down using a sponge and hot water, the walls were left to dry.

Removing wallpaper isn’t typically an easy or fun project, but with the right tools, a little elbow grease, and the right team of determined women (in our case!) you can get it done in a short amount of time.

For us, when all was said and done, we celebrated our accomplishment with a well-deserved Mr. Scribbs pizza and I found myself considering the next step in this renovation!

Supplies Used:

  • Extremely hot tap water
  • Fabric softener (Any kind works: We used the least expensive)
  • DIF Concentrate wallpaper remover
  • Hand held 2 gallon garden sprayer
  • 5-in-1 Hyde hand tool
  • Bucket of hot water
  • Large yellow sponge and bucket of hot water
  • Painter’s tape
  • Painter’s plastic
  • Ladder
  • Gloves
  • Lots of patience!!


Little Changes, Big Impact: Wall Shapes

If you’re looking for simple ways to give a room in your home some appeal, what about painting some shapes onto the walls?  Now, you could accomplish this by painting just a few geometrical shapes all over the walls, randomly placing squares and circles, but don’t limit yourself to that.

For example, think about your laundry room.  What if you’d paint the walls a sky blue color and then paint a clothesline on one wall?  And don’t quit there, go ahead and paint some “cartoony” clothes on that line.  You could use bright colors in the clothes you “hang” on that line and those bright colors would infuse your room with a sense of fun and interest without overpowering it.

If you’re looking for a twist on this idea, go ahead and hang a “real” clothesline on your wall and fill it with “clothes” that you cut out of extra wallpaper that you may have lying around.

This is a simple project and a fun way to use up excess wallpaper.  Just glue two sheets of wallpaper together (same pattern on the front and back or different patterns–it doesn’t matter).  Glue the two sheets together and, when they’re dry, cut shirt, dress and pants shapes out.  Then, using real clothes pins, hang these items on your line.

Whether you paint the clothes shapes onto the wall or cut them out of wallpaper, this is a great way to infuse your room with color and interest (and a sense of whimsical fun) without having to completely overhaul the entire space.