Basketball and Decorating

caleb2Not too long ago, we purchased a portable basketball hoop for the kids. We figured we’d all have fun shooting hoops and doing all that “basketball stuff” in our driveway. I assumed it would be a great bonding time, would provide some excercise, and, above all, give us something to do outside.

Well, shortly after we installed the hoop in its place, I realized that it was very likely one of the greatest gifts anybody has ever given to his or her neighbors.  In the history of mankind.  Allow me to explain:

See, I’m short.  Let’s just get that out on the table.  And it’s not just me.  It’s my whole family.  We’re all short.  And when we set up that basketball hoop and extended the rim of the basket until it was regulation height, I realized just how short we really were.  We just stood there and watched it go up and up and up until it finally clicked into place.  I wish I had a snapshot of that moment–all of us looking straight up from our humble little positions on earth, some of us squinting.  You would have thought we were watching a comet.  Nope.  Just trying to see the basketball hoop.

Well, the insane height of the basket only frightened me for a minute or two before I steeled my nerves, grabbed the ball and started dribbling it.  It made a satisfying “thump” on the cement.  Made me feel like a man.

Bouncing the ball, feeling cool, I stepped back a ways, gave myself some space for a good running start, and I took off. My tongue was hanging out in concentration, the ball was thumping against the concrete, my child-like hands were slapping it down, perfectly in-sync with each pattering footstep.  It felt just like what I’ve seen on TV:  real basketball players, running down the court getting ready to impress.

My little heart was pounding as I reached that point when I had to jump.  My muscles tensed, my legs coiled and I launched myself into the air.  Flight:  it’s a truly amazing thing.  I felt the air whipping through my thinning hair.  My ears popped as I reached heights heretofore never reached.  I felt like superman.  Unstoppable.  And, best of all, it happened in slow-mo.

Well, in what felt like a long instant replay, I felt myself going up, up, up and I saw the basket get closer and closer and closer.  I reached up with the ball, prepared for the “slam”, prepared for the cheering, prepared for the moment of release… and then, suddenly, I was back on the ground again.  The basket was barely visible way up in the sky.  The ball was still in my hand.  My right leg hurt and I had drool on my shirt.  I was sweating.

Standing there, unsure what to do, I threw the ball as hard as I could into the air and pulled a muscle in my side as I did so.  The ball sailed skyward until it hit the bottom of the net–nuzzling it like a soft breeze–and then it fell back to earth, making an eery, hollow thump on the cement.

And then the kids started laughing.  I was told that in my amazing moment of jumping and “slamming”, I had never once been more than 3 inches off the ground. Never once.  I thought I had been soaring, but I’d actually only been skidding along.

Needless to say, the laughter went on for a while–until they started playing.  Then it quit abruptly because they realized they were no better.

And from that point on, we’ve spent many a day running beneath that insanely high (regulation-height) basket, dribbling big basketballs that look oversized in our small, child-like hands.  We run and jump and not a single one of us gets more than 3 inches off the ground.  It’s as if we’ve got invisible rubber bands strapped around our ankles and anchored into the ground.

And that’s why I say this was one of the greatest gifts a neighbor has given another neighbor ever.  It’s comic relief.  Whenever my neighbors are feeling down or are having a bad day, they just need to look out the window and watch the Hansen family running around the 10 foot tall basket, leaping and jumping and for all that hard work, never once getting more than a few inches off the ground.  It’s absolutely hilarious.  We’re that bad.

And it’s all because we’re not basketball people.  We’re just not cut out for it.  But even though we stink at it and even though we don’t have very many skills and even though we’re physically not capable of playing the sport competitively (or even casually) . . . we still do it and we still have fun.

And that’s the decorating point today.  So many times, I’ve talked to customers at RepcoLite who are picking out a color to go on their walls that’s the same color as the color already there.  It’s just a new coat–a clean coat–but it’s nothing different.

And they’re bored with it–I can tell that–it’s the same old thing they’ve always done.  But when you ask them and try to get them to step out and try something new, we often hear the same old excuse:  I’m no good at decorating. It’s not my thing.  I don’t know how to do it.

Well, I’m not good at basketball.  I stink.  And so does my entire family.  And yet, we’ve already made some great memories running around the hoop trying to throw a ball high enough that it has a chance to go in.

Just because you don’t think you’re good at decorating, don’t let that stop you from trying.  When you step outside of your comfort zone and start trying new things, you’ll discover how much fun it can be to take those plain walls in your home and start turning them into something that reflects who you are, who your family is.  So get going and give it a try.  And if you don’t know where to start, stop out at RepcoLite and let our decorators give you some advice.  You’ll be amazed how much fun the process can be.

Making “Big Red” Red Again

Holland’s Big Red Lighthouse, a landmark of the Holland area for years has recently been fading from the bright red icon we’re used to seeing at the entrance to the harbor to something more, how shall we put it…pink.

The last paint job on the lighthouse was in 2009 when, according to John Gronberg, secretary and commissioner of the Holland Harbor Historical Lighthouse Commission, “the most expensive paint we’ve ever used” (not supplied by RepcoLite, for the record!) was brushed and rolled onto the structure. It wasn’t long, the harsh weather conditions began to take effect. In the end, that high end and promising coating failed much quicker than expected and the “pinking” of Big Red was well underway.

Three short years later, in 2012, the members Holland Harbor Historical Lighthouse Commission found themselves actively looking for solutions to turn Big Red red again. Happily, working with Lamar Construction, we were able to step in and help.

Check out some photos showing the process and results!

big_red 10 big_red 4 big_red 5 big_red 7 big_red 8 big_redb big_red 13


 More Info:

5 Tips to Help With Touch-Up Painting

bigstock-Couple-painting-home-5695270I received a question in my email the other day regarding touching up some paint on a wall. The question was a good one and I thought I’d spell out a few simple tips here that will help make your next touch-up job go a little easier.

1. MAKE SURE IT’S THE RIGHT COLOR

It happens often: you paint the walls a certain color and then pick up another gallon of paint in a slightly darker color. It looks great. Until 2 years later when you grab that darker color by accident and use it to touch up spots on your lighter walls. Suddenly a quick touch-up project becomes a repaint. If you’ve worked with multiple shades of similar colors, never assume that the gallon you grabbed is the right color. Always test a sample in an inconspicuous spot before proceeding!

2. EVEN IF YOU’RE “SURE” IT’S THE RIGHT COLOR, CHECK IT

What I mean is this: even if you never used multiple shades as described above and you’re absolutely, 100% positive that you are holding the can of the paint you originally used on your walls, you should still check that color. Yes, it was originally the right color, but things have changed. The paint on your walls typically darkens and deepens over time. And even in the most immaculate households, it can sometimes get a little dirty. What that all adds up to is that the paint on your walls may no longer match the paint in that original can. So don’t do what so many folks do and touch up 27 silver-dollar-sized spots on your wall only to find out the next morning that every single one of them is lighter than the wall paint. Instead, sample a small area first, allowing the paint to dry down adequately, before you begin touching up.

3. IF THE PAINT’S TOO LIGHT, FIND A SWITCH PLATE

This tip is pretty self-explanatory but sometimes folks don’t realize just how many options are truly open to them. If you check your color before touching up and discover that it’s too light–don’t panic. All you need to do is look for something in your room that has your wall color on it. This can be a switchplate, a piece of trim, a picture frame or anything along these lines. If you can’t find anything like that, another option is to simply cut a small, shallow hole in your drywall and remove a quarter-sized sample. Take this sample and bring it to RepcoLite and we’ll custom match a color for you so you can accomplish your project.

4. PAINT CORNER TO CORNER IF POSSIBLE

OK, once you have your color figured out, it’s time to actually do the work. And the ideal way to do any touch up is to look for an obvious breaking point in a room and paint a larger section. What I mean is this: ideally, don’t touch up 25 quarter-sized spots on your walls. Rather, paint that one wall corner to corner with your new color. Or paint from your built in cabinet to the doorway. Basically, look for a breaking point and paint a larger section. This will help your new paint blend in visually much better and makes the whole process of touching up much easier.

5. APPLY SMALL AMOUNTS OF PAINT USING THE ORIGINAL APPLICATION TOOL!

Sometimes, you just don’t want to paint corner to corner. Sometimes you simply want to do the little touch-ups. When that’s the case, here’s the best way to tackle it: First, make sure you use the application tool you used to originally applied the paint. If you brushed the paint onto the surface originally, then use a brush to do your touch-ups. If you rolled the paint onto your walls, then use a small roller of similar nap to do your touch-ups. And, when you’re doing these, use small amounts of paint and put some care and effort into feathering them out.

Touching up our walls doesn’t need to be complicated. But it does take a little effort to do it well. If you follow these tips, you should have no problem pulling it off!

3 Ways to Compromise With Your Kids about Paint Colors

donuts-690281_1280Once upon a time, probably about 6 years ago or so, my wife and I walked with our kids to the Zeeland Bakery.  Caleb (who was 5 at the time) waited outside with me while my wife and the other kids sauntered into the shop and ordered various donuts and cookies and different types of bread.  (It’s always a huge undertaking whenever we go to the bakery).

Anyway, while Caleb and I were waiting outside, a lady walked by with a 1-year-old boy in a stroller.  I smiled at the lady and Caleb smiled at the lady and he even went so far as to say “Hello.”  I was proud that the little guy was so polite.  And it was this pride which eventually led to my downfall.

See, as the lady was walking away, but while she was still within earshot, I thought I’d demonstrate how polite and kind my little guy was.  So I said, loud enough for the lady to hear, “Wasn’t that a nice little boy?”

Oh, it was a question that he should have been able to hit out of the park.  It was an easy one.  A no-brainer.  All he had to say was “Yes Dad, that boy seemed very nice, indeed.”  Had he said that, the lady would have thought I was a super parent because I’d raised such a wonderfully polite little lad.  In fact, I figured there was always the off chance that she’d turn her stroller around, shake my hand and ask my advice as to how to raise her own child.

Yes, my mind was brimming with the possibilities and the glory when Caleb spoke up.  He raised his little voice to match my raised voice and suddenly, as is always the case when this kind of thing happens, the entire world quit moving.  Suddenly, there were no cars–no road noise.  The shop doors quit opening and closing.  The clocks that had been ticking ceased their workings for a few split seconds.  Even the birds and the wind and the airplanes and the fountains went silent.  A whisper at one end of Main Street would have been audible at the other.  And it was into this utter and complete silence that Caleb bellowed his answer, informing me, the lady, her poor, poor child and everybody else within earshot that, “No,” he didn’t think that kid was all that much.  “In fact,” he went on to say, “the kid was actually kind of ugly.  His ears were big and his nose was all turned up and his eyes were squinty.  Like a rat.”  As if this wasn’t bad enough, Caleb ended by informing me (and all of Zeeland) that he had only said “hello” to the kid because “he felt sorry for him.”

Well, I just stared at him in horror and disbelief as he continued to rattle off all sorts of uncomplimentary descriptions that reverberated off the buildings and up and down the silent streets.  Silent, that is, except for the wildly squeaking wheels of the lady’s stroller as she pushed her child rapidly away from that horrible father and his nasty little son….

I mention this little episode partly as penance but also because it’s the perfect example of how kids think and act.  If you ask for a child’s opinion, you’re going to get it.  They’ll typically tell you exactly what they think.  Problem is, while they’re usually honest, they don’t always exercise the best judgment.

In an earlier article (which you can read HERE), I suggested that it’s important to involve your kids in the process of decorating their rooms.  You should let them pick the colors, ask them what they like and what they hope to see in their rooms.  However, when you do that, you’re going to have to be ready for some crazy answers from time to time.  In fact, when you ask an 8-year-old what colors he’d like on his walls, don’t plan on hearing him say “Oh, a nice medium-beige with an earthy brown would do just lovely.”  No, get ready for black and orange (halloween colors).  Or bright blue and red and yellow (Superman colors).

So, with that said, if you do decide to let them help you decorate their own rooms (which I still believe to be a great idea), you better have a method in mind as to how to incorporate their ideas without completely abandoning the overall look of the room.  You both need to be happy with the outcome.  And that means compromise.  Here are 3 tips:

1. PICK AN ACCENT WALL

When your kids choose the brightest yellows and oranges, the flashiest greens and blues, a great compromise is to paint one of the walls–an accent wall–with one of those bright, flashy colors.  Have them settle on which color they like best and see if you can’t work that into a small wall–a wall with a window or a door.

Now, in most cases, when you paint an accent wall, you’d pick the focal point of the room to do this with.  In this case, however . . . well, not so much.  If you’re trying to minimize the effect of the color, then picking the focal point of the room is the last thing you want to do.  Just pick a small wall–a wall that’s not the first thing you see when you walk into the room–and see if you can’t put their color there.  They’ll be happy, feeling proud when they see their bright wall and you’ll be happy because the room doesn’t glow like the face of the sun.

2. PICK MUTED VERSIONS OF THEIR COLOR

Another great compromise that sometimes works in the paint store is to steer kids toward more muted versions of their colors.  If they love bright reds and yellows, maybe throw out some options like a rusty red or terracotta and a more muted yellow.  Sometimes they’ll see these new colors and be completely willing to compromise.  Again, with this type of scenario, both of you can potentially reach a mutually happy outcome.

3. ACCESSORIZE, ACCESSORIZE, ACCESSORIZE

Perhaps the best way of working wild, crazy colors into a decorating scheme is to bring those colors in with accessories.  If your kids want to see black and orange or some other funky combination of colors on their walls, but you can’t bring yourself to do it, then offer this:  coat the walls with a nice neutral color and then bring in accessories that fit your child’s desired color scheme.  Bring in lampshades with bright colors, find art prints with the colors, switchplates and any number of other accessories that will serve to fill the room with the chosen colors without overloading the walls and driving you crazy.

The bottom line is this:  when you bring your kids into the decorating picture, you’ve got to be ready to compromise.  Don’t let them decide everything when you hate what they’re coming up with.  Likewise, don’t decide everything yourself when they hate what you’re coming up with.  You both have to be happy with the outcome for this little project to work.  If you hate the room, you’re always going to feel irritated when you walk past it.  If they hate the room, don’t worry, they’ll find a way to let you know about it.

So work together, have fun, and compromise!

Let Them Help: Decorating With Your Kids’ Input!

paint_handsEvery now and then I hit upon something that I know is a good idea. And, though this doesn’t happen very often, this is one of those times. There’s no way around it: decorating your kids’ rooms with their help is a great opportunity for you and for them. Oh, I know there are lots of little bugs in the idea and potential complications–but that doesn’t change the fact that it’s a good thing to do.

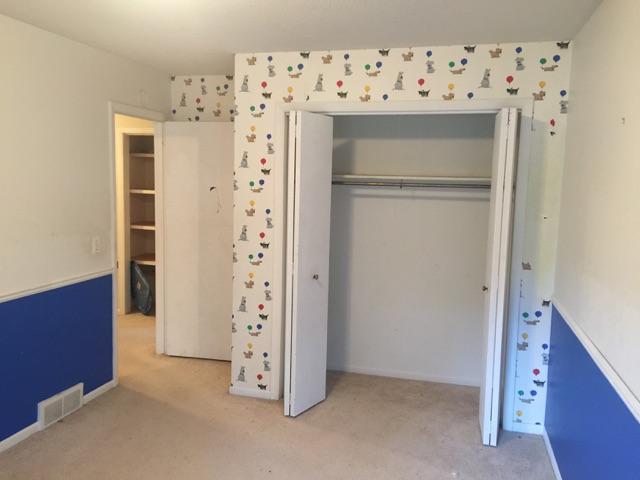
Taking a room that was decorated with younger kids in mind and turning it into “hip, way cool pad” is a great way to let your kids know that YOU know that they’re growing up. Taking down the wallpaper borders of stuffed bears and turtles and replacing it with something more age-appropriate will make your kids feel important. And involving them in that process, seeking their input and listening to their suggestions will make them feel that they are on the path to growing up–they’re actually an active force in the creation of their new room.

Surprise Makeovers are Cool on TV, But Not So Much In Real Life

If you still need convincing that it’s a good idea to involve your kids in the process, then think about it this way: on TV, surprise makeovers are cool. They really are. But that’s because we don’t normally watch the recipient of the new room beyond their initial reaction. We see them when they first whip off a blindfold and stand blinking and squinting in the bright lights as they try to take in their new surroundings. Everybody’s happy and giggly and the show ends. We don’t see the couple standing there 12 hours later, now that the cameras and energetic TV personalities are gone, staring at the new walls and wondering what happened and how anybody ever thought that bright orange was a good look.

Your kids feel the same way about their room as you would about your home. Their room is their space–their world away from the world, especially as they get older. Just as you wouldn’t likely appreciate it if your husband or your neighbor just dropped by one afternoon and repainted your living room in colors of their choosing, neither will your kids necessarily be receptive to the changes you bring about one day while they’re off at school. Your vision for their room isn’t necessarily their vision for the room. You’ve got to make it your goal to discover a mutually acceptable vision.

Involve Them, But Remember Their Limitations

To that end, involve them in every aspect of the process. Take them to the store and let them look at colors. Let them flip through wallpaper books and mural books. Let them explore the world of Faux Painting. However, make sure that you keep the outings short and sweet–no marathon shopping trips that will frustrate and wear your kids out. Remember that their attention spans are not like yours–keeping the trips to a limited amount of time will make sure both of you enjoy the outings. And don’t forget to think bigger than just a trip to the paint store or the furniture store: try to tie your decorating trips in with a nice dinner out or something like that.

Taking the kids to the paint store and listening to their suggestions and then taking them out to dinner will be one of those special moments kids remember. If you treat their opinions as valid options and listen to their thoughts and take the time to discuss things with them over dinner, they will start to feel like an intricate part in the decision process. And trust me, I may have young kids and I may not have had much experience in the world of psychology, but I know this is a good thing. You don’t have to be a genius to see that by involving your kids in something so small as decorating their rooms, you’re basically telling them that their opinions matter and that you value their thoughts.

What If . . ?

Alright, now you’re probably thinking that I’m living in a world where everything is puppy dogs and lollipops. Sure it sounds good to involve the kids in the decorating process, but what’s going to happen when they pick out Sponge-Bob Yellow and Bright Red for their walls?  We’ll cover that in the next post.

3 Paint Storage Methods that Don’t Work!

vicksHave you ever noticed that when you’re sick, everybody is suddenly a doctor.  Everyone has an opinion and a cure for what ails you.  And while some of the cures are very common–chicken soup cures, we could call them–others are anything but.

For example, one older gentleman I know–who will remain nameless–uses Vicks VapoRub whenever he has a cold.

Now, you may say:  “What’s so strange about that?  Many folks use Vicks VapoRub when they’ve got a cold.”

And of course, you’re right.  Many folks do.  But the older gentleman I know uses it (and has recommended that I use it) in a very unusual manner:  He eats it.  By the spoonful.

Yes.  Whenever he’s sick or feels that “under-the-weather” feeling starting up, he heads straight to the medicine cabinet with a teaspoon and downs a spoonful of Vicks VapoRub–that greasy, Crisco-ish paste.  Somehow he swallows it down and, “almost instantly” (he says) the soothing Vicks vapors make him feel better.

Needless to say, I’ve never tried it.  Nor do I recommend that anyone else ever try this.  Yes, my friend is 80+ years old, but I certainly do NOT attribute that age to eating Vicks.  I believe he’s achieved a fine old age in spite of Vicks.

At any rate, when you’re sick, everybody comes out of the woodwork with suggestions and recommendations to make you feel better.  Some make sense, others are of the “eat-a-spoonful-of-Vicks” variety.

Well, the same thing happens whenever you paint:  There are tons of different tips and tricks people recommend for everything from opening the lid to applying the paint to storing it on your shelves.  Today I want to focus on several common methods recommended for paint storage but which, in fact, actually do more harm than good.

Pound Some Nails in the Rim!

The first method I want to debunk is the Pound Some Nail Holes in the Rim Method.  Now, technically, this isn’t nails in rima paint storage tip.  It’s actually a painting application tip, but I’m including it here because it can radically affect your ability to store paint when you finish the job.

Now, the point of the method is to pound nail holes in the rim of your paint can so that all the paint that collects there as you paint, actually drips and drains back into the can.  Oh, it sounds like a great idea and many, many folks (me included at one point) have tried it.

However, the problem with the method is this:  those holes (as well as the process by which they’re created in the rim), can actually damage the rim of the paint can, dramatically reducing the ability of that rim to create a good seal with the lid.  That’s just a fancy and long way of saying:  pound holes in the rim of your can and you’ll find that you can’t seal the can very well later.  Oh, the lid may go on and may look tight, but you’ll often find, when you open it later, that the seal was very poor and your paint has dried out significantly.

So, all that to say:  don’t pound nail holes in the rim.  Instead, simply keep that rim clean of paint.  Or, if you happen to get paint into it, clean that paint out before trying to affix the lid.

Store the Can Upside Down!

upside downThe second method I’d like to address is the common Store the Paint Can Upside Down method.  The theory behind this concept is that air will leak in through the lid.  If you turn the can upside down, the air will not be able to sneak in and therefore, your paint will stay good longer.

The problem with this theory is that often, the bigger problem in a can–the reason paint can dry out so often in a closed container–isn’t so much that the air is leaking in.  It’s because the air’s already in the can when you close it.

If you’ve got a half-full gallon of paint and you pound the lid on and store it–upside down or rightside up–the air that fills up that empty half of the can will start drying the paint that remains.  If you leave the can rightside up, this air will cause a thick coating to form on the surface of the paint and on the exposed sides of the can.  If you turn the can upside down, the same thing will happen, only on the bottom.

This is frustrating enough when the can is rightside up, but at least that way, the skin is on the surface of the paint and you can see it and easily remove it before you do any stirring or shaking of the paint.  However, if you stored the paint can upside down, the skin forms on the bottom side of the can.  All the clumpy stuff, the junk, the bad, unusable paint is at the bottom of the can where you can’t see it when you open it up.

At first, you’ll turn the can over, pop the lid, see good paint and think your “upside-down storage” method worked.  But when you drop a stick in and start stirring (and break up and spread the clumped paint all through the good paint) you’ll realize the flaw inherent in the system.  Unfortunately, by then, it’s not very easy to get the clumped, dried paint out of the good paint without straining it.

So, we recommend simply storing the paint can rightside up, but taking precautions (as we wrote about here) to make sure the can is as full as possible before storage.

Use Plastic Wrap!

The third storage recommendation that is often tossed around is the Place Some Plastic Wrap in the Gallon andplastic then Pound the Lid on method.  This is supposed to create an extra seal between the rim and the lid and prevent air from seaping into the can.

That’s the idea anyway, but unfortunately this method usually fails because most often the plastic, rather than augmenting the natural seal between lid and rim actually compromises that seal.  With the plastic in there, the lid can’t seal as tightly as it could without the plastic and the result is air leaking into the container.

You’re much better off to do as we recommended above and simply clean the excess paint out of the rim before pounding the lid on.  That way you won’t need the plastic at all.

And there you go:  3 different methods recommended on the internet and home improvement shows that just don’t work all that well.  For my money, avoid these crazy solutions (and of course, avoid the earlier solution regarding eating a spoonful of Vicks) and stick to the ideas we recommended here!