
Category Archives: Blog


Should I Fill the Grain on My Oak Cabinets Before Painting?
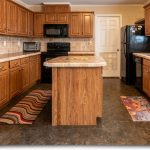
If you’re sitting in a home with 90’s Golden Oak cabinets, chances are you’ve at least toyed with the idea of painting them. However, it’s also likely that if you’ve debated a paint project, you’ve also wondered about filling the grain so you have doors that look smooth.
But is it necessary?
In most situations, we would say it’s just not worth all the extra work. And there’s a LOT of extra work! There are a variety of options for filling the grain, but all of them are going to require a tremendous amount of sanding. It’s time consuming, labor intensive, and messy. And usually, the end results aren’t worth it.
- When you apply 1 coat of primer and 2 coats of finish paint to your cabinet doors, you’re going to find that the graining in the oak is dramatically minimized. The paint and primer don’t fill the grain, but they do minimize all but the most open and porous.
- Much of the “look” of the open grain is due to the color variations. The open grain stains much darker than the surrounding wood, creating a deep contrast. However, when the surface is painted a solid color, all of that visual contrast disappears. And along with it, much of the visual representation of the grain.
- Finally, painted oak is actually trending! A growing number of cabinet companies are releasing lines of “painted oak” cabinets. The solid paint color is always popular, but the addition of the grain texture adds a modern appeal. (Who’d have thought!)
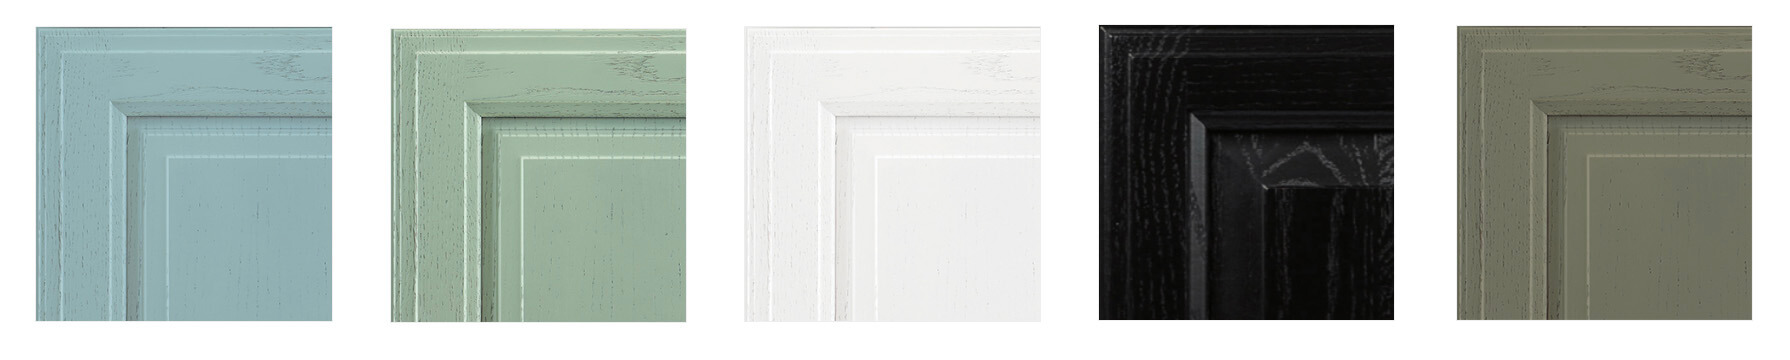
In most situations, when you paint your oak cabinets, you will see some of the physical texture of the grain when you look at the doors closely and at angles. However, when you stand in your kitchen and look at the room, the only thing you’re usually going to notice is the new, lighter, cleaner, updated cabinets! So don’t let the worries about seeing too much grain prevent you from updating your space!
What Paint Sheen Should I Use in My Bathroom?
As is usually the case with paint and coatings, there’s no “one-size-fits-all” answer. Before recommending a finish paint and sheen for any room, there are questions that must be asked. In this case, we’re dealing with a bathroom, so the first question is this: Is it a half bath or a full bath? If there’s a shower or tub present, the recommendation is potentially different than if there isn’t.
Other questions we’d ask would concern any problem areas or situations that have manifested over the years.
- Are mold and mildew a routine issue?
- Is the current paint in good condition, or are there areas where it’s peeling?
- And on and on….
It’s always good to talk to someone personally to get a recommendation that fits your space and your needs. However, with that said, we can make some generic recommendations.
 So What Sheen is Best?
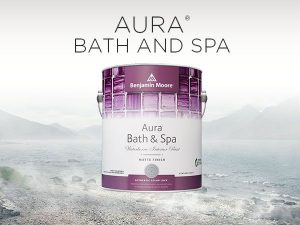
For the most part, the answer hinges on the product used more so than the sheen itself. Aura Bath and Spa from Benjamin Moore is our favorite bathroom paint. It’s designed for high humidity environments, is mildew resistant, and hides and covers extremely well. Best of all, it does all of that in a matte finish.
That means you can finally have a bathroom that fits in with the rest of your home! Before Bath and Spa, we were forced to choose shinier paints for our bathrooms and we just had to tolerate the look. Now, there’s an option to get a matte look and still get excellent durability.
If you don’t want to use Aura Bath and Spa, we’d most generally recommend a satin sheen. RepcoLite’s Hallmark line offers mildew resistance and great washability.
If you have a bathroom fan that moves the moisture out of the room quickly, or if the tub/shower doesn’t get a lot of use, Hallmark Eggshell would also be an option to consider.
If it’s only a half bath, your options are wide open when it comes to sheen.
Always Talk It Over!
In the end, we love to recommend Aura Bath and Spa. In our experience, it’s the perfect bathroom paint and eliminates most of the issues that you’ll ever run into when painting that room. But always call, chat on our website, or stop in at any Repcolite, Port City Paints, or Snyder Paints and talk through your exact situation before buying your paint!