Sheep from Norway and Web-Based Color Tools

Sometimes, the most difficult part of the painting process is picking the right colors. After all, nobody wants to spend money and time on a project only to end up with colors they don’t like all over their walls. For that matter, nobody wants to spend time and money on a project only to end up with colors that they “like” on their walls. We want to go through the work of that painting process and end up with results we love.

And so, many would-be home re-decorators find themselves bogged down in the very first step of the painting process: color selection. Because really, it’s all about color. If you put the right combination of colors together, the project turns out great. Use the wrong colors and it’s not going to matter whether or not you used the highest quality paints, the best brushes and roller covers made from the wool of spotless sheep raised in the pristine, picturesque landscapes of Norway (or wherever). All the fancy tools and quality paints in the world can’t save you from a bad color combo.

Color’s critical to every paint project and finding your inspiration isn’t always easy. As a result, many people start a project expecting to make big changes in their home. By the end of the project, however, they find that they’ve fallen back into old standards they’ve become comfortable with. They know those color schemes worked in their home and they know they’re safe. But we also all know that “safe” isn’t always fun.

Finding new colors, new combinations, exciting themes seems tricky, but it doesn’t need to be. In fact, the internet is filled with great color tools that will help you visualize color combinations you may never have thought of before. These tools are designed for various purposes, but all of them can be used by the savvy home re-decorator to narrow down her colors, and, most importantly, to help her step outside of her standard color schemes.

Benjamin Moore’s Color Chooserpersonal_color_viewer

The first online tool I want to recommend to you is the Benjamin Moore Color Chooser. This is a standard tool designed specifically for selecting paint color combinations.

When you click the link, you’ll be taken to a page where you can create your own projects, store colors and do all kinds of other tasks. But the main thrust of the site is to allow you to pick from a variety of sample room photos and then fill in the walls, the trim, the ceilings with the Benjamin Moore Colors of your choice. You’ll be able to see how the colors interact with each other and you’ll get an idea about what certain color combos might look like in your home.

Spin the Color Wheel

spin_the_wheelAnother great tool is called Spin the Color Wheel. And while it sounds like a game show, you’re not going to win any prizes here (except maybe a cool color scheme for your bathroom).

Spin the Color Wheel is actually a tool that’s designed to help web-designers find perfect color schemes for, well, websites. And it’s actually kind of fun. (Even without the prizes. Or Pat Sajak. Or the crowd chanting “Spin. The. Wheel!”)

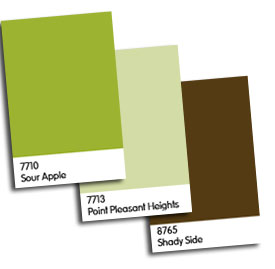
You just go to the site and click the “Spin the Color Wheel” button on the right. When you do so, you’ll be presented with 3 random color samples. If you don’t like any of them, you can “spin again”. If you like one or two of them, you can press a little “hold” button. This will lock this color down so it doesn’t change with subsequent spins of the wheel.

After going through it a couple times, I found 3 or 4 color schemes that I thought were pretty interesting (one of which is displayed in the picture above). Oh, they may need a little tweaking here and there, but still . . . I went from having no idea what colors to choose or what would look good together to having 3 or 4 places to start from.

The Color Wizard

color_wizardThe Color Wizard is another web-designer tool. But, just like the Color Wheel one we just talked about, the Color Wizard can help you narrow down paint colors and discover new themes.

This one works based on some RED, GREEN and BLUE sliders. You just drag the sliders from left to right and your color samples change. Sounds pretty basic, right? Well, there’s an interesting twist to this site that makes it worth checking out: using a selection panel on the left of the color sample window, you can select different types of color schemes. You can select Complimentary Colors and the options you receive when you drag the sliders will represent complimentary colors on a color wheel. Or, you could select Analagous Colors and you’ll be presented with samples that are strictly analagous. It’s a great way to explore color, and, like the other tools I mentioned above, it’s a great way to jump start your creative mind and help you discover color schemes you may never have considered before.

All in All…

All in all, tools like these are great ways for nervous or newbie decorators to discover color schemes and open their eyes to the wide world of color. However, I’d recommend a couple cautions.

First, remember that the colors you see on your screen (especially when using the Benjamin Moore color chooser or any other paint-related color tool) are not necessarily accurate representations of the color in real life. Your monitor may show colors with a greener tint than they really have, or maybe a redder tone. In real life, when you see the chips you thought looked so good on the computer, you might find that they don’t look good at all.

But don’t despair! Use the color selection tools on the internet for a basis for color selection. If you saw a great tan, blue and green combination, but don’t like the color chips when you see them in real life, then find other chips that come close to the colors as you saw them on your monitor.

A second caution I’d urge is this: the web-designer tools are not going to present you with nice and tidy paint chip references. Instead, you’re going to get color names like “#FF7700” or the ever popular “#D1BEAD”. These are web colors and web-designers and other geeks know what they mean. If you go into a paint store with those numbers, you’re going to get a lot of blank stares. So, use those colors as starting points. Use them to figure out what colors you like to see together and then, when you go to the paint store, do your best to recreate what you found. Good luck, have fun . . . and most importantly, get painting!

A Little Color Here, A Little Color There

Many times, people think that in order to create a room with some “visual pop”, they’re going to need to pop open a gallon of Safety Orange paint and roll it all over their walls.

We tend to view that big transition from the world of “neutral” to the world of “color” as being . . . for lack of a better word . . . violent.  And not everybody is up to the challenge.  Not everybody has the intestinal fortitude to make such a bold shift.  And so, as a result, there’s often a feeling of frustration that builds in the home decorator who’s trying to make the change.

There’s the desire to step out into the world of color, but there’s the fear they will go too far, lose control of the color and  let it overpower their room.

And so, in the end, what often happens is this:  the people on the verge . . . the ones who’d like to bring in color, but who are a little nervous, usually end up reverting to whatever was on their walls in the first place.  Maybe they try for a darker tan than they had before, but typically, they stay in the same, safe color range.  When the room is finished and the new paint is dry, they often feel a little sense of disappointment–it doesn’t look terribly different from the original.  It’s safe.  It feels boring and blank.  And yet the alternative–walls splashed with Fuschia and Teal and Turquoise and Lime Green–seems too crazy, too schizophrenic.  And so, they come to despise home decorating projects.

Well, if you’ve ever found yourself in that place–if you’ve ever wanted to step out boldly with color, but have been too nervous to try it . . . well, I’ve got good news:  It can be remarkably easy and, most importantly, SAFE.  All you need to do is this:  bring your color in with accessories.

It’s a simple solution and it’s used by Designers and Professional Decorators all the time.  It’s the ideal way for those just stepping into the world of color to get their feet wet.  You simply find a nice, calm, reasonable, safe neutral tone for your walls and then spice it up with accessories.

Paint some of your boring picture frames bright pink and green.  Maybe stripe a couple of them and mount them.  Or maybe, take a look at your dresser.  Maybe you don’t want to paint the whole thing, but what would happen if you painted two of the drawers?  Or, what if you’d paint just the top?

green_roomPick up some simple shelves and splash them with a bright color and you’ll be amazed how much character they display.  These simple, boring, run-of-the-mill shelves suddenly look like designer pieces when we see them in a pink or a bright yellow.

And what about that boring lamp on the desk?  What if you’d paint the base white or neutral and then pick up a bright lampshade?  Or, reverse that:  keep the lampshade white and simple and paint the base a bright color.

One of the most impressive uses of color in a small room that I’ve ever seen is pictured above.   They made perfect use of this concept:  the walls are a light, neutral green.  They’re safe.  Simple.  Dangerously boring.  But then, the designers added the dark brown bedspread and the brown picture frames.  These constituted another earthy color, another safe choice, but they added to the overall effect.

The bench with the darker green stripes goes even farther towards adding some visual interest, but I think it’s easy to see that even then, the whole room has a very safe feel to it.

And then there’s the bed.  The bright green on the bed suddenly gives the room a shot of life.  It makes it vibrant, exciting . . . the kind of place you walk by and then walk back to so you can take a longer look.

And the reason it works so well is twofold:  first, the green is so bright and bold that it instantly grabs your attention.  Secondly (and more importantly), the green is in the last place we’d normally think to look.  In a normal situation, the bed might be brown and the frames might be lime green along with the legs of the bench.  And if that were the case, I don’t think the room would have it’s flair . . . it wouldn’t make the statement that it does here.

But instead of doing that, these designers “messed with” our expectations and, in so doing, by putting the color in the last place we’d expect to see it, they created something that really stands out. The color in the room isn’t overpowering, but the intelligent, controlled use of the bright green pumps vibrant life into the setting.

And that’s what I’m talking about.  You don’t need to go crazy and cover your walls with  circus colors in order to spruce up your rooms and infuse them with energy.  You can do it through accessories, through the compelling choices of bright colors and interesting items, through the intelligent, well-thought out placement of these colors in areas we might not usually expect them.  Remember, you don’t need a room full of color to make a statement.  You just need the right colors in the right locations.

Ending Decorating-Induced Depression One Can at a Time!

Young couple is tired because of redecoration

About a year ago, I was working at our Lakewood Blvd. location and a couple came in with a bag full of samples: hardwood flooring, kitchen cupboards, countertops, carpet scraps, paint chips–everything. They dumped them on the counter and then the lady explained–in a very depressed way–that they had just remodelled their kitchen.

They’d put in all the materials they were showing me samples of. And they hated it–hated all of it. The floors looked terrible against the walls and the kitchen backsplash looked pink. That made the cabinets look green and on and on and on. She was really down–I could sense that immediately–and then I learned why: they had spent nearly $10,000 on the remodel and they hated it. They hated it so much that they were right then looking for new tile and considering new floors. They were thinking about tearing out what was new and starting over. From scratch. Seriously.

It was depressing. Painful. Emotionally draining. I can only imagine what was going through their heads. See, if I buy a videogame that stinks, I spend 3 weeks bemoaning the fact. Ask my wife. I drop $50 and don’t get the edge of my seat, laugh-til-I-drool experience I was expecting from that game, and I mope dejectedly around the house until I buy something else that I hate. Then I focus on that….

Anyway, I do that over $50. Let me drop $10,000 and hate the result and you’re going to have to institutionalize me.

That’s what these folks were dealing with: depression and frustration. They were looking at new materials, more time spent with their house ripped apart, more debt, more work, more inconvenience . . . all just to accomplish what they thought they were accomplishing in their first go-round. Depressing.

But I said this was an amazing story–not a depressing one. And it is. See, I handed these poor people off to one of our decorators at RepcoLite and after about 1/2 hour of talking, we made up a quart of a new paint color for their kitchen walls. The next day they were back for a couple gallons of that color–and they were excited.

See, the problem with their whole project wasn’t that they chose the wrong tile and the wrong floors and the wrong cabinets. The problem–believe it or not–was that they chose the wrong paint color. The color on the walls made everything else seem disjointed. When a new color was put down–a color that complimented all the different materials–the whole room changed.

The couple came back a week or so later and to tell us the good news. Rather than having wasted $10,000 and all that time, all they needed to do was change the wall color.

Now, I bring that up for a number of reasons. First off, I write all that to let you know just how much difference the right color can make on a wall or a room or a home. It’s difficult to imagine, but it’s true: a new color in the same old living room, filled with the same old furniture and carpet, can make the room seem completely new. It really can–if a new paint color can make floors, cabinets and backsplashes that seem to be terrible together look great and coordinated, then think what it could do in your home.

The second reason I bring that story up is this: things are never as bad as they seem. When you’re home project doesn’t turn out looking as great as you thought, don’t panic. Don’t let yourself immediately spiral into depression. Take a step back. Take a deep breath. And then consult some experts. Chances are, everything will turn out fine in the end.

Taking the Confusion out of the Painting Equation

bigstock-picture-of-bored-and-tired-you-87363971_smallerFor the last couple posts, I’ve been recounting sad and potentially awkward moments that served to illustrate my broader “paint point.”  See, by telling you all about my pie making fiasco or my scooter-building screw up, I tried to convey the importance of following a recipe or a set of instructions.

When you follow the steps for any given project, things go smoothly.  When you branch out on your own and think for yourself and build or bake on the fly . . . well, it’s not uncommon to have experiences like those I wrote about.

Well, this idea–following a specific order or set of instructions–doesn’t only apply to scooters and pies.  It also can help you make sure that any decorating project you tackle goes smoothly and turns out well.

Believe it or not, there’s a definite order in which you should make your home decorating selections.  Working outside of that order . . . or jumbling that order up . . . often leads to complications and frustration and confusion.  To keep your project on track, follow this order:

FURNITURE:  Start with the furniture that will go in your newly remodeled room.  If the furniture is not changing, move on to the next step.  But if you’re thinking about purchasing new . . . here’s the place to start.  Don’t start with a trip to the paint store–start at the furniture stores.  And the reason is simple:  nothing more directly relates to the comfort of a room than the furniture we put in there.  When it comes to selecting furniture, you want to have the world “wide-open” in front of you.  You don’t want to be limited to a handful of color options because you’ve already painted your walls.  You want absolute freedom to pick whatever couch or chair or bed or table suits your fancy–no decorating limits at all.

FLOORING:  After furniture, it’s time for you to pick out flooring.  Again, you don’t want to be limited by paint colors when it comes to your flooring selections, so choose them early in the project. This may not seem important, but it is.  We see it all the time at RepcoLite:  folks find paint colors they like and then look at carpet.  They find a style of carpet they love, but then find themselves utterly depressed and frustrated when they learn that carpet doesn’t come in a color that works with the colors they’ve painstakingly selected.  Avoid this mistake by starting with carpet very early in the process.

WINDOW TREATMENTS:  Now, this doesn’t apply to every room or every remodel project, but when it comes into play, be sure to select these items before moving on to your paint.

BATHROOM & KITCHEN FIXTURES:  If you’re working in your bathroom or kitchen, this is the point–after floors and window treatments (and furniture if applicable)–where you would nail down your faucet and fixture selections.  By this point, you’ll have some idea where your project is heading and you should have very little trouble selecting the right items.  In fact, it’s very interesting.  Start with this step (as I’ve done) in a bathroom remodel and you’re only heading for heartache.  You walk into the store, look at hundreds of options of faucets and you pick one based on what you think looks cool.  Later, as the room starts to take shape, more often than not, you find that while your faucet may look cool . . . it no longer fits with the decorating scheme you’ve got going.  However, if you approach this selection at this stage in the process . . . after your floor and window treatments . . . chances are you’ll be able to instantly eliminate 1/2 of the faucets.  You won’t want the bronze ones.  Or maybe, with your decorating scheme, you’ll realize that the chrome-look is definitely not going to work.  Whatever you decide, the bottom line is that choosing this item at this stage in the process will simplify your selection process.

LIGHTING:  This step could easily be lumped in with the above step.

ARTWORK & WALL HANGINGS:  Now’s the time when you start to flesh out your decorating.  You’ve found furniture, flooring, window treatments, fixtures (lights, faucets, etc.) and now’s the time you start putting some color and fun on your walls.  Pick items that will look good with all your other selections–pick items that will develop your theme or the feel you want the room to have.  Pick these items and limit them only by the items you’ve already selected.

PAINT:  Believe it or not . . . NOW’S finally the time you head to the paint store.  See, paint should be your last selection in the entire process.  And the reason is very simple and very straightforward:  paint is changeable.  When you find a couch you like, you’ll probably have 10 (at most) potential fabric options.  Same with everything else on our list.  The only thing that is completely fluid when it comes to decorating is your paint.  At RepcoLite, we can match your paint to whatever colors you need.  We can pull a fleck of color out of your throw pillow.  We can pull colors out of your artwork.  We can match a twist of fabric in your carpet.  Paint is completely adjustable and, as such, should be the last thing you select.

Following that flow of events when it comes to any decorating project is going to simplify your project immensely.  The days of frustration and confusion will slip away and you’ll find yourself actually enjoying the journey–not just anticipating the destination.

Off on the Blueberry Pie Tangent

In the last post, I wrote about an experience I had with a toy that required some assembly.  I told you how I started well but then, eventually, got ahead of myself and started thinking on my own.  I discarded the instructions and put things together as I understood they would have to be put together.  This worked fine until I got to a point where I couldn’t continue.  The parts I had wouldn’t fit where they were supposed to.

After some frustration, I picked up the instructions and discovered I should never have attached this or that part to this or that post until the very end.

I had stepped out of order–and I screwed everything up.

Another example of this . . . as I was reminded yesterday . . . was a great little event my wife and I experienced shortly after we were married.  See, we were in love (and still are) . . . like all newlyweds . . . and we decided that nothing would be more romantic on a Saturday afternoon in the summer than baking a pie together.  Yeah. A Pie.

Well, that sounded like fun and so we headed in to the kitchen and compiled the ingredients.  My wife read from the cookbook and I did all the little tasks as she reeled them off.  Everything went well until she read–(and I’m screwing this up because I don’t remember the exact recipe . . . so for you bakers out there . . . this is not meant to be taken as an accurate and literal recipe!)–she read, “Add 1/2 cup of sugar.”

I looked at her.  She looked at me and winked.  I liked that . . . and so I measured out the sugar and dumped it into our mixing bowl with all the other things I’d amassed so far.  I looked back at her and winked.  She turned back to the book.

Clearing her throat she continued:  “Add 1/2 cup sugar . . . to a separate mixture of 1/2 cup flour and 4 eggs.”

I looked at her.  She looked at me and winked.  I looked at the bowl of other ingredients and the sugar I’d just dumped in and looked back at her.  “Babe, you said to add the sugar and now you say to add it to a separate mixture of flour and eggs?”

“Yes.”

“Well, I already dumped it in there,” I said, gesturing with my powdery fingers toward the big mixing bowl.

She followed my finger and looked and then said, “Hmmmm.  Why don’t you try to take it out.”

She looked at me and winked.  I bit my tongue.  Yeah.  Sure.  Let me just wave my magic fairy wand and I’ll take out the sugar.

I looked at the bowl and was getting ready to say something rude when I remembered that we were in love and that we were newlyweds.  So I pushed my frustration aside and started scooping.  After about 3 or 4 minutes, I’d removed most of the sugar and had it dumped nicely and stirred thoroughly through a mixture of 1/2 cup flour and 4 eggs.  Just like she said to do.

Now, we were cooking.  Stirring that mixture, I felt all my frustrations fade away.  I mean really, was it worth starting a big fight just because she read the instructions in such a way as to lead me into error?  It was just a pie, right?  We were in love, right?  Right.

When I had the mixture stirred thoroughly, I looked at her and winked.  She turned back to the book and skimmed over the instructions, trying to find her spot.  She mumbled to herself for a few seconds, until she found where she’d left off.  She smiled and read, “Add 1/2 cup sugar . . . to a separate mixture of 1/2 cup flour and 4 eggs . . . being sure to separate the yolks from the whites . . . before mixing.”  She trailed off at the end and stared at the cookbook for a few seconds, re-reading.  When she looked up, she didn’t wink.

I winked.  Or, I guess you’d more accurately call it a twitch.  I twitched.  A whole bunch of times.  And then the veins started pulsing on my forehead.

We both looked down at the mixture of everything . . . yolks and whites . . . on the counter and then we both looked back at each other.  We were in love, right?  Of course. But still . . . .

And so I said, in my most loving voice (but of course, sarcasm snuck in), “Babe.  Let’s try something new.  Let’s read a whole sentence.  From the big Capital letter all the way to the little period at the end . . . let’s read that whole thing before you tell me to do something.  Would that work?”

Well, as all husbands know, that didn’t work.  Before I knew what had happened, she was sitting on the front porch rocking violently in the rocking chair and I was standing in the kitchen all by myself, covered with flour and sugar and looking at a pile of fresh blueberries and a bunch of other ingredients I didn’t understand.

In the end, I produced a pie.  I’m not sure how good it was, but I do know that it took me forever to finish it.  That’s not the point, though.  The point I want to convey is that things work best when you follow the intended order.  We were trying to bake our pie out of order.  We were doing things that we should have waited to do.  We were skipping steps that should have been accomplished before moving on.  And in the end, it was a confusing, head-scratching mess.
Just like my experience with the Scooter from yesterday’s post.  Stepping out of order created mass confusion and problems.  It cost me extra money.  It cost me extra time.  It made me bleed on my carpet.

And all of this ties directly to home decorating.  See, when folks overhaul a room in their home (or, remember when people used to build new houses?).  When folks overhaul a major part of their house and start over with new carpet, new wall colors, new furniture . . . new everything . . . it can be a complicated and confusing job.

I meet these people at RepcoLite all the time.  They stand at the color racks and try to figure out what in the world they should pick for their colors.  They look at over 3,000 options and before long, their brain starts to smoke.

They grab colors they like–blues and greens and tans and greys–and then they head off to the carpet store (or, if they’re at our Lakewood RepcoLite, they just turn around and browse the samples)–and they try to find a carpet they like that matches their colors.  But many times they can’t–not exactly–so they decide to put that part of the decision off until later and they head to the furniture store.  There they look for couches they like and try to match one to their paint colors.  And again, 9 times out of 10, they can’t do it.

Before long, they end up back at the paint store, looking for new colors.  And this time, they’re even more frustrated and confused than before.

They’re starting to hate the process.  They’re starting to dream about colors and they’re starting to call those dreams, “nightmares.”  They’re arguing with their family, their tempers are short, and they’re, in a phrase, “sick of it all”–the whole remodel, the redecorating, the repainting–all of it.

But there’s good news!  The reason they’re so sick of it–the reason you’re so sick of it if you’re in that same boat–is because you’re most likely working out of sequence.   Is it possible you’re working your way through the home decorating recipe out of order.  Are you doing what I did when my wife and I baked the pie?  Or what I did when I tried to build the scooter?  Are you doing things first that should be saved for last, you’re doing things last that should have been done earlier?  Well, if you are, no doubt the whole thing is confusing, frustrating, mind-boggling.

But there’s good news as I said.  There’s a recipe you can follow.  It will help you discover order and clarity in your decorating process and it will make everything you do, every step you take, easier and less painful . . . and most likely, even fun.

Tomorrow, I promise, we’ll cover those steps.

Decorating Kids’ Rooms: They’re Only Young Once!

bigstock-Super-hero-flying-some-motion-64086529There are few places in your home where you can really cut loose and have a good time with color as much as you can in a kids’ room. When it’s your bathroom or your living room or a dining room we all tend to be a little more cautious.  We don’t want to go nuts and create something on the walls that will drive us crazy or overpower our other decorating.

However, in a kids’ room, we really don’t have to worry about those things.  Because really, with rooms for children, the crazier and more bold you go with your color choices, the more people will think you’re a really cool parent!

It’s amazing how it works:  do that crazy stuff in your living room and folks think you’re “over the top” or “gaudy.”  Put some bold colors in a kids’ room and suddenly, you’re “Hip Parent of the Year.”

And really, it’s a “win-win” proposition.  Sure, other people will think it’s great and fun and amazing–but really, is that all that important?  No, the real benefit will come from the fact that your kids will gain so much from a project like this. They’ll be excited about the new look, excited about the colors you’ve brought it, and you’ll give them a place of their own–a place that looks completely untouched by the boring, drab world of adults.

Sure, it’s not terribly easy to reconcile yourself with the thought of moving from nice, neutral earthtones into something bold and wild . . . but your kids will thank you for it.  And honestly, remember this:  they’re only young once!  Have fun with it while you can!