Dress for Success: 3 Tips for Your Next Paint Job!

bigstock-Man-s-Legs-83108792_webA number of years ago, in the middle of the night, we heard something that sounded like gunshots outside our window. Well, needless to say, the second I heard the “shots”, I hopped out of bed, ready for action. Fight or flight, right?

Anyway, I was standing there, running through all the potential scenarios in my head when I looked down and realized I was in my underpants.

Well, this wouldn’t do.

See, in all of the scenarios I’d imagined–fighting off burglars, bustling my family to safety amidst a hail of gunfire–in none of them was I dressed in my underpants.

And so I went straight to my dresser and started rummaging around for my jeans.

“What are you doing?” My wife’s whispered voice cut through the darkness.

I could see her sitting in the bed, staring at me. “I’m looking for my jeans.” Duh. I closed the drawer I’d just searched and opened the next one down.

“Why?” her whisper was sharp and cutting, laced with anxiety and a little bit of fear. Gunshots, you know.

“Because I’m in my underpants,” I said without turning around. Time was of the essence. “Do you have any idea where that one faded pair with the hole in the knee is?”

There was a sudden thud on the floor next to me and she said, “There! There’s the pair that was sitting on the nightstand.” Her words were tense, strained.

I picked them up, but they were my fancy jeans. They were stiff and a little uncomfortable. And, like I said, a little too fancy.

“Nah. I want my faded pair.”

There was silence for a second and then her whispers filled the void: “Seriously? You need a specific pair of jeans to go fight off a burglar?”

I just shook my head. She didn’t get it. But everyone knows you can’t fight off a burglar in fancy pants or underpants. You need action pants. It’s really not that complicated.

And that’s when I found them. Relief washed over me. I yanked them out of the drawer and stepped into them, instantly feeling cooler and much more ready for whatever was happening.

Ten minutes later, it was clear that there was no burglar lurking. Nobody shooting. It was just fireworks. It was honestly a bit of a let down.

As I pulled off my action pants and placed them back in my dresser, it hit me that there was a paint point in all of this. I just never knew what it was until now.

See, I’ve been discussing a number of painting tips for the Do-It-Yourselfer on our daily little radio blurbs. (You can click here to listen!) And one of the recommendations I’m making is to dress for the part whenever you paint.

Here’s what I mean:

1. Wear old clothes.

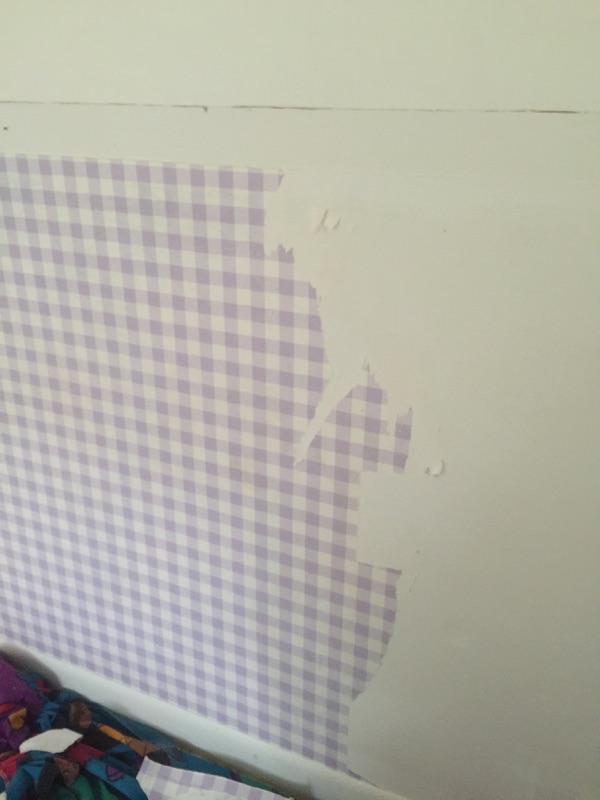
This is a no-brainer. I get that. And yet . . . it happens all the time. We tackle a small project thinking we’ll just be careful. 10 minutes later, we’re standing at the sink doing everything we can to rinse blue paint out of a nice shirt. Or a good pair of shorts. I’ve personally done this countless times and have resigned countless clothing items to the “can’t-wear-that-to-Church-again” bins. Instead of accidentally damaging good, expensive clothing, take the extra few minutes–even if the project is a quick one–to throw on some old clothes.

2. Wear the Right Clothes.

OK. The first recommendation was about wearing old clothes. What I’m talking about here revolves around wearing the right ones. And what I specifically mean is this: pick up a pair of painter’s pants or painter’s shorts at a RepcoLite, Port City Paints, or Snyder Paints store. These things come with extra pockets for putty knives, screwdrivers, brushes and other tools you’ll need when you’re working. If you’ve ever worked through a paint project and spent a fair amount of time running around trying to remember where you set your putty knife down or left your screwdriver, then check these out. They’re not very expensive and they’re definitely worth it if you tackle more than 1 or 2 painting projects in a year.

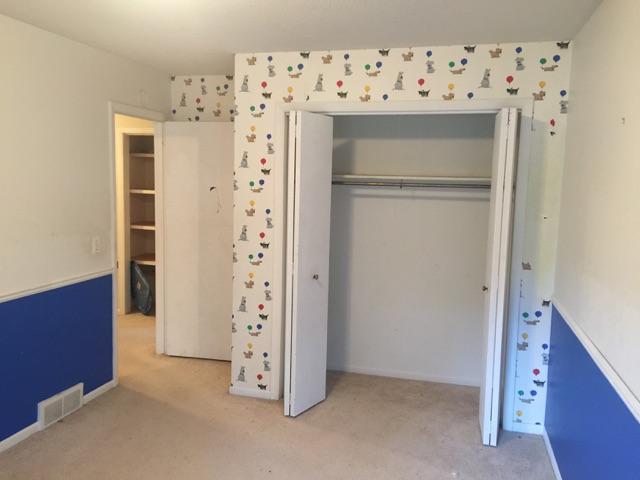
3. Dress your room appropriately.

Finally, the last tip that’s even remotely connected to my jeans story is this one: dress the room appropriately. And what I mean by this is simple: purchase some dropcloths and use them! Cover your furniture, cover your floors, protect your decor. Sure, it takes a few extra minutes, but the minute that first drip falls from your brush and lands on a plastic sheet instead of your couch, you’ll realize how smart you were!

And there you go. 3 Tips to help you dress for success on your next paint job! Give them a try! And if you have any other great ideas, leave them in the combox!

Paint Behind the Toilet Without Pulling It (Or Even Removing the Tank!)

030916_wb_5
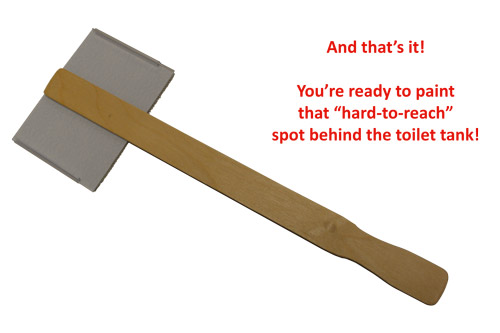
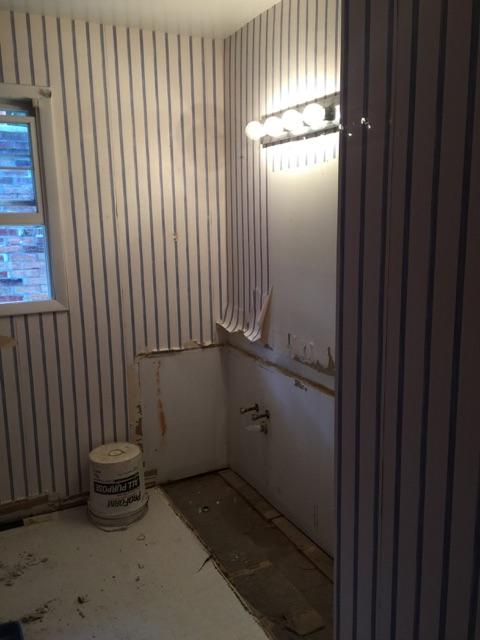
Years ago I tackled a bathroom remodel and in all my wisdom, I pulled the toilet out myself. At 10:30 at night. Before having the kids use it. It was a nightmare.

Oh, there were so many things that went wrong on that particular project, I can’t even really begin to list them. But most of the pain that I felt revolved around that stupid toilet. See, it was the only one in our house and the minute I pulled it, the kids started showing up at the doorway. The toilet, at that point, was sitting in the hall, and it wasn’t long before they were eyeing it with interest, or perhaps desperation, as they danced.

Suddenly, the pressure was on. I had to get the toilet back in ASAP. And of course, doing exactly that was, perhaps, the most painful home improvement experience I’ve ever had.

My wife was helping me and every time we’d try to set the toilet down, the toilet bolts would fall through the floor and land in the basement.  I’d run down, stuff them back up through the holes in the basement ceiling/bathroom floor and then, before I’d get 10 feet away, I’d hear one ping off the concrete. My wife’s muffled “Sorry!” would drift down from the upstairs and I’d do the whole thing again. And again and again.

We struggled like this for over an hour.  We argued.  We laughed.  We fought.  We nearly cried.  Maybe we did cry.

We cried. Let’s just be honest. At least I cried. All in all it was horrible and I resolved never to pull the toilet out again.

And that’s why this tip about how to paint behind the toilet without pulling the toilet or even taking the tank off is so intriguing to me.

After all, painting in a bathroom is bad enough. It’s crowded. Tight. And then, to top it all off, at some point in the project you’re going to need to find a way to wedge yourself alongside the toilet, hug the bowl, and then do your best to reach around with a roller or a brush and slop some paint on the wall behind the tank. If you’ve ever tried to do this, you know how much fun it is.

But here’s a tip that will make it easier the next time you try.

Here’s What You Need:

1. Replacement Pads for a Shur-Line Edger. ($3.45 for a 2-pack at RepcoLite)

2. Some double-stick tape (or duct tape, or hot glue, or something sticky).

3. A stir stick.

Here’s What You Do:

030916_wb_2b

1. Gather your supplies.

030916_wb_3

2. Affix the double-stick tape to the back of the edger pad.

030916_wb_4

3. Affix the stir stick to the edger pad using the tape.

And that’s it. Once you’ve done that, you’ve got a thin, easy to maneuver “paint brush” of sorts that will allow you to reach behind the toilet tank and apply your paint without having to remove the toilet or the tank! It’s a great time saver and it’s going to cost you, at most, $5.

If you’re going to give it a try, here are a couple other tips to make sure the project goes quickly and smoothly:

1. Don’t forget to clean behind the tank first. You could use a rag on a stir stick to reach back there and remove the cobwebs.

2. Wrap the tank with a garbage bag and tape it tight, so it’s not loose or in your way. Then, you can get behind there with the tools we talked about and it won’t matter if you bump the tank.

The Great Flaking Paint Disaster of 2016

Peeling paint. Pattern of blue grunge material. Damaged paint. Scratched old plate

Photo courtesy of bigstockphoto.com

In our home, the previous owners painted a 4” wide border around the ceiling in the living room. On that border, there were a few small spots where the paint was flaking off. On a Saturday morning a couple of weekends ago, my wife was out of the house for a couple of hours, so I thought I’d surprise her by touching those spots up.

I grabbed some sandpaper and set out to accomplish what I should have been a 5 minute job only to find that wherever I touched the sandpaper to that border, the paint fell off. In huge patches. It was terrifying. Everywhere the sandpaper touched, a silver-dollar-sized section of paint came loose from the ceiling and fell to the floor like huge a snowflake. I would sand in ever expanding circles, expecting (hoping) to find some section of paint that was still stuck to the ceiling, but no. No matter where I sanded more and more flakes started falling. At that point, the kids came in, saw the mess on the floor and all the missing paint on the ceiling, and said “Mom’s going to kill you when she gets home….”

Oh, of course my wife wasn’t going to kill me. Probably. I was concerned, however, about the problem that I now had on my hands. If you’ve ever dealt with peeling paint issues, then you know the frustration and anxiety I was feeling.

See, these are problems that have to be fixed the right way. There are no shortcuts. There are no quick fixes. Fixing it the wrong way, the quick way, usually ends up creating bigger problems down the road. Instead, fixing a problem like this takes patience as well as some blood, sweat, and tears. Here’s how you do it:

STEP 1: FIND OUT WHY IT FAILED

The first step to fixing anything at all is finding out why it needs fixing in the first place. You can treat the symptoms, but it’s likely the problem will recur until you actually address the problem that caused the failure in the first place. In my instance, with the peeling paint on my ceiling, the problem was caused (as is usually the case) by poor surface prep. When I examined the paint chips I found that the backs were gritty and chalky. That means the grit or powder was there before the paint was applied. The paint stuck to that rather than the ceiling itself and thus came off easily when bumped or stressed.

When it comes to peeling paint, surface contamination of one kind or another is typically the cause. Sometimes it’s drywall dust, sometimes it’s due to cleaning agents, soap films, or other contaminants like that.

Surface contamination is the one of the typical causes of many paint peeling problems. The other main cause is due to the painted surface simply being too smooth or hard. Sometimes we paint over a glossy, hard enamel finish and the new paint peels right off when bumped or scratched. Without scuff-sanding or priming surfaces like that with primers like BIN primer from Zinsser, you’re just asking for the paint to fail.

So all that to say, if you’ve got a peeling paint problem of your own, the place to start is by doing a little detective work. Figure out why it peeled. From there, you’ll be able to plan the next step in the repair process.

STEP 2: LET THE SCRAPING and SANDING BEGIN!

Once I figured out the reason my paint failed, now all that was left was to do the work and fix it the right way. Sadly, that’s easier said than done.

See, when it comes to peeling paint, the only solution is to get all of the loose paint off. All of it. If paint is left on the surface, it’s absolutely necessary that it’s left there only because it’s stuck so well it wouldn’t come off!

So, to get the paint off that border section of my ceiling, the only fix is for me is to get out a paint scraper, some sandpaper, and go to work. It’ll take some time and it’ll create a fair amount of mess, but any shortcut I take will only result in bigger problems down the road.

For example, on my ceiling, with the paint peeling as badly and easily as it is, if I were to paint over that old paint–even though some areas seem to be adhering quite well–the surface tension of the new paint as it dries would likely be enough to pull loose new sections. Soon, that paint I’d left on the ceiling would be coming off and taking all of my new paint with it!

To avoid that, the right solution is to get all of the loose paint off. Once that’s done, a second part of this step is to go around and give some attention to all the areas of paint that remain on the surface. Most likely, when you examine these spots, you’ll see rough edges where the remaining paint meets bare spots on the wall. These spots will not be filled and disappear when you apply your new paint. In most cases you can minimize the visual appearance of these spots by sanding all the edges of the remaining paint. Sand the spots smooth in order to create a smooth transition from the bare surface to the remaining paint.

Also, if you determine that the reason your paint is flaking is because the surface you painted is too shiny or smooth, then you need to make sure you scuff sand the surface with a 150 – 180 grit sandpaper.

STEP 3: GET THE DUST OFF

Once the sanding/scraping process is complete, it’s absolutely imperative that the surface be as dust-free as possible. That may mean wiping it down with a damp rag or it may mean vacuuming it with a shop-vac. Either way, that surface needs to be dust-free or the problem will just repeat.

Likewise, if the paint failed because of an oily residue left by a cleaning agent or something else, the surface needs to be washed well with a degreasing agent like TSP (Tri-Sodium Phosphate) before any new painting is done. Remember:  without eliminating the source of the failure, the problem will only repeat.

STEP 4: ROLL ON THE NEW PAINT

When the surface is completely clean (and I can wipe it with your hand and not have a chalky, dusty residue come off on my palm), then it’s time for my new finish paint. (In certain situations, a primer might be recommended. You’ll probably want to talk to someone at RepcoLite if you have any questions about whether you need a primer or not.)

I’ll probably apply a primer coat to my ceiling just to be safe. After that, I’ll roll on two coats of finish and finally, after all of that, I should be done and the living room will be better than before. And, best of all, it should look good and resist flaking or peeling for years to come!

Peeling paint can be a very frustrating situation. And when it happens to us, we may find ourselves tempted to take a shortcut or an easy way out. However, in a situation like this, shortcuts just don’t produce good results. Instead, take the time to do the project the right way. It’s a lengthier, more time-consuming fix, but it will give you much better results (and save you a lot of repeat work) in the long run!

The Fabric Softener Fix for Stripping Wallpaper!

IMG951538

On August 28, 2015, we finally closed on our home in Fruitport, Michigan. Being a short sale, Patrick and I had been waiting since late February of that same year to sign the documents, solidifying the closure. I knew it would be months before we could move in, even after the closure, but that was the least of my worries. We were inching closer to our ultimate goal of remodeling a home. Standing two stories tall, half brick-half vinyl siding, attached garage, on just shy of an acre, seven bedrooms, and three and one-half baths, we were eager to start our adventure in reconstructing and cosmetically reconditioning a three thousand square foot, 1970’s retro home.

A twenty foot dumpster had barely enough space for all the garbage and debris we removed from the home. White ceramic tile and soiled carpet had been pried and stripped from the floors; drywall torn down in the master closet, living room, basement, and upstairs spare bathroom; three layers of shingles had been removed from the roof surrounding the fireplace. Yet, despite all this, the most agonizing and time consuming demolition project was still ahead: the removal of the wallpaper!

Throughout the whole process, my most valuable resource was Patrick’s mom, Phyllis, and her sister, Aunt Diane. Thanks to their much-appreciated help, we were able to remove the majority of wallpaper from six walls, including the kitchen, two bedrooms, a master walk-in closet, and two bathrooms in two days time.

However, even though we got the job finished in the end, it wasn’t without some complications. In fact, after many “oops” and a bunch of experimentation as to what solutions and tools to use, it occurred to me that stripping wallpaper was going to take a lot more time and patience than I had anticipated. Who knew that dogs of all shapes and sizes holding balloons could be so intimidating? (see the photos!) It only took us three walls of peeling quarter-sized paper pieces, one-by-one before I was found myself ready to defeat.

It was around that time, at the moment of near despair, that we decided to shift gears and try something different.

After reading somewhere that fabric softener actually helped in the process of removing wallpaper, we decided to give it a try. After all, what was there to lose?

So, in a yellow garden Sprayer, we combined 1/2 gallon of SUPER hot water (though not quite boiling) with 1/2 gallon of fabric softener (we used the least expensive!) along with 1 cup of DIF Concentrate Wallpaper Remover.

Using a PaperTiger by Zinsser, I scored the wallpaper in circular motions. And here, I’d like to urge a little caution: I cannot stress how important it is not to press too hard when scoring. Using too much pressure with the PaperTiger can easily result in damaged drywall. Light to medium pressure works just fine.

To prevent damage to our sub floors, we used Blue Painter’s Tape to stick plastic sheeting to the top lip of all base boards to catch excess solution that dripped from the walls.

(On a side note: If you find yourself removing wallpaper in a room or setting where you’re concerned about using a garden sprayer, you can get the same effect by using a spray bottle filled with solution!)

Anyway, once we had all the prep work done, we sprayed our new solution onto the walls and let it sit for 20-30 minutes, then scraped it off using a variety of different wallpaper scrapers and putty knives.

The paper came off with remarkable ease and we realized we were finally closing in on finishing the project. A second application of solution was applied to clean what residual glue was left after the wallpaper had been peeled away. After a final wipe down using a sponge and hot water, the walls were left to dry.

Removing wallpaper isn’t typically an easy or fun project, but with the right tools, a little elbow grease, and the right team of determined women (in our case!) you can get it done in a short amount of time.

For us, when all was said and done, we celebrated our accomplishment with a well-deserved Mr. Scribbs pizza and I found myself considering the next step in this renovation!

Supplies Used:

  • Extremely hot tap water
  • Fabric softener (Any kind works: We used the least expensive)
  • DIF Concentrate wallpaper remover
  • Hand held 2 gallon garden sprayer
  • 5-in-1 Hyde hand tool
  • Bucket of hot water
  • Large yellow sponge and bucket of hot water
  • Painter’s tape
  • Painter’s plastic
  • Ladder
  • Gloves
  • Lots of patience!!


Q-Tip Touchups!

Here’s a shortcut you can try next time you’ve got to touch up a few nail holes or wall dings in your home.  Rather than get out a brush or a small roller and a tray, pick up a Q-Tip.  Yes.  I really mean one of these things:

Here’s the scoop:  a Q-Tip is perfect for small touch up areas.  You wouldn’t certainly want to do any large areas with it–that’s what rollers and brushes are for–but if you’d love a quick, painless method to touch up small nail holes, this is it.  You just use it and toss it.  No clean up, no mess.  The small size of the touch up spot means it will easily blend in to the existing wall and, even if you’ve got a slightly larger area to cover, you can turn the Q-Tip on its side and use it as a micro-mini-roller.  It takes a little bit of getting used to, but once you do, you’ll find out how easy this is for those quick touch ups!

The Inevitable Forgetting of Important Things

and_baseball_web_030816
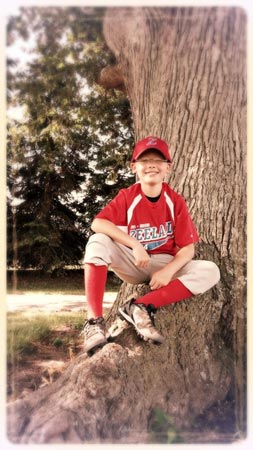
My family and I just wrapped up another Little League season and among all the wonderful things that baseball season brings into our lives, there’s one thing that I could do without:  the Inevitable Forgetting of Important Things.

There are a number of Capital Letters in that phrase, so let me explain:  Whenever there was a baseball game on a week night, our evening would devolve into chaos quite quickly.  I’d arrive home from work five minutes after the time we should have left.  To get back on schedule, I’d typically eat dinner without chewing it while I changed my clothes and brushed my teeth. This was a multi-tasking miracle in regards to the number of tasks accomplished at once.  However, because of the diverse nature of the tasks, it was also messy and somewhat disgusting.  Still, it’s what was necessary to get to the game on time.  So I did it.

Once that strange combination of eating/teeth brushing/clothes changing was done, I’d run out to the van, hop into the driver’s seat, turn the key and then, for the first time in the entire evening, I’d pause. Turning around, I’d stare each of the kids in the eye, hold their attention for a second or two, let the import of the moment sink into their little heads, and then I’d ask:  “Do you have everything?”

It was a simple question.  A question meant to jog their little memories.  A question meant to make them ask the question in their own heads:  “Do I really, truly have everything I might need for tonight’s athletic event?”

Instead, every time I asked the question, they’d respond immediately, with absolutely zero thought (and with some exasperation):  “yes, dad”.

Well, I’ve got five children and the oldest two are 13, so this isn’t my first rodeo, so to speak.  And so I would never let them off that easily:  “You have everything?  Really?  How about your glove?  Your hat?  Your bat bag?  Your bat?  Your cleats?”  I’d rattle off every single piece of baseball gear I could think of as they answered with an immediate “yes” to each item.

Finally, after what felt like a 30 minute deposition, I’d turn around in my seat, ease the van out of the driveway, and begin the journey to the baseball field.  And every single time, after I was far enough away from home to make going back frustrating, I’d hear it start:  the scuffling of their little fingers as they clawed through their bat bags looking for something.

I’d hope against hope every time I heard this that they were looking for a Mento.  But no.  After about 30 seconds of frantic scuffling, someone would nervously clear his throat as happened several nights ago:

“Uh, Dad?”

“Yes…” (through gritted teeth).

“Ummm.  Funny thing . . . you know when you asked if we had everything and then listed off all the things?”

“Yes.”

“Well, you know what you forgot to list off?”

“No.  What did I forget to list off?” (through gritted teeth again).

“Well . . . and this really is hilarious . . . you never asked me if I was wearing my cup.”  At this point the kid usually breaks into nervous laughter and falls silent. No one else typically laughs at this point because they know trouble when they see it.

I try to keep my cool and clinging to a very unreasonable hope, I ask:  “Are you wearing your cup?”

“Ummm.  Not technically.  I actually forgot it.  We’ll have to go back and get it.  But don’t worry.  I’m pretty sure I know where it might be…”

Every time.  Every game. Oh, sometimes they’d forget gloves.  Sometimes, it was their bat.  Maybe their hat, their sunglasses, their Gatorade . . . it doesn’t matter.  Whatever it was they forgot, it was always something we’d have to go flying back to the house to retrieve.

And it drove me nuts, stressed me out, and got almost every single game night off to a rocky and uncomfortable start.  All because we weren’t organized.  All because we were starting something without having all the right equipment.

Well, the same thing often happens when we’re working on paint projects. We start the work and after we dip our expensive brush into a new gallon of oil-based paint, we realize we forgot to pick up paint thinner.  Or we pour our paint into a tray and realize that the roller cover we had isn’t the right one for the project. Or–and this just happened to me a week or so ago–we run downstairs to grab that paint brush we’ve got in the basement only to find that we didn’t clean it out well enough the last time.  Now it’s unusable and we’re standing there with our paint can open and no brush to apply it with.

checklist_1

When we forget to amass the right tools for our paint projects, we find the stress level rises quickly.  Our schedules are thrown into chaos, and all too often (if you’re like me) we try to make things work using the tools we have, not necessarily the right ones.  And usually, the results are frustrating and disappointing.

The good news about all of this is there’s a fix.  At least for the paint project part of it (I don’t know how to fix the baseball stuff!).  Anyway, the way to make sure you’ve got all the right tools for your next paint job is as simple as using a basic “Project Checklist”.

We’ve got one that you can download by clicking this link.  It’s a simple tool that will help you mentally go through your project ahead of time.  The list will recommend certain items and most of the time, you’ll discover one or two things you would never have thought to gather ahead of time.

Tackling a paint project can be a very rewarding and fulfilling experience.  It can even be somewhat of a stress reliever–almost therapeutic in a way.  Just make sure you’ve got all the items necessary before you start and you’ll discover how smoothly a project can go!